Tallyfy bills per seat through Recurly. You commit to full and light seats, pre-pay for your…
Manage billing
Go to Settings > Billing to manage your subscription, seats, payment method, and invoices. Only administrators can access this section.
-
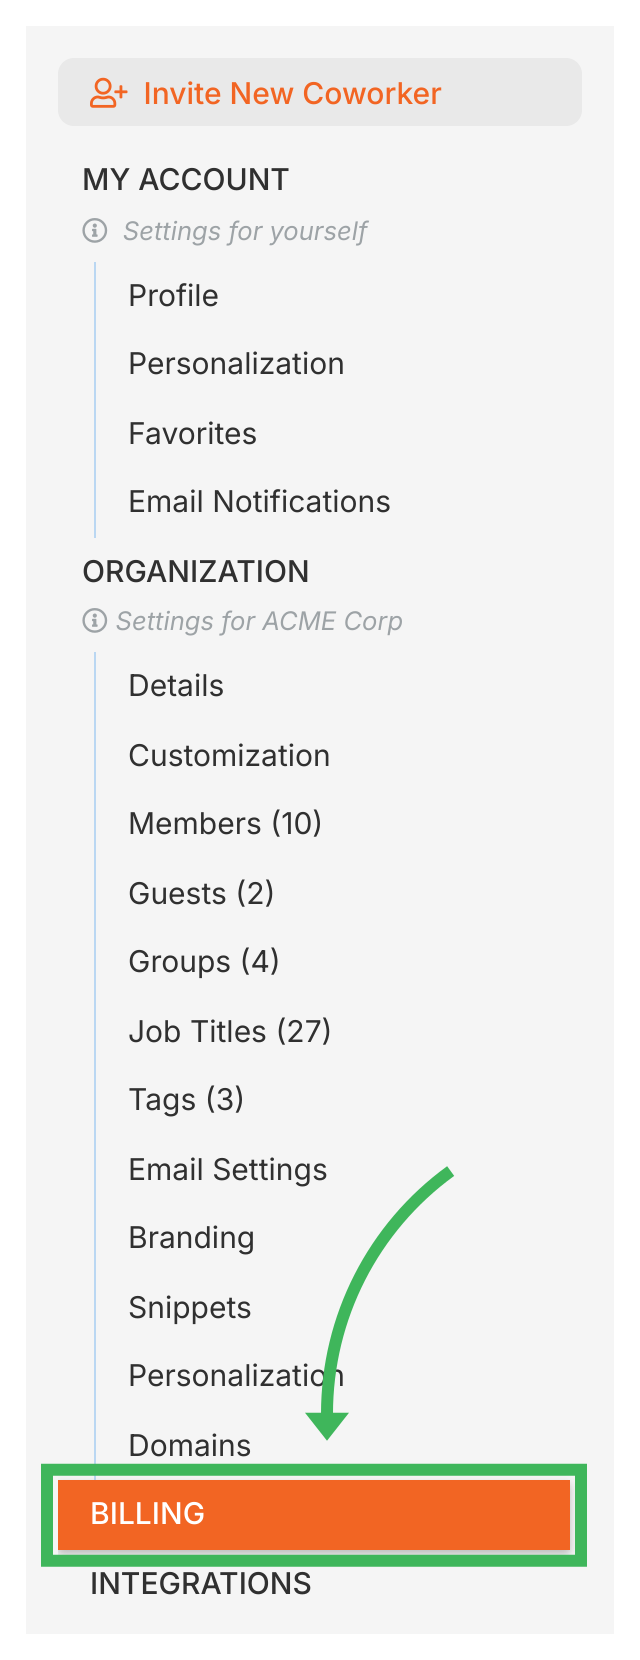
Click Settings (bottom left).
-
Click Billing.
-
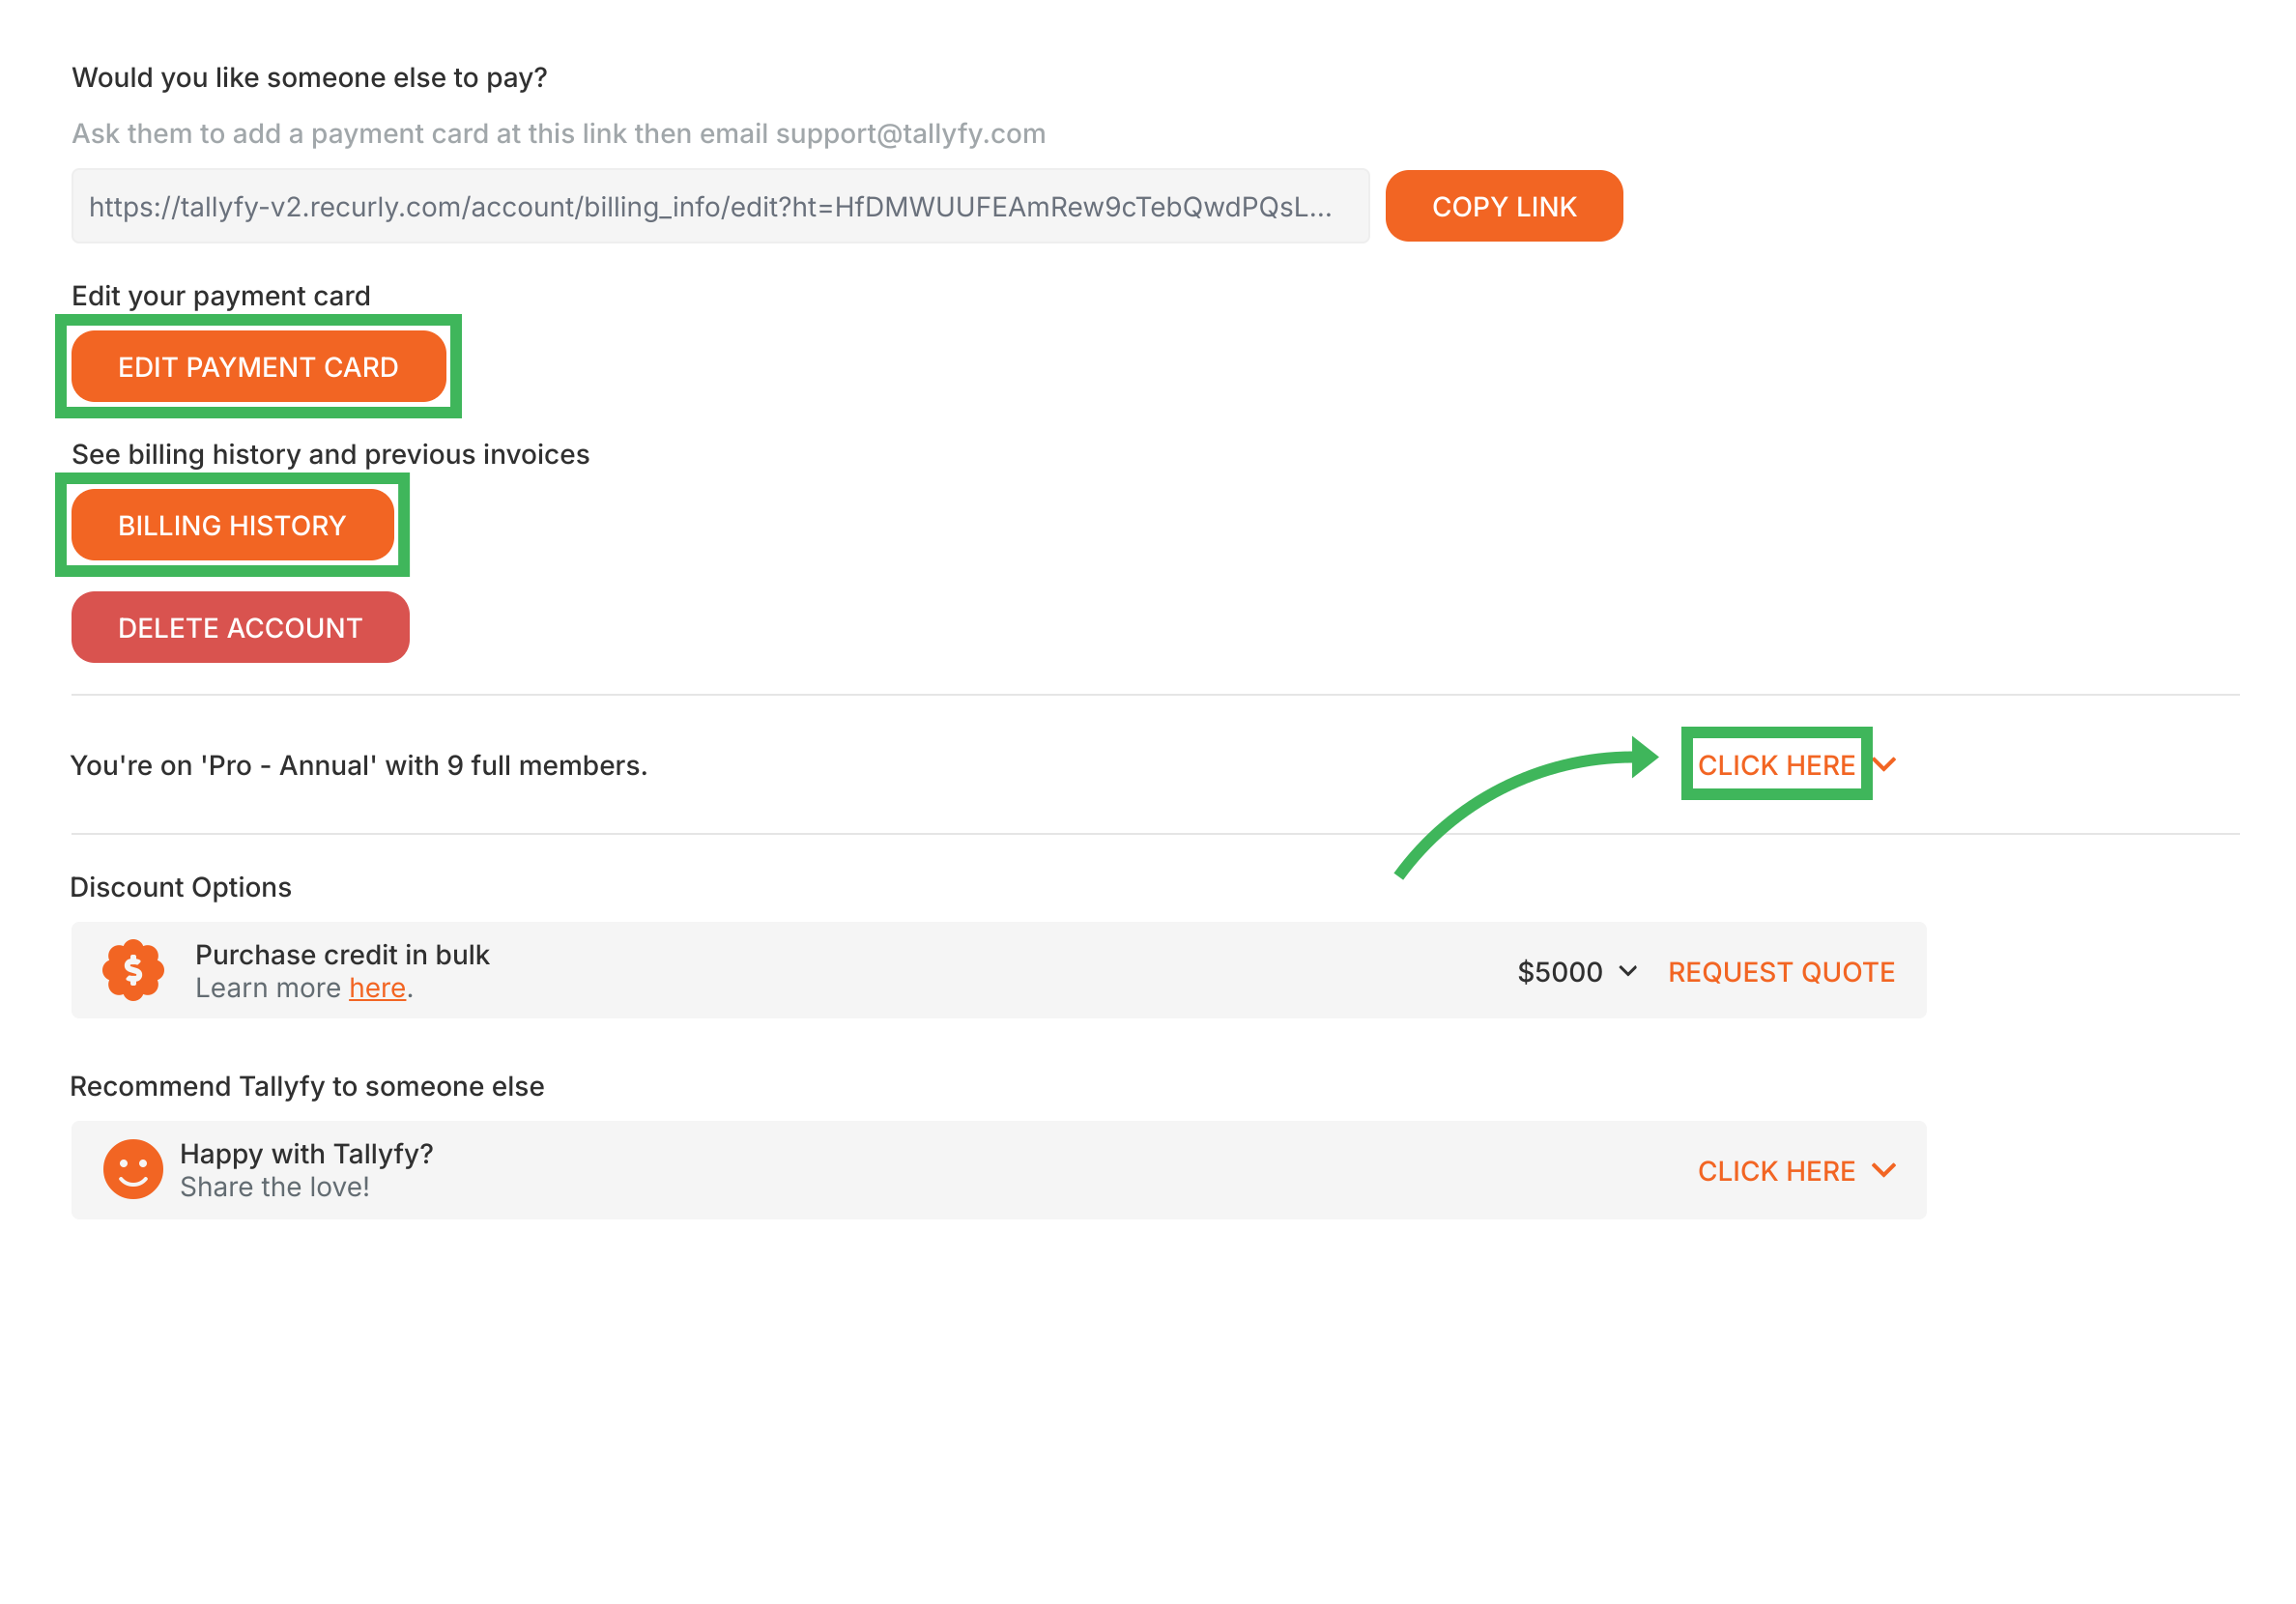
You’ll see your current plan and seats, payment method, and billing history.
From the Billing screen:
- Click View Billing History for past invoices and a plan summary. See understanding your billing history for what the activity feed and invoice list show.
- Click Edit Payment Card to update your credit or debit card.
The user who created the organization is the default billing contact. To change it or add CC email addresses:
- Contact Tallyfy Support.
- Provide your Organization ID.
- Specify the new billing contact email address(es).
If your trial hasn’t been converted yet, you’ll see a checkout to subscribe to a paid plan. Once you’re subscribed, the billing screen shows seat management.
- Go to Settings > Billing.
- To change your billing cycle (annual or monthly), open your plan settings and confirm.
- To add capacity, click Buy more seats, pick full or light seats, and confirm the pro-rated amount.
See how to buy more seats for the full flow, including invoiced accounts.
Analytics and pre-paid usage credit (AI tokens and per-task credit) appear in the billing section. See billing add-ons and usage credit for what each one does and how to top up.
Billing emails (invoices, payment confirmations, subscription updates) arrive instantly by default. To receive fewer emails:
- Contact Tallyfy Support.
- Ask to switch to daily billing updates.
- You’ll then get one daily summary instead of individual emails.
- Go to Settings > Billing.
- Click Update Plan.
- Enter your code in the “Have a coupon?” field during checkout.
- Complete checkout. The discount applies to your payment.
Use the self-service cancellation form in Tallyfy when possible.
For monthly plans, cancellation takes effect at the end of the current month.
If you pay by card, a failed charge shows a banner asking you to update your card in Settings > Billing > Edit Payment Card. If you’re billed by invoice, an invoice about 30 days overdue puts your organization into read-only mode until it’s paid, after which access returns automatically.
See what happens if my payment fails for the full details, or contact support.
- 30-day export window after termination
- 90-day backup retention after deletion (recovery may be possible)
- Permanent deletion after 90 days from all systems
Billing > Subscribe to a paid plan
When your free trial is ready to become paid, open Settings then Billing to subscribe. Choose…
Billing > Billing add-ons and usage credit
Two kinds of add-ons sit on top of your seats. Analytics is priced per seat per year on every…
Billing > How to buy more seats
Add full or light seats anytime from Settings then Billing. Choose a seat type, enter how many…
Was this helpful?
About Tallyfy
- 2026 Tallyfy, Inc.
- Privacy Policy
- Terms of Use
- Report Issue
- Trademarks