Tags in Tallyfy are keywords you attach to templates and running processes. Unlike folders, you can add multiple tags to the same item. A single template can be tagged “HR”, “Onboarding”, and “High Priority” all at once.
Requirements
Administrator permission to create, edit, or delete the organization’s tag list
Edit permission on a template or process to add tags to it
Benefits of using tags
Find things faster - search by specific tags in seconds
Organize flexibly - group items in multiple ways without folder limitations
See labels easily - color-coded tags make identification instant
Filter lists - combine tags to narrow down your Tracker view
Group related processes - see all “Client Project” processes even if they span different folders
Managing the organization’s tag list (admins only)
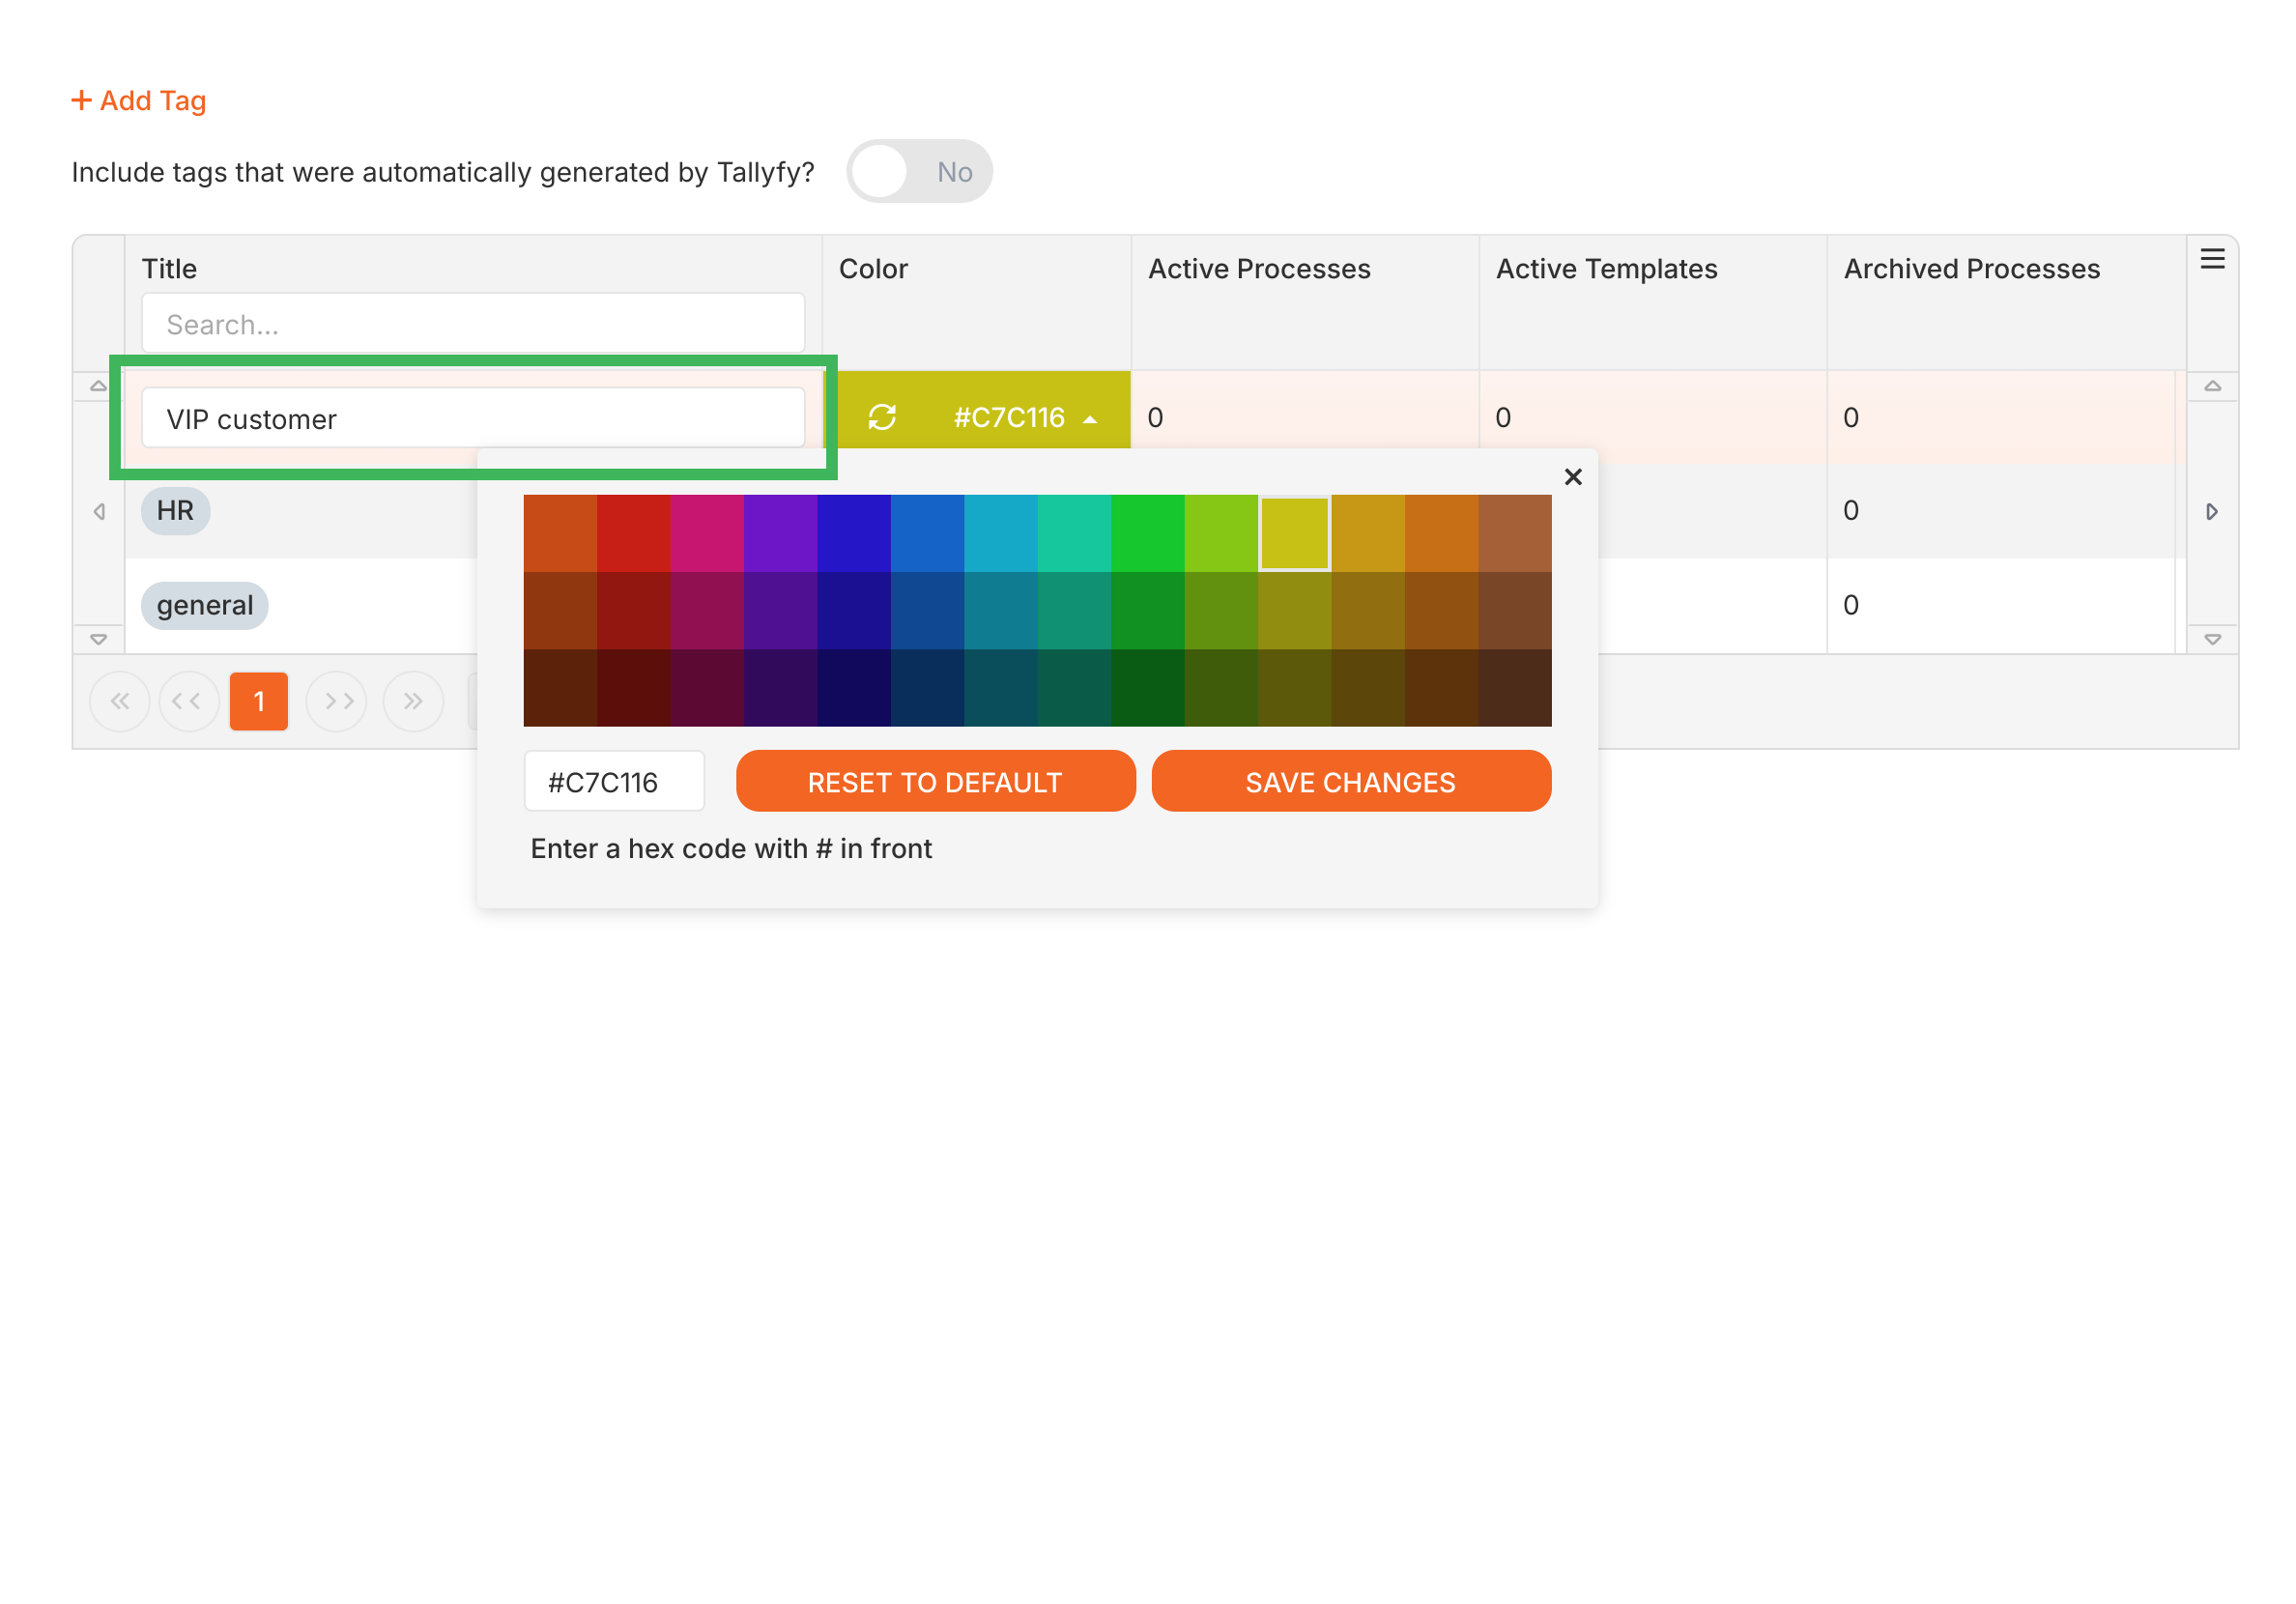
Administrators control which tags everyone can use. Tag names can’t exceed 30 characters and must be unique within your organization.
Go to Settings > Organization > Tags
To add a tag, click Add Tag, type the name (max 30 characters), choose a color, and save
To rename a tag, click its name, type the new name, and click Save
To change a tag’s color, click the colored square next to it, pick a new color, and click Save
To delete a tag, click the menu icon (⋮) next to it
Choose Delete Tag
Confirm deletion - this removes the tag from the list and all items using it
Adding tags to templates
Open the template in Edit mode
Click Settings (or Config) in the top toolbar
Go to the Summary tab
Find the Tag field
Start typing to search existing tags
Click a suggested tag to add it
Type a new name and press Enter to create a tag (Admin rights required)
Click Save Changes
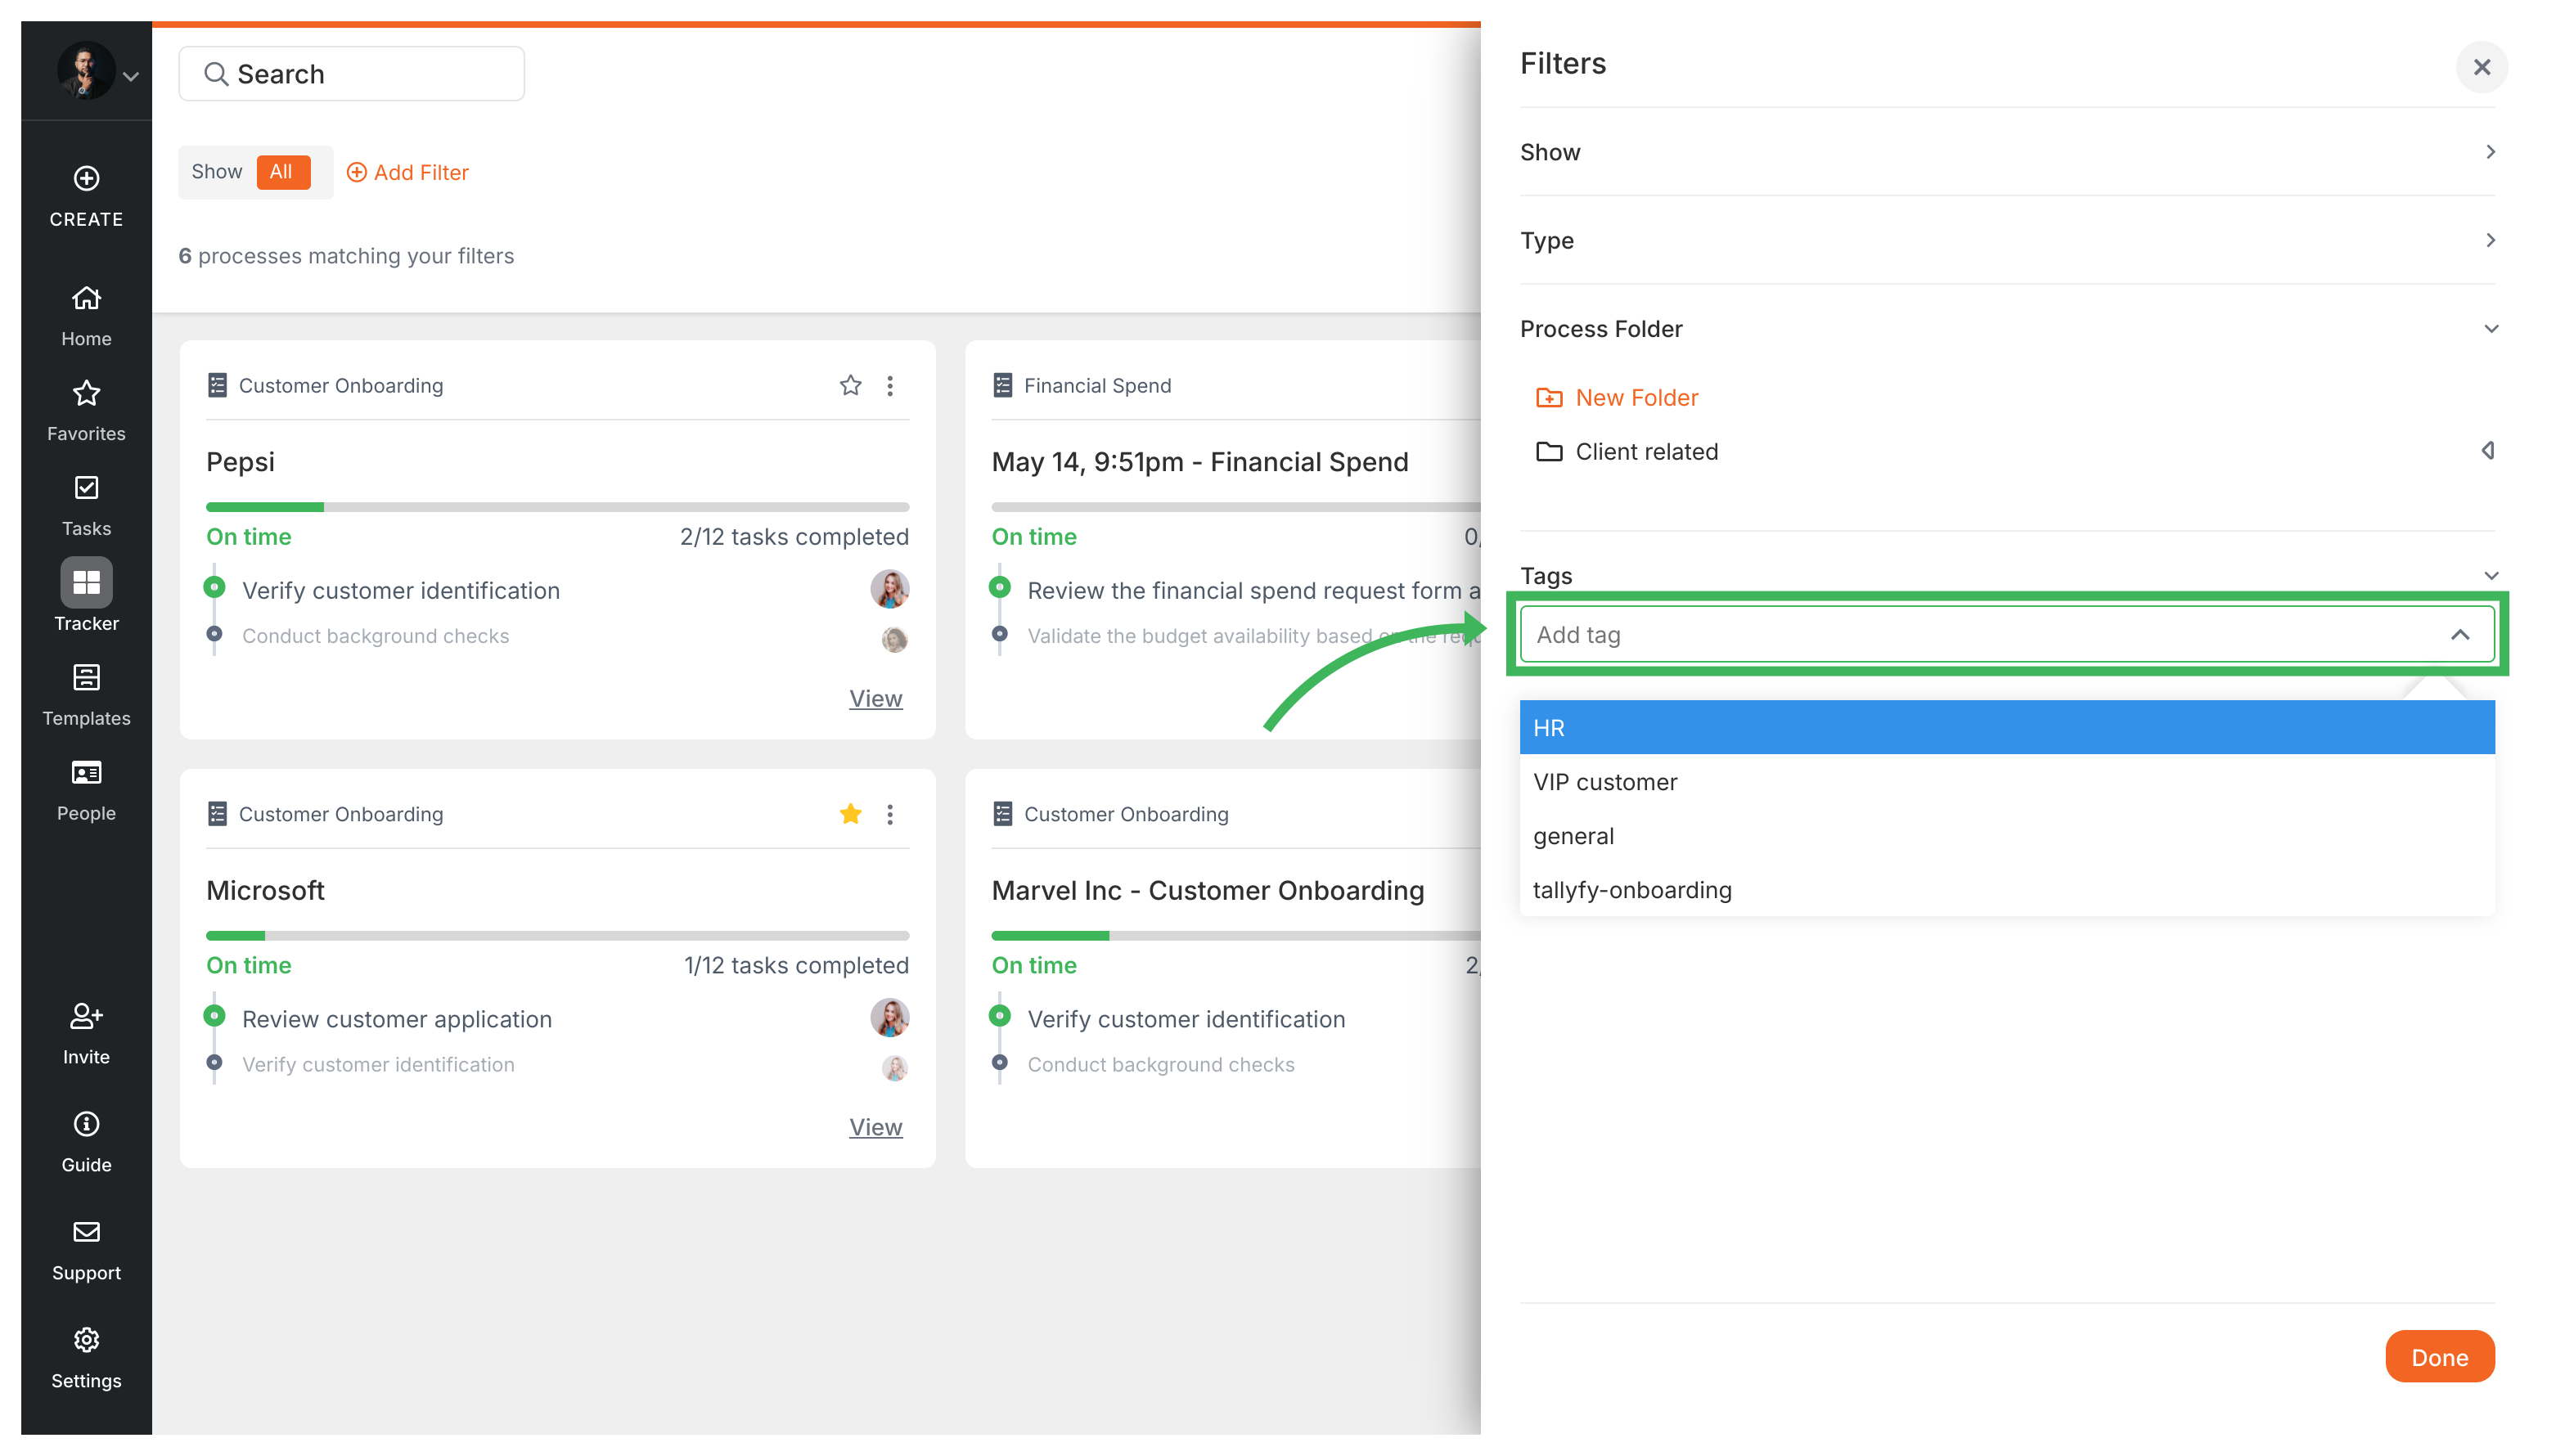
Adding tags to running processes
Open the running process you want to tag
Click the Add Tag button near the process title
Pick from existing tags or type to create a new one (Admin rights required)