Kick-off forms sit at the beginning of a Tallyfy template and collect information before the main workflow starts. They work for both internal team members and external people - customers, partners, or vendors can submit a public kick-off form to launch a process automatically.
Unlike standalone forms, kick-off form data flows directly into the process steps that follow.
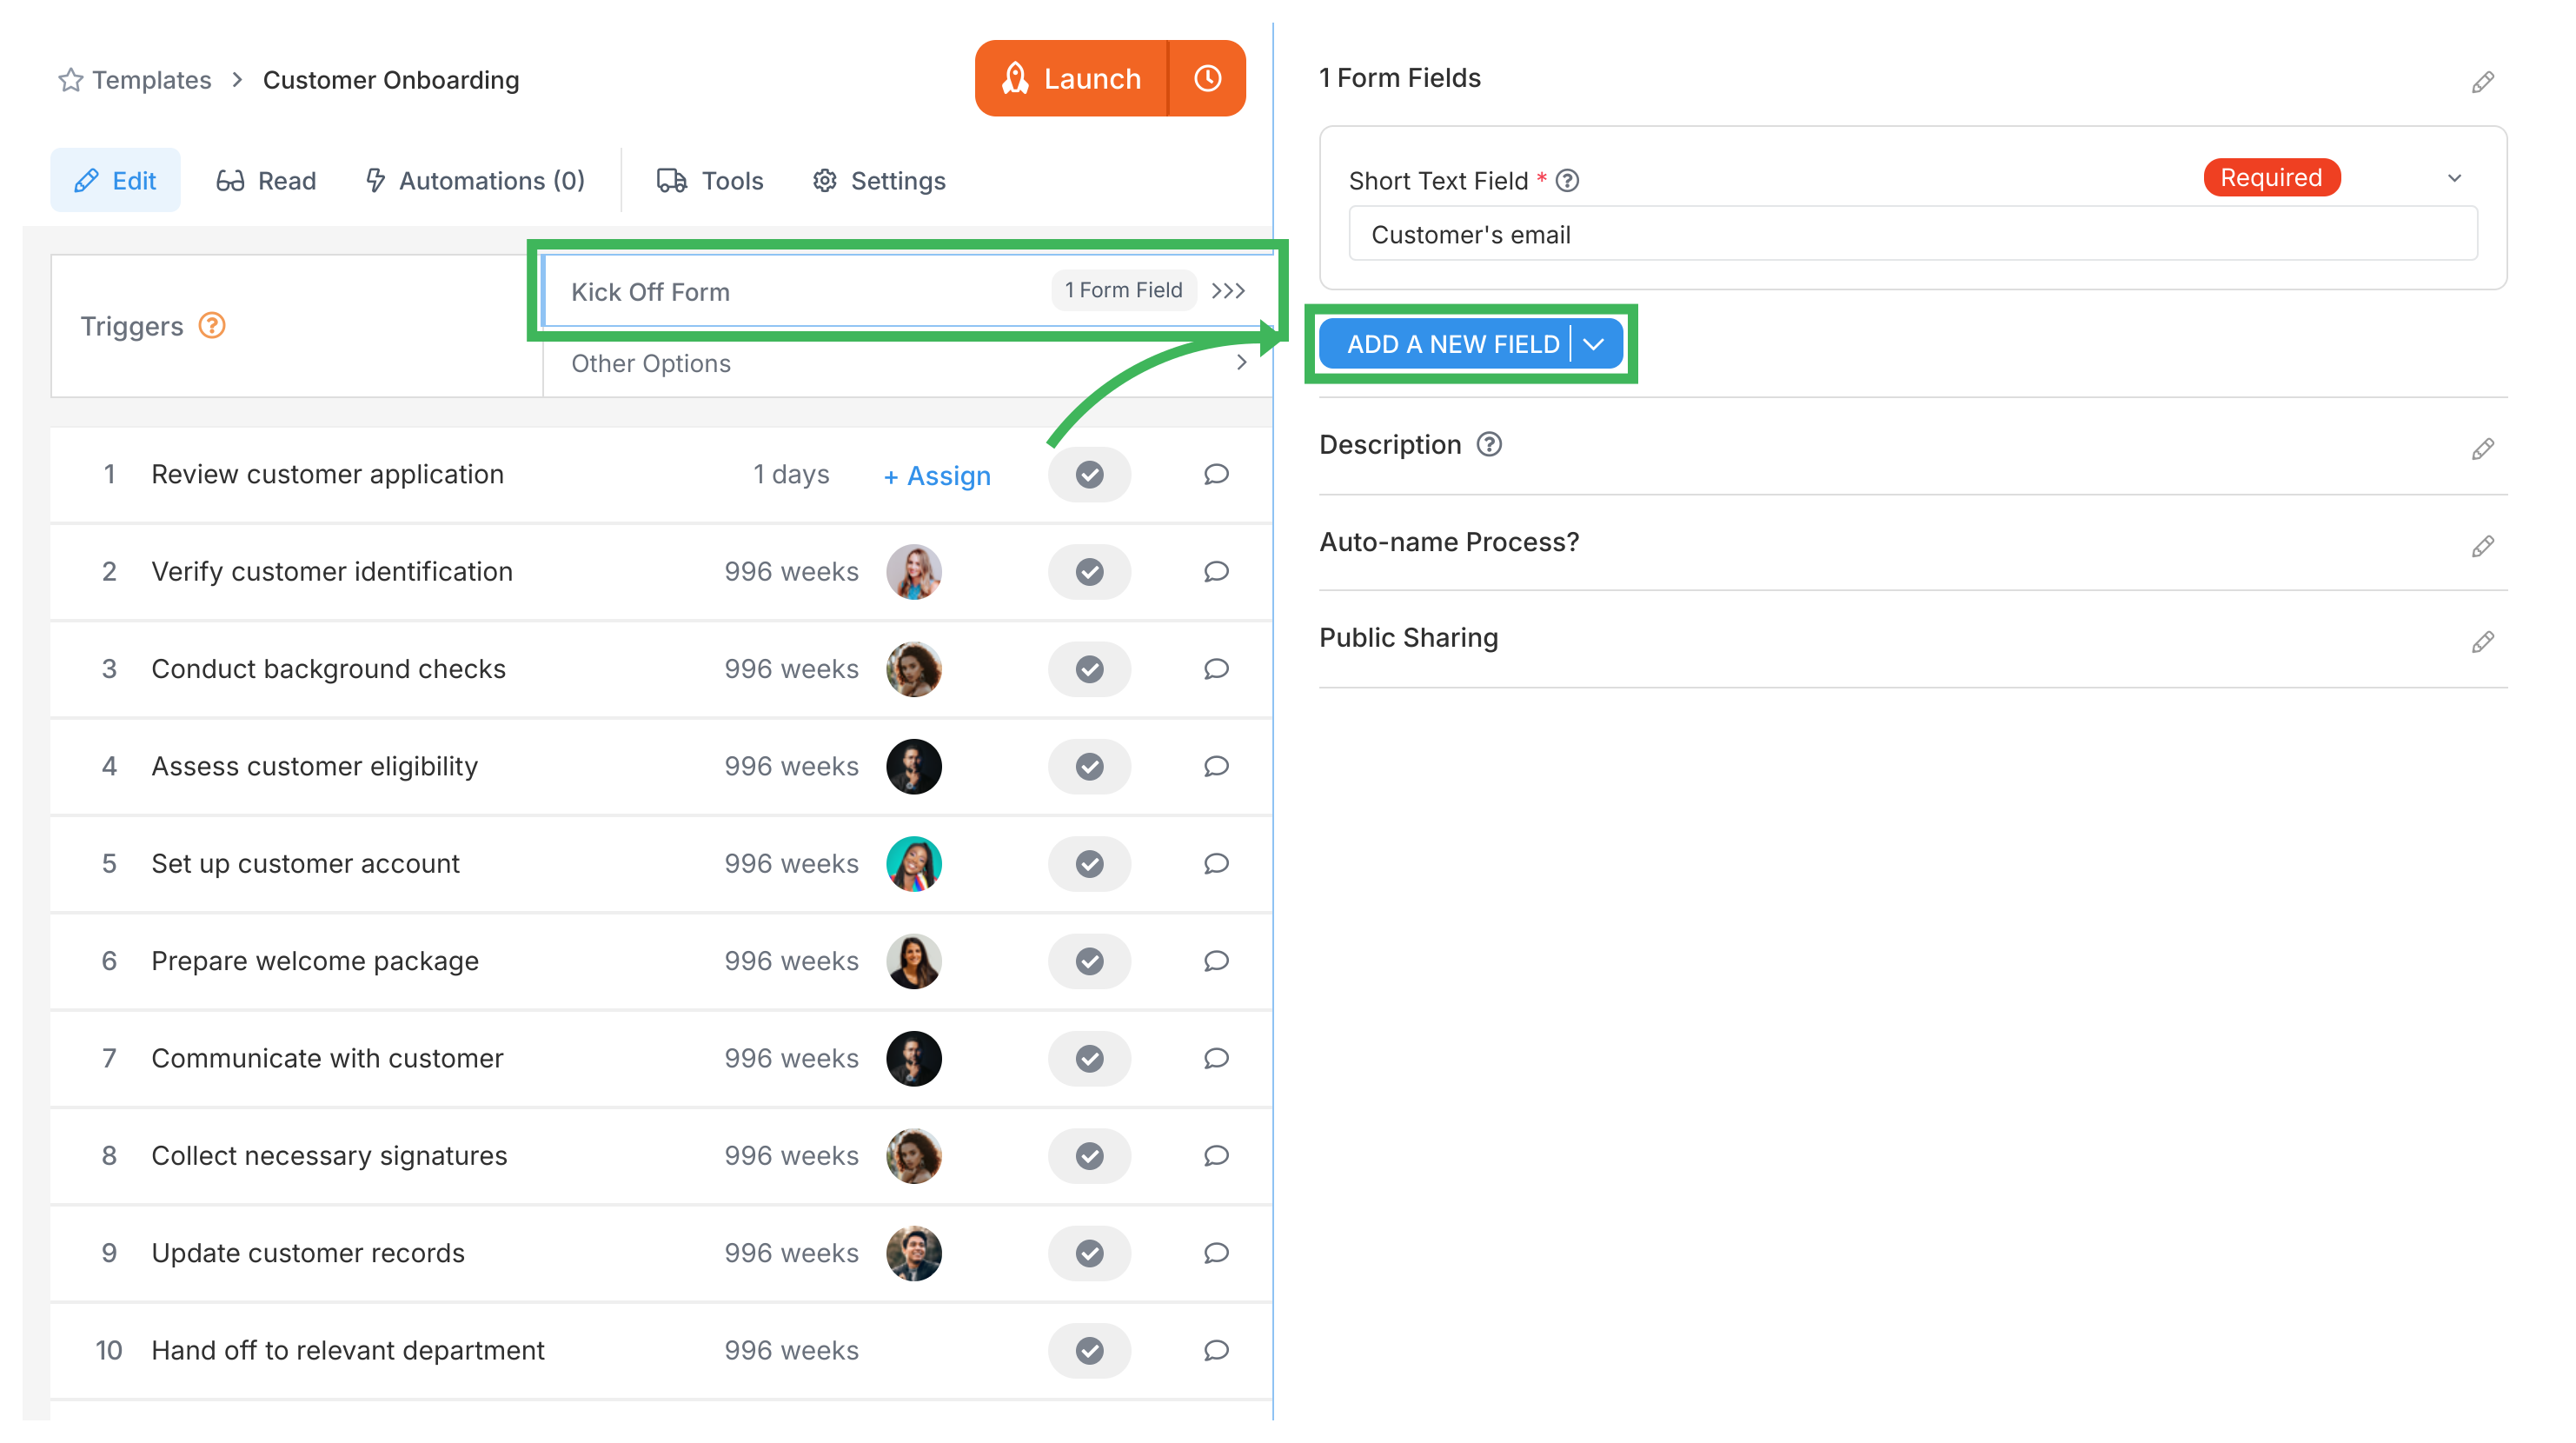
Configure each field - name, type, required toggle, help text, options, and default content if needed.
Save your template.
Available field types
Field type
Use for
Short Text
Names, IDs, brief responses
Long Text
Descriptions, detailed explanations
Dropdown
Pick one from a predefined list
Multi-select
Pick multiple from a list
Radio Buttons
Pick exactly one option
Date
Scheduling, deadlines
Email
Email addresses
File Upload
Documents, images, attachments
Table
Structured tabular data
Assignee selector
Pick people to assign within the process
Mark fields as Required only if the process can’t start without that data. Required fields prevent automatic launching via email triggers or some API calls that don’t supply the field values.
Completing kick-off forms
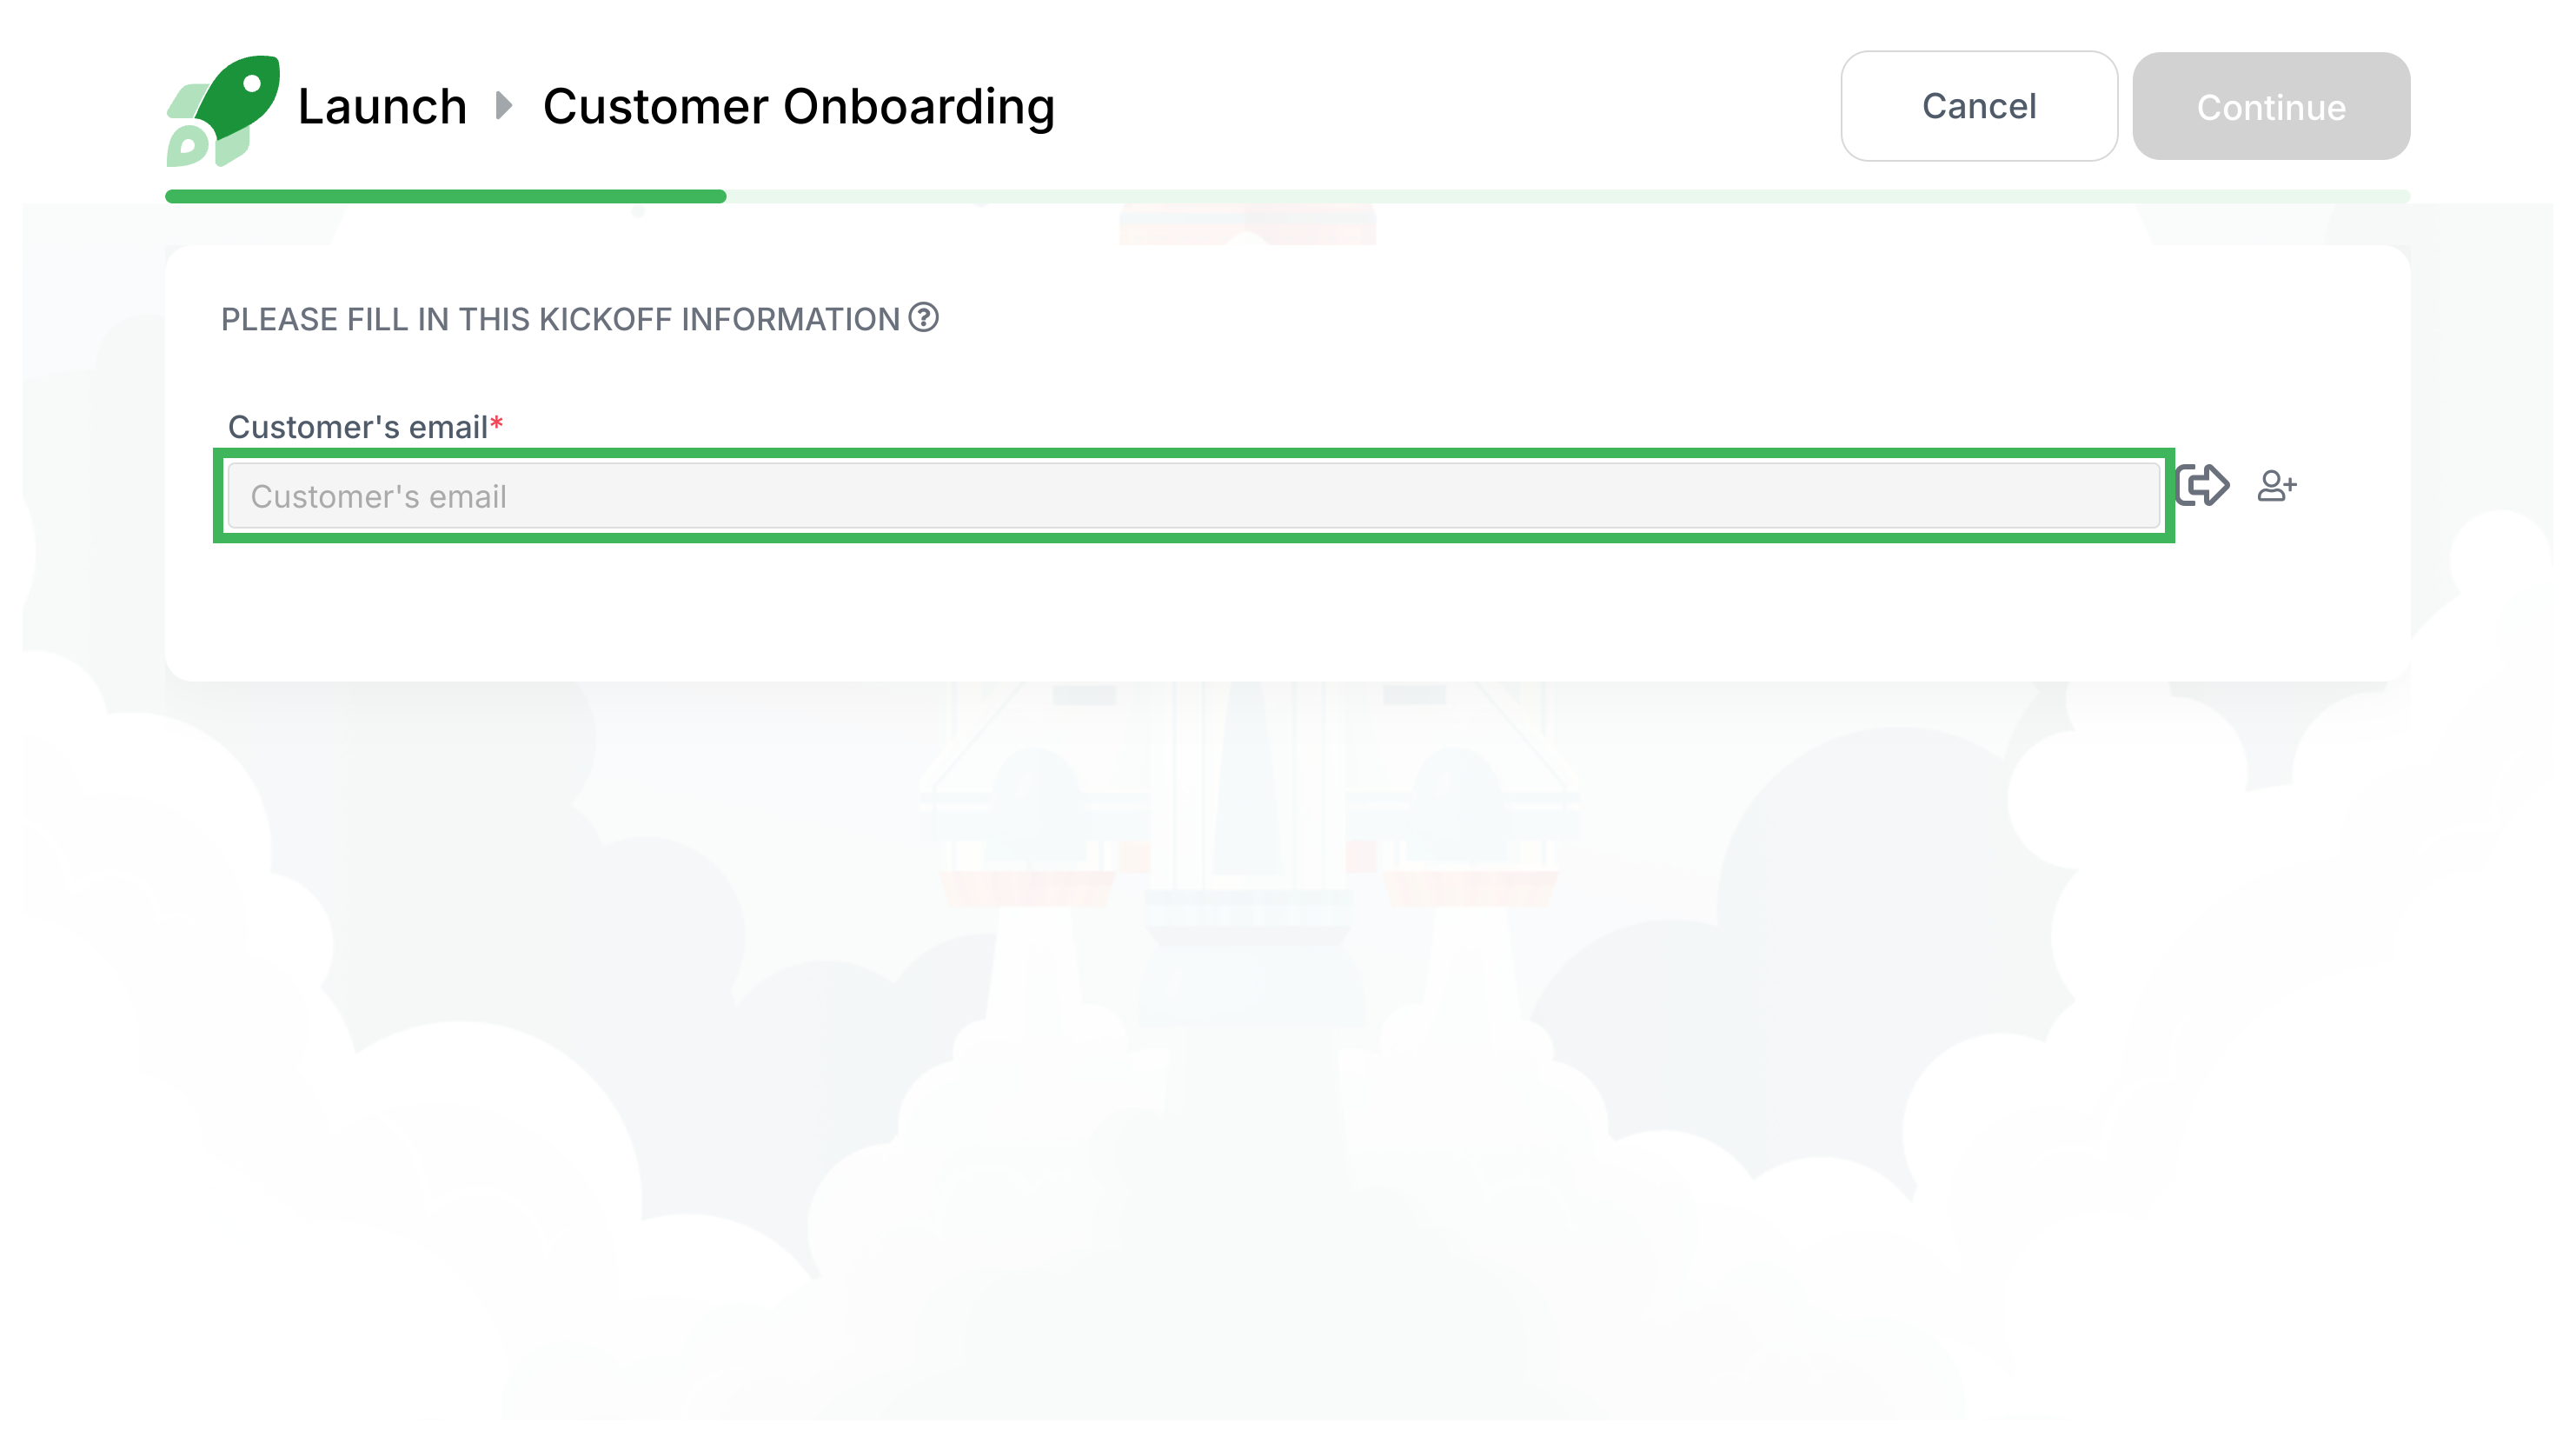
Click Launch Process on the template.
The kick-off form appears.
Fill out the fields (required fields show a *).
Click Submit.
The process starts with the submitted data.
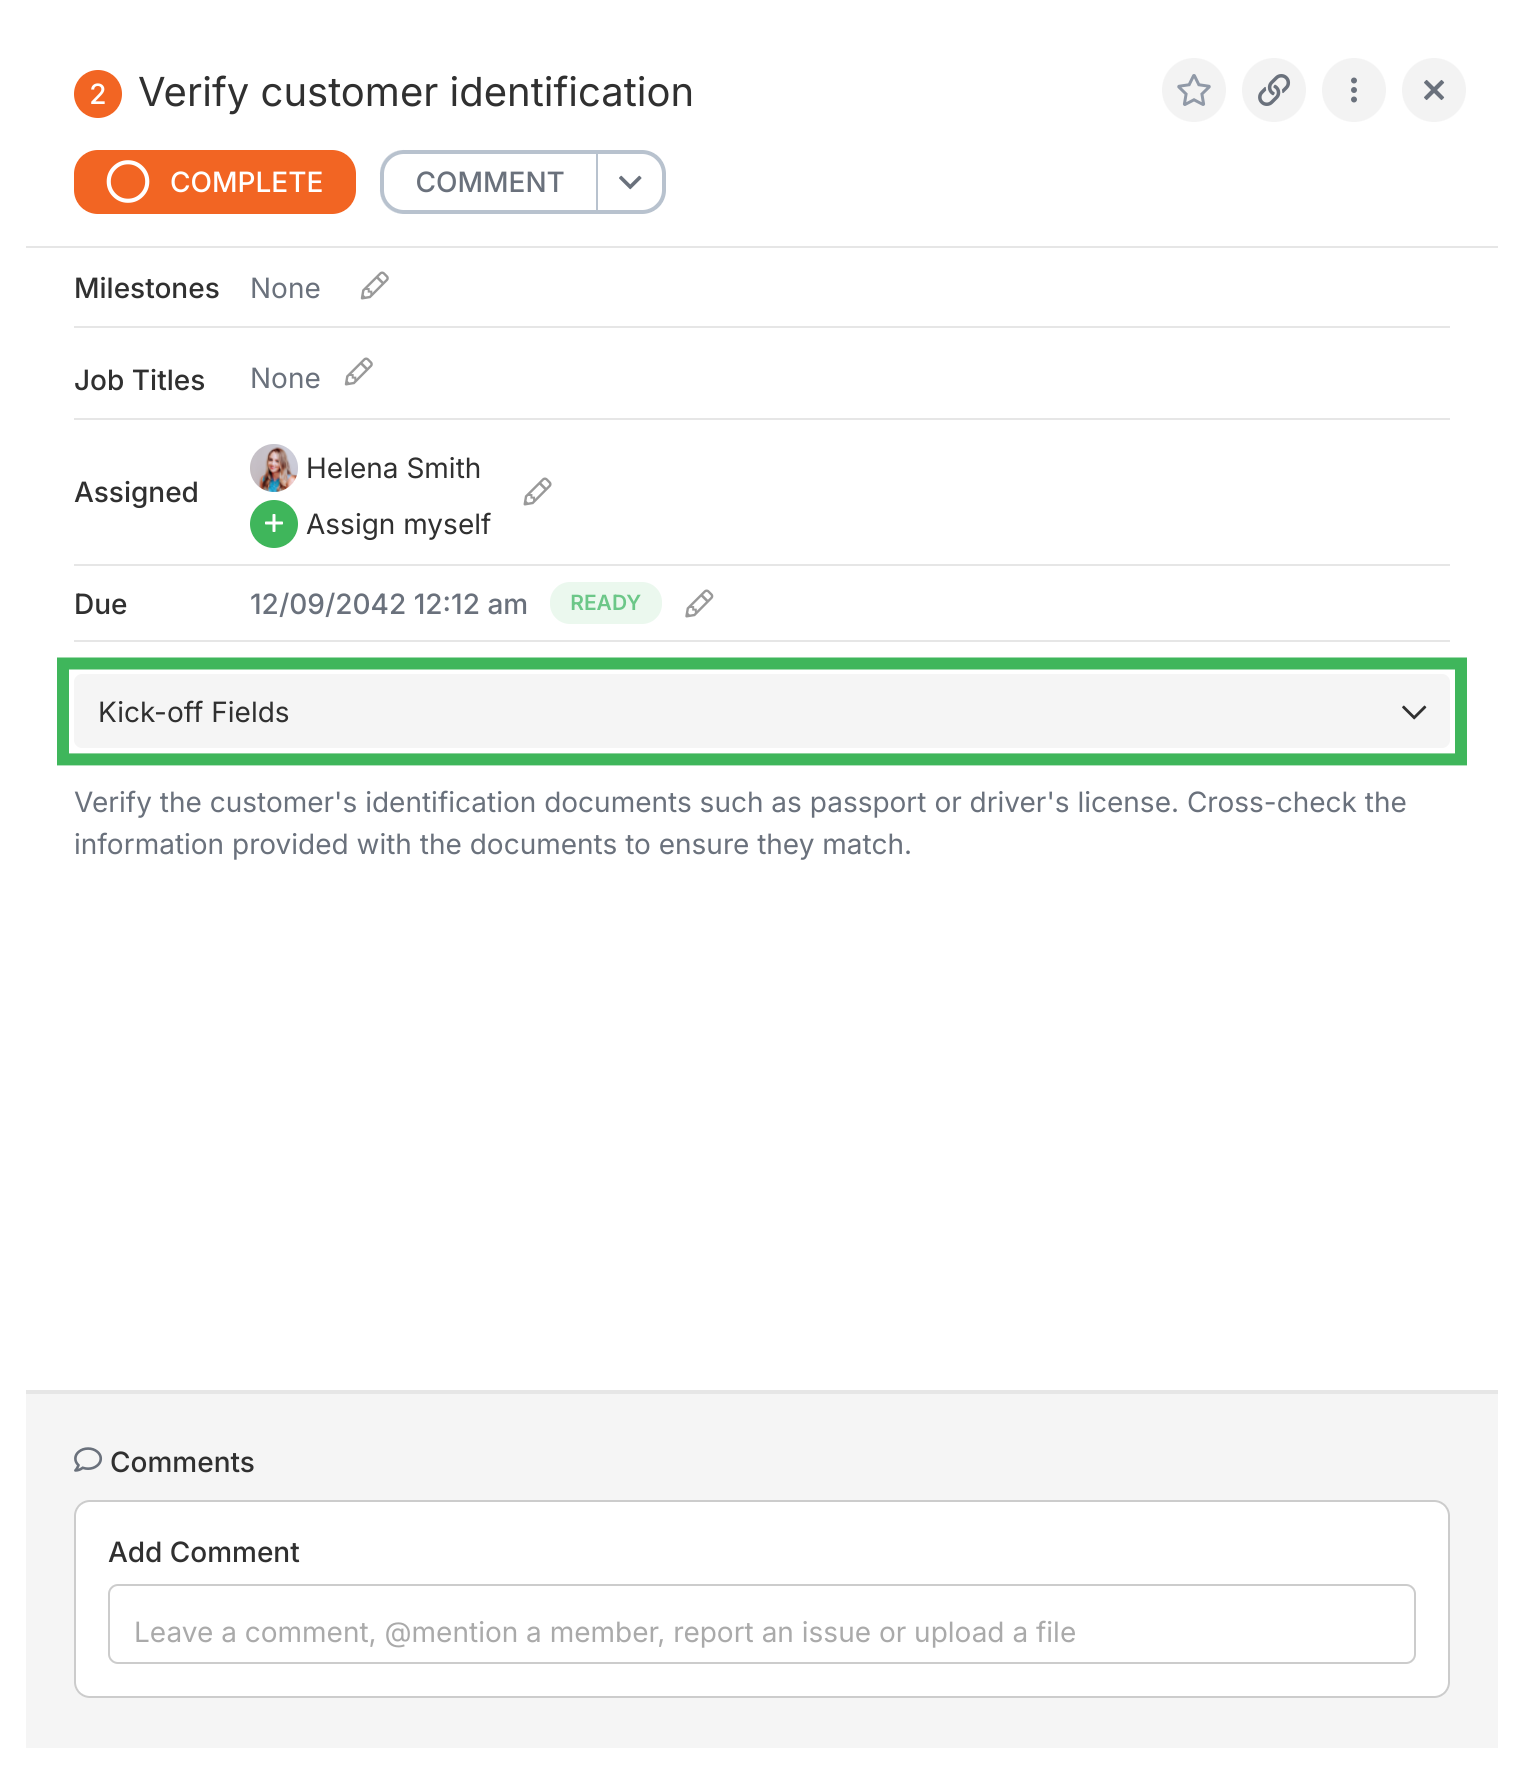
Viewing kick-off form answers
Anyone on the process can see submitted kick-off data:
Share a kick-off form publicly so anyone - even without a Tallyfy account - can submit it to start a process.
Why use public forms:
Instant workflow launch - no delay between submission and process start
Submitter tracking - the person who submits gets a unique link to track progress (after email verification)
Spam prevention - email verification filters out fake submissions
Branding - public forms display your organization’s logo
Deactivated members and public forms
Tallyfy uses the kickoff_sharing_user_id to authenticate public form submissions. When that member gets deactivated, Tallyfy automatically reassigns the public form to the template owner. If the template owner is also inactive, the public link won’t work. Check public form assignments before deactivating members. (See Removing Members.)
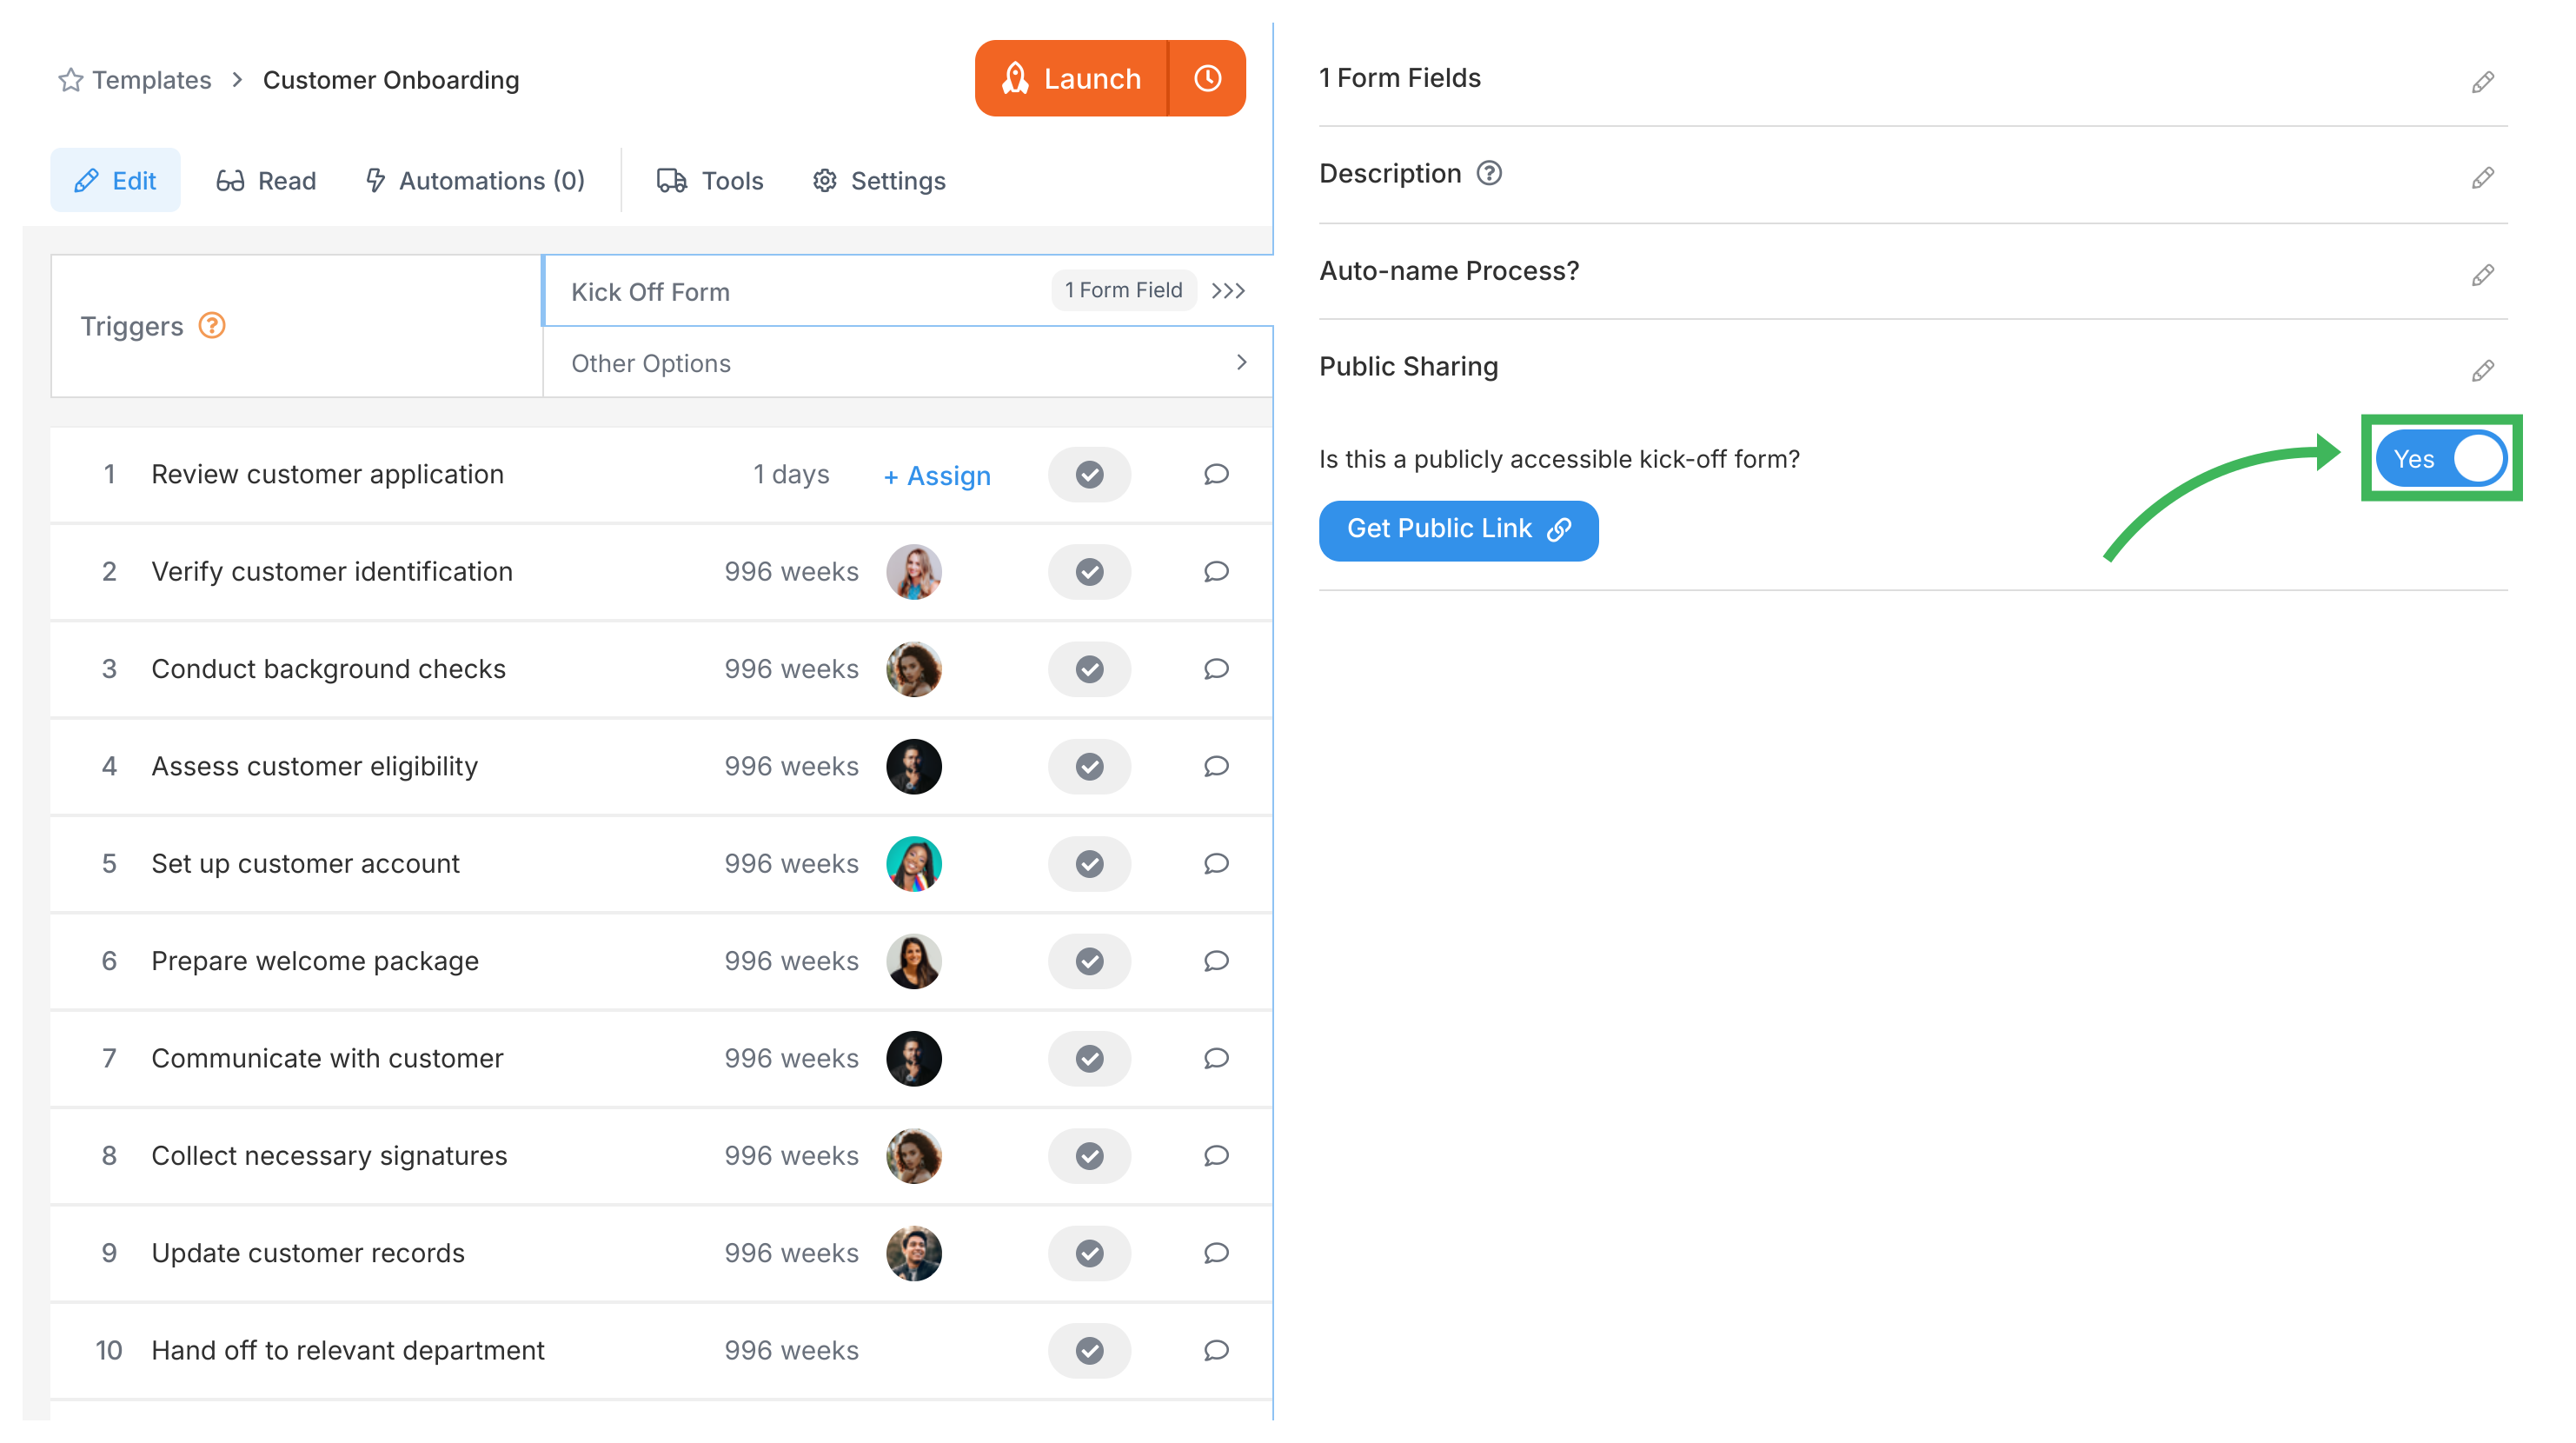
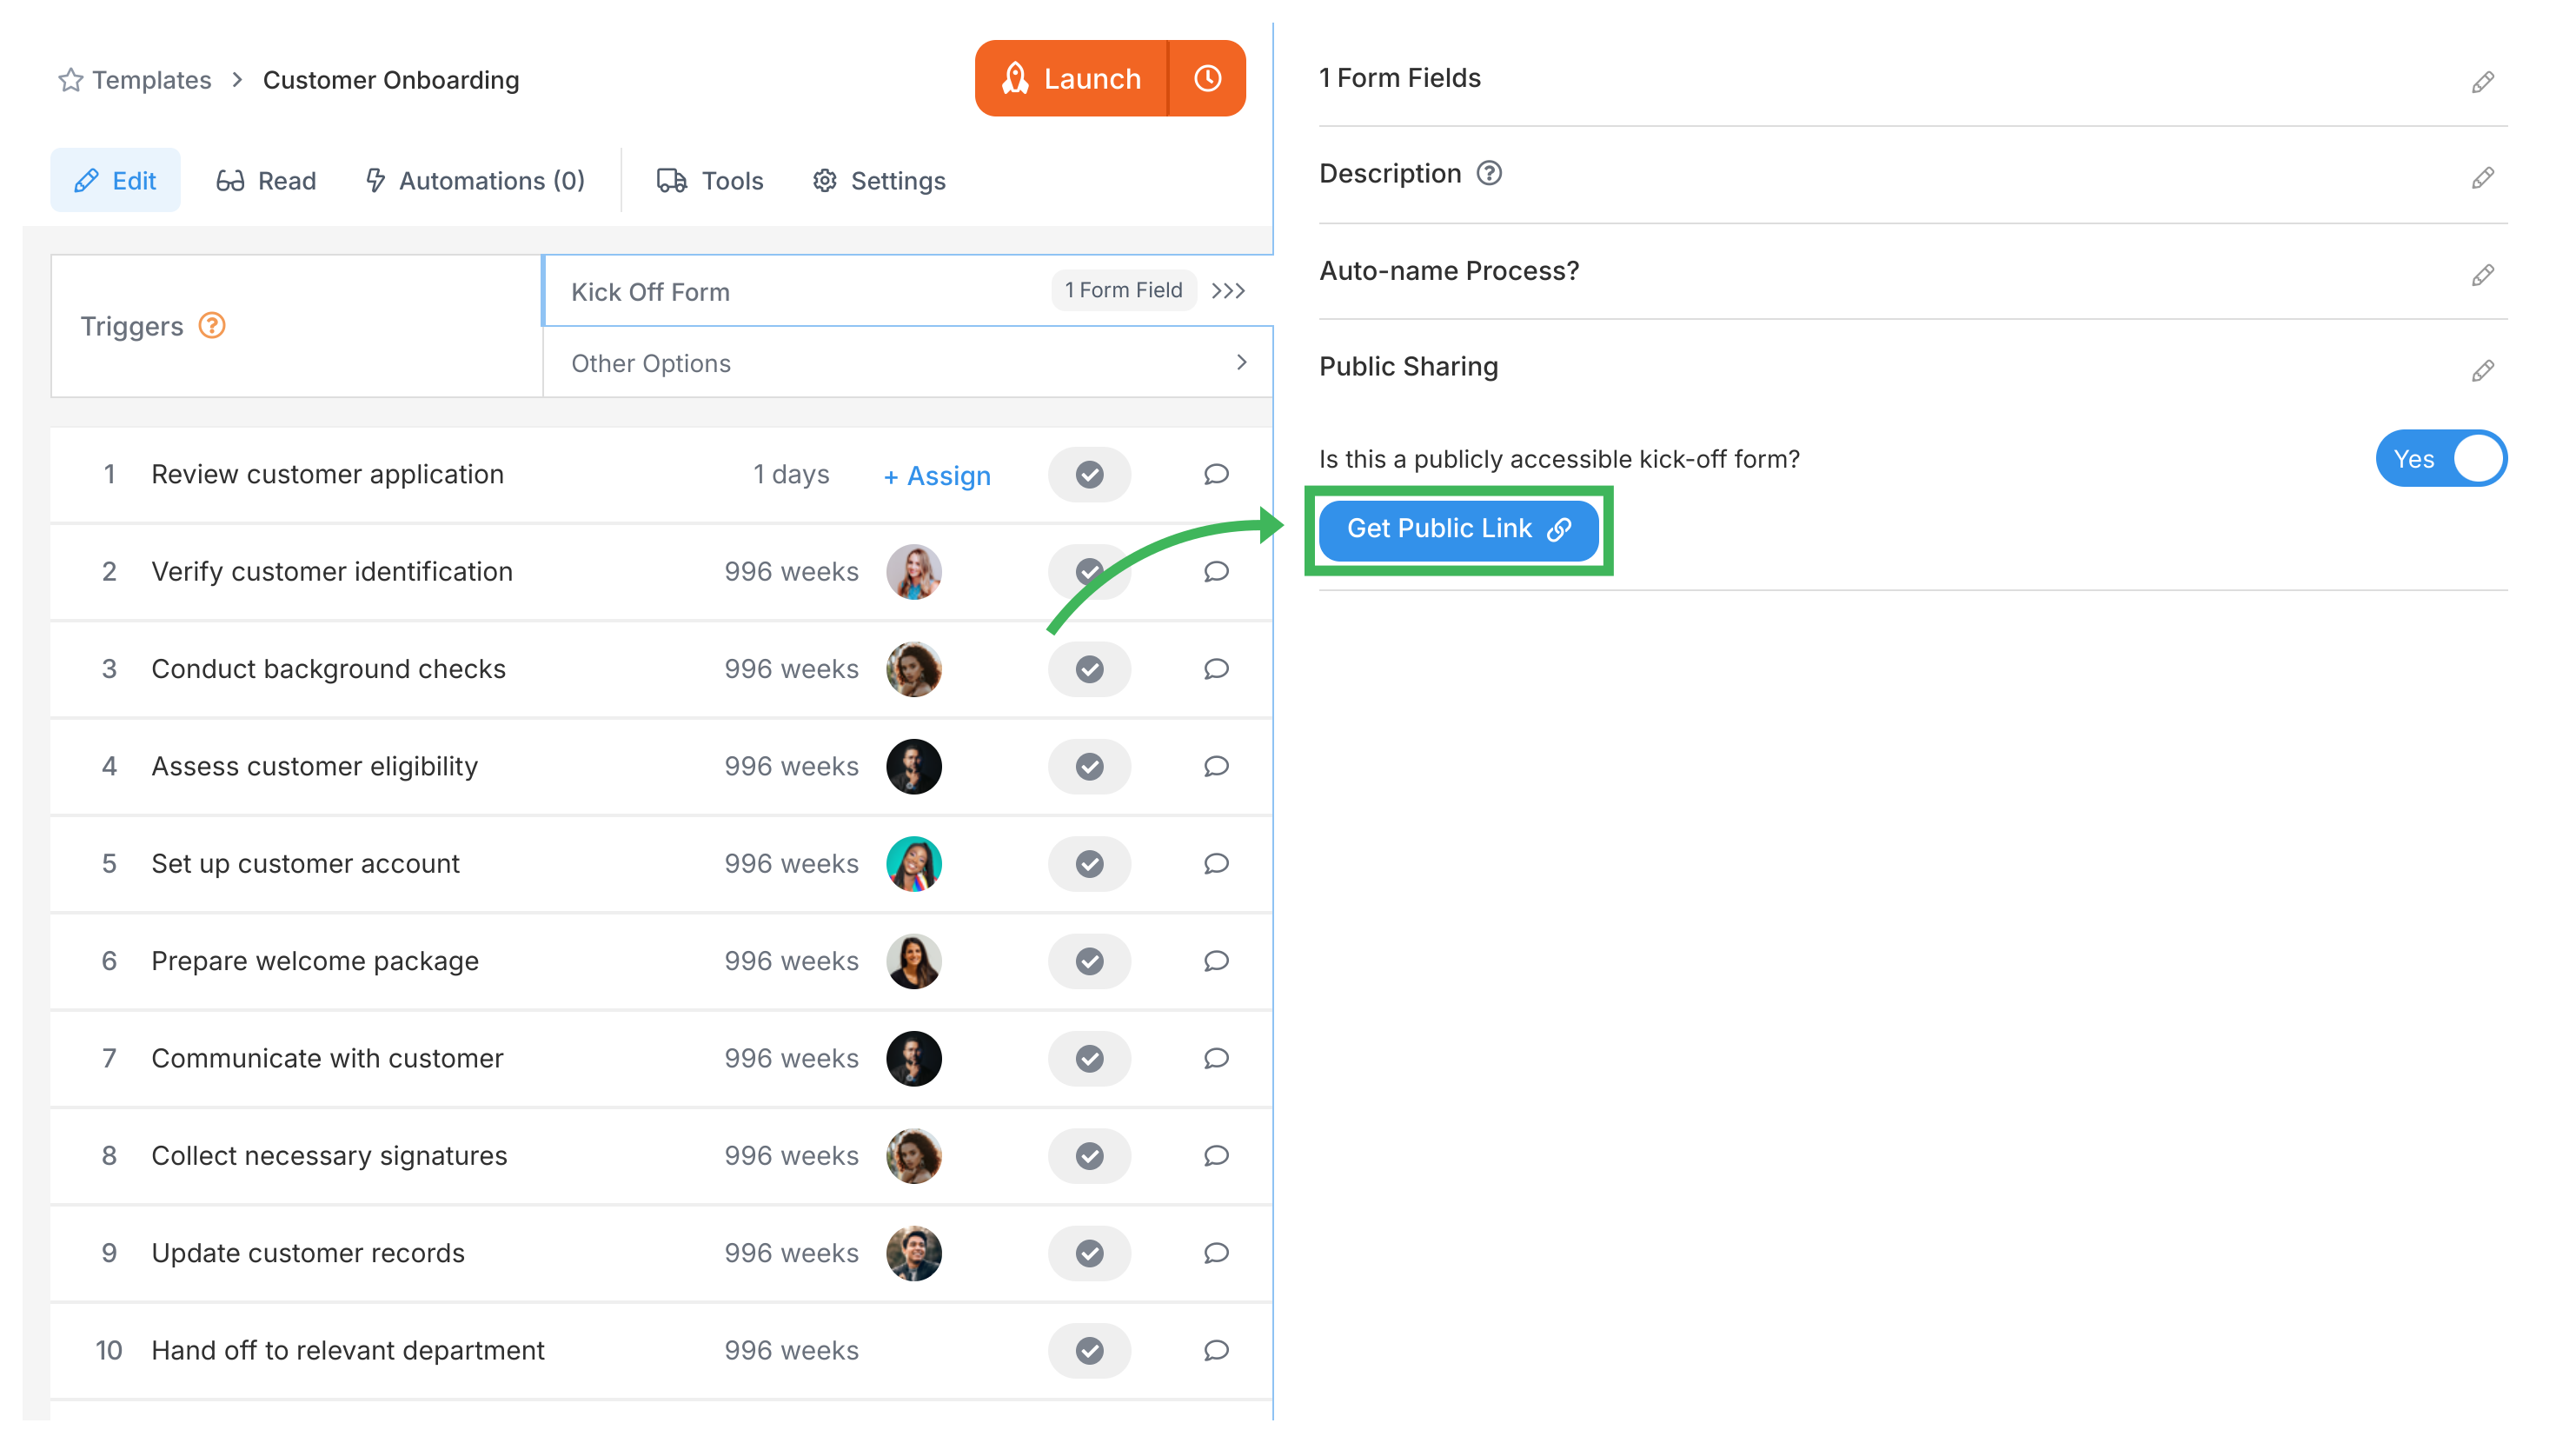
Making a kick-off form public
Open the template in Edit mode.
Go to Triggers > Kick-off Form.
Find Public Sharing on the right panel and switch it ON.
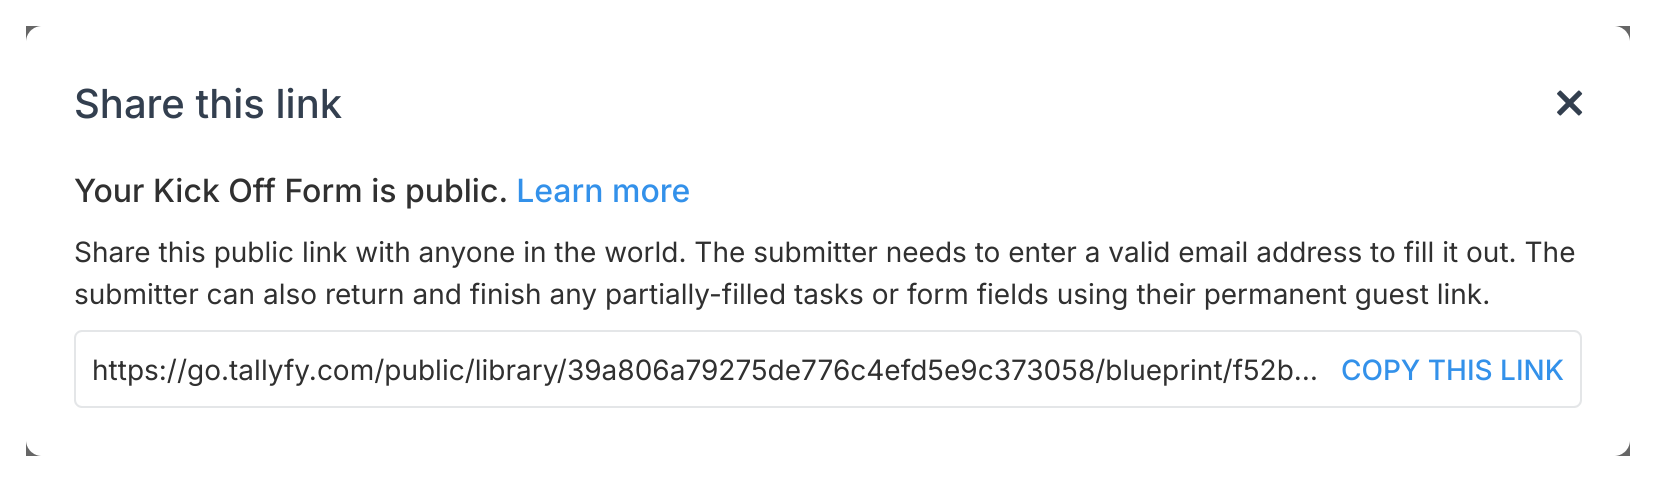
Click Get Public Link.
Copy the shareable link from the dialog.
Share this link with people outside your organization.
How public form submission works
The visitor enters their email address.
Tallyfy sends them a private access link via email.
They click the link to open the form.
They fill out and submit.
The process launches inside Tallyfy.
They can reuse their private link to check process status later.
Public forms vs. internal steps
Public kick-off forms
Internal process steps
Audience
External users without Tallyfy accounts
Team members and assigned guests
Purpose
Collect initial data to start a workflow
Execute tasks after the process starts
Access
Public link via email, website, etc.
Tallyfy dashboard with login
Experience
Simple form with your branding
Full task management with comments, attachments, tracking
Visibility
Submitters track overall progress only
Full internal task details
Best practices
Collect only what’s needed upfront
Ask for data the launcher definitely has right now
Save detailed branching questions for later workflow steps
Keep the form short. Don’t front-load complexity.
Form design tips
Use clear field names - skip jargon
Arrange fields in logical order
Mark fields required only when truly necessary
Add help text for anything that needs explanation
Test the form before sharing it widely
Common mistakes
Front-loading questionnaires - asking for info that isn’t available yet
Branching in kick-off forms - conditional logic belongs in workflow steps, not the initial form
Over-requiring fields - making fields mandatory when launchers might not have that data
Ignoring user context - different users have different information at launch time