Launch a process in Tallyfy by clicking Launch Process on any template card and naming the…
Launch manually
Click Launch Process on any template card, give it a descriptive name, and hit Launch. That’s the core flow. Templates are reusable definitions - processes are the live, trackable instances you create from them.
Manual launching gives you full control over timing, naming, and per-instance customization before a workflow starts running.
-
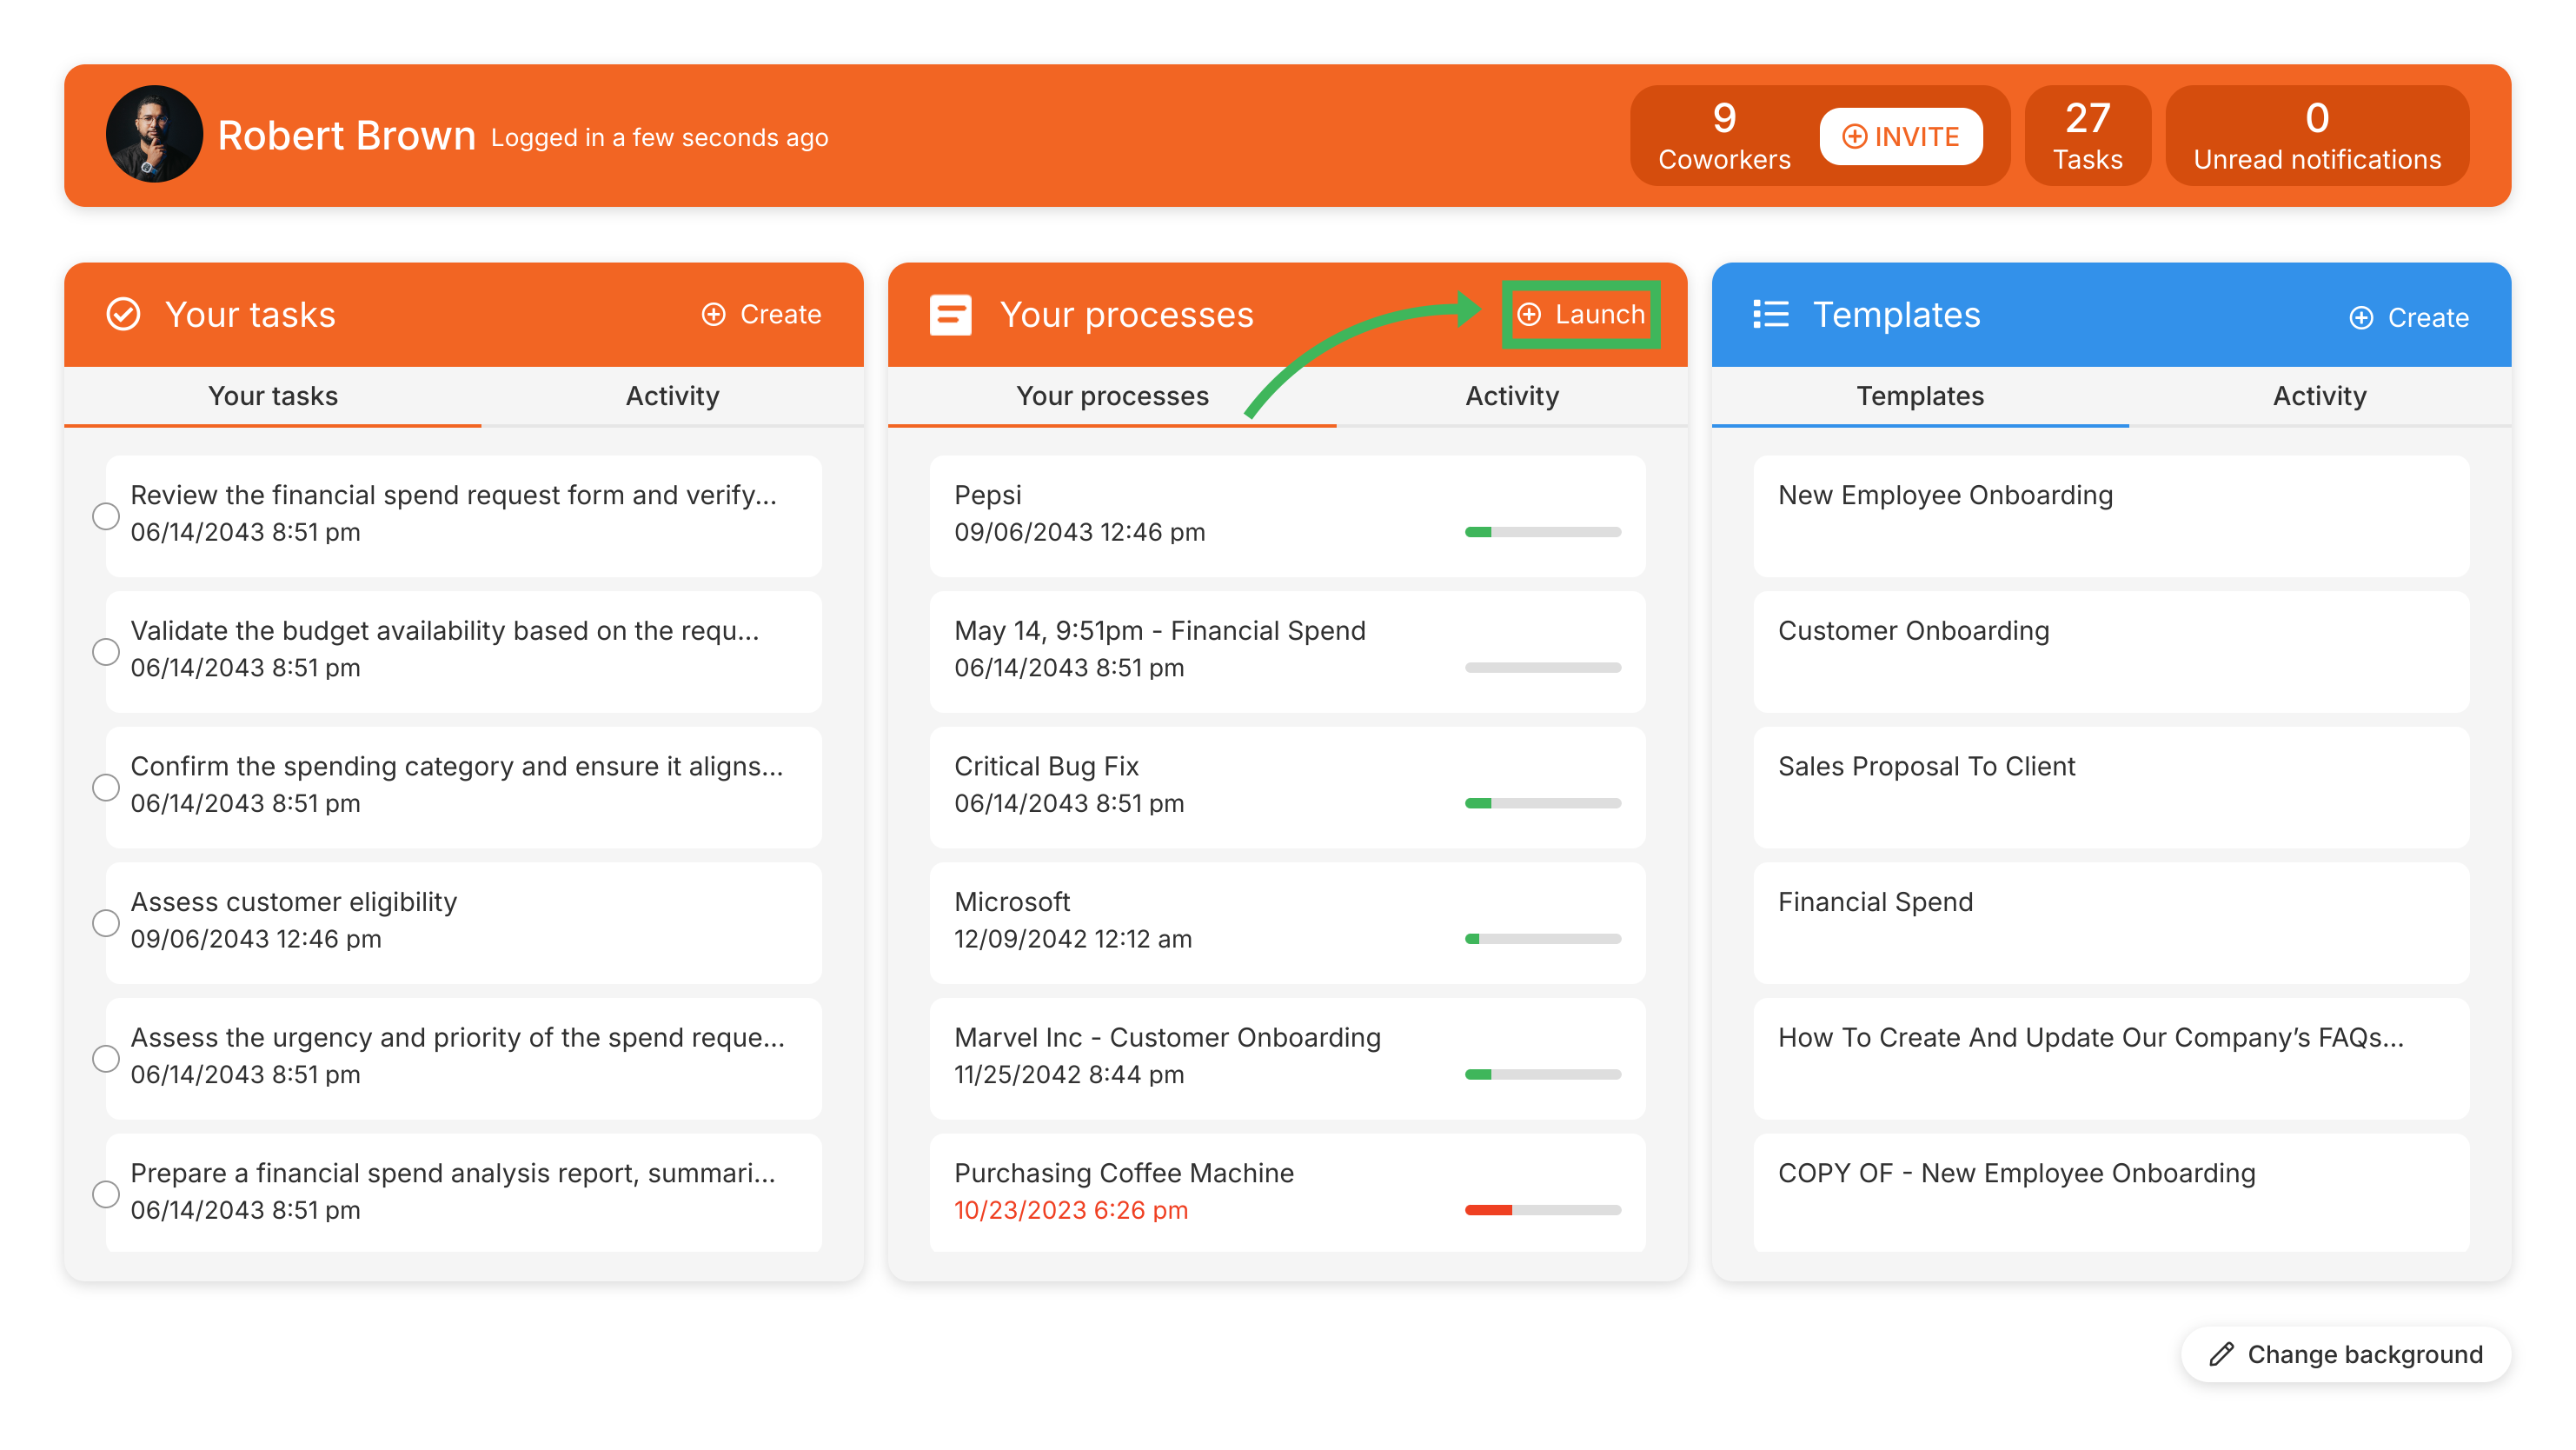
Start the launch from either:
- The Home screen - click the Launch Process button.
- The top navigation bar - click + Create > Process.
-
Both options open the Templates library.
-
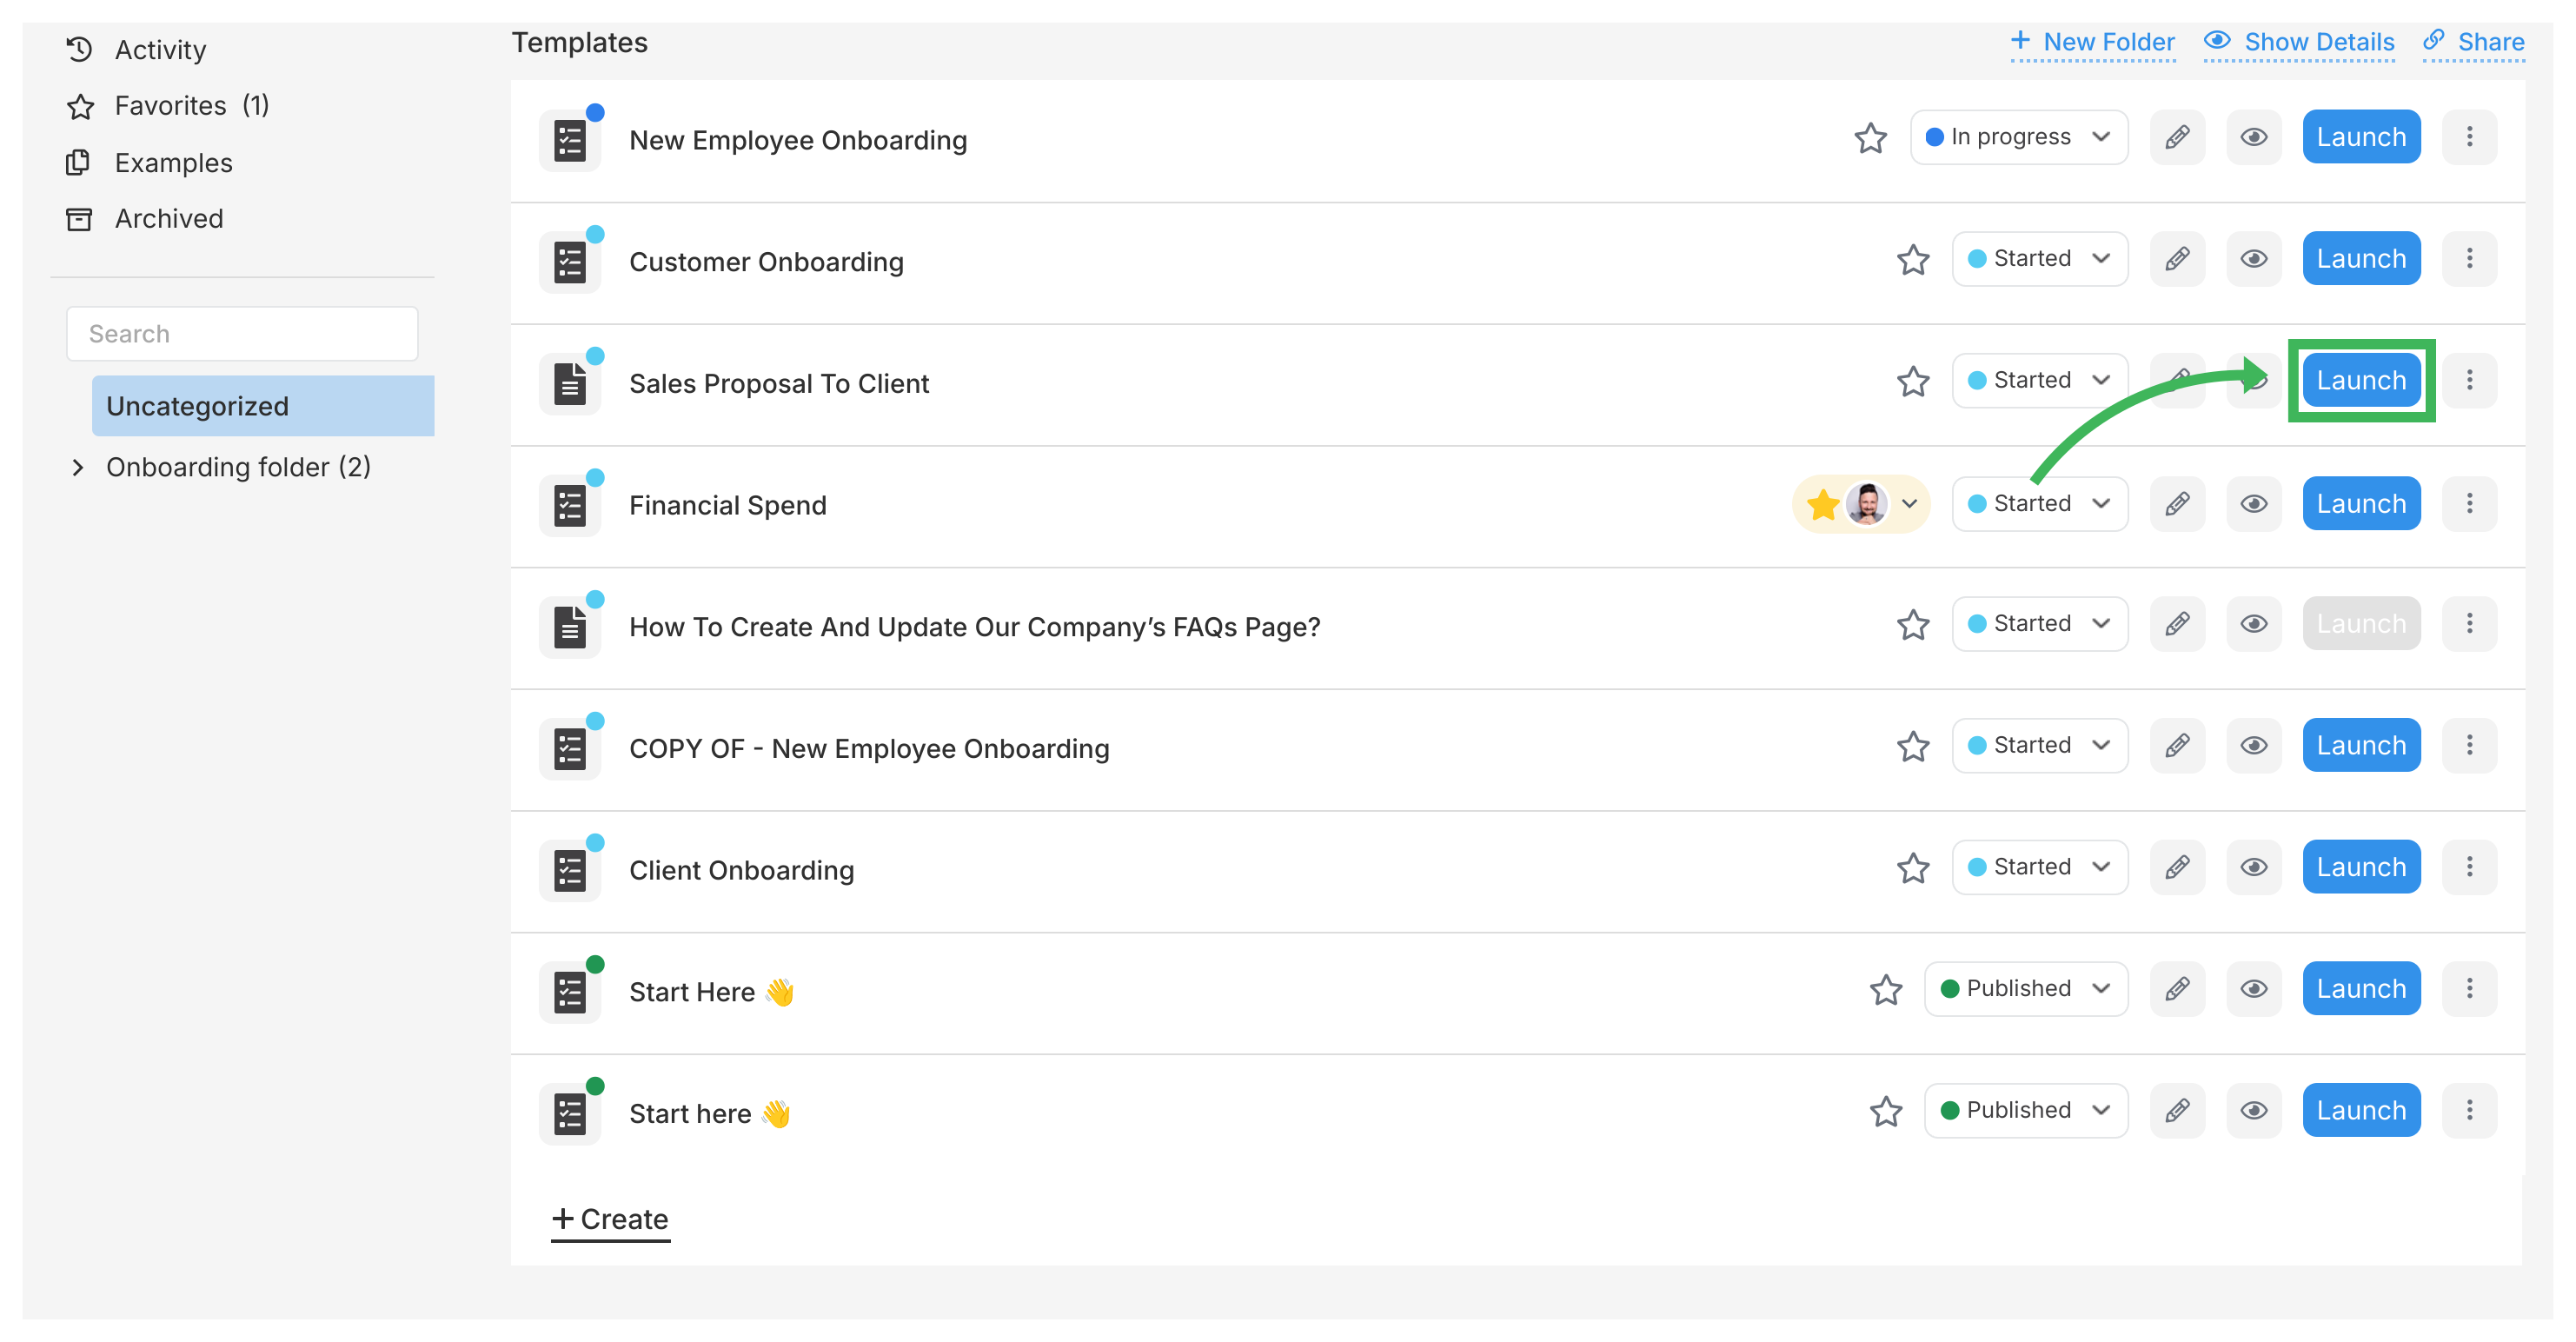
Find the template you want and click Launch Process on its card.
-
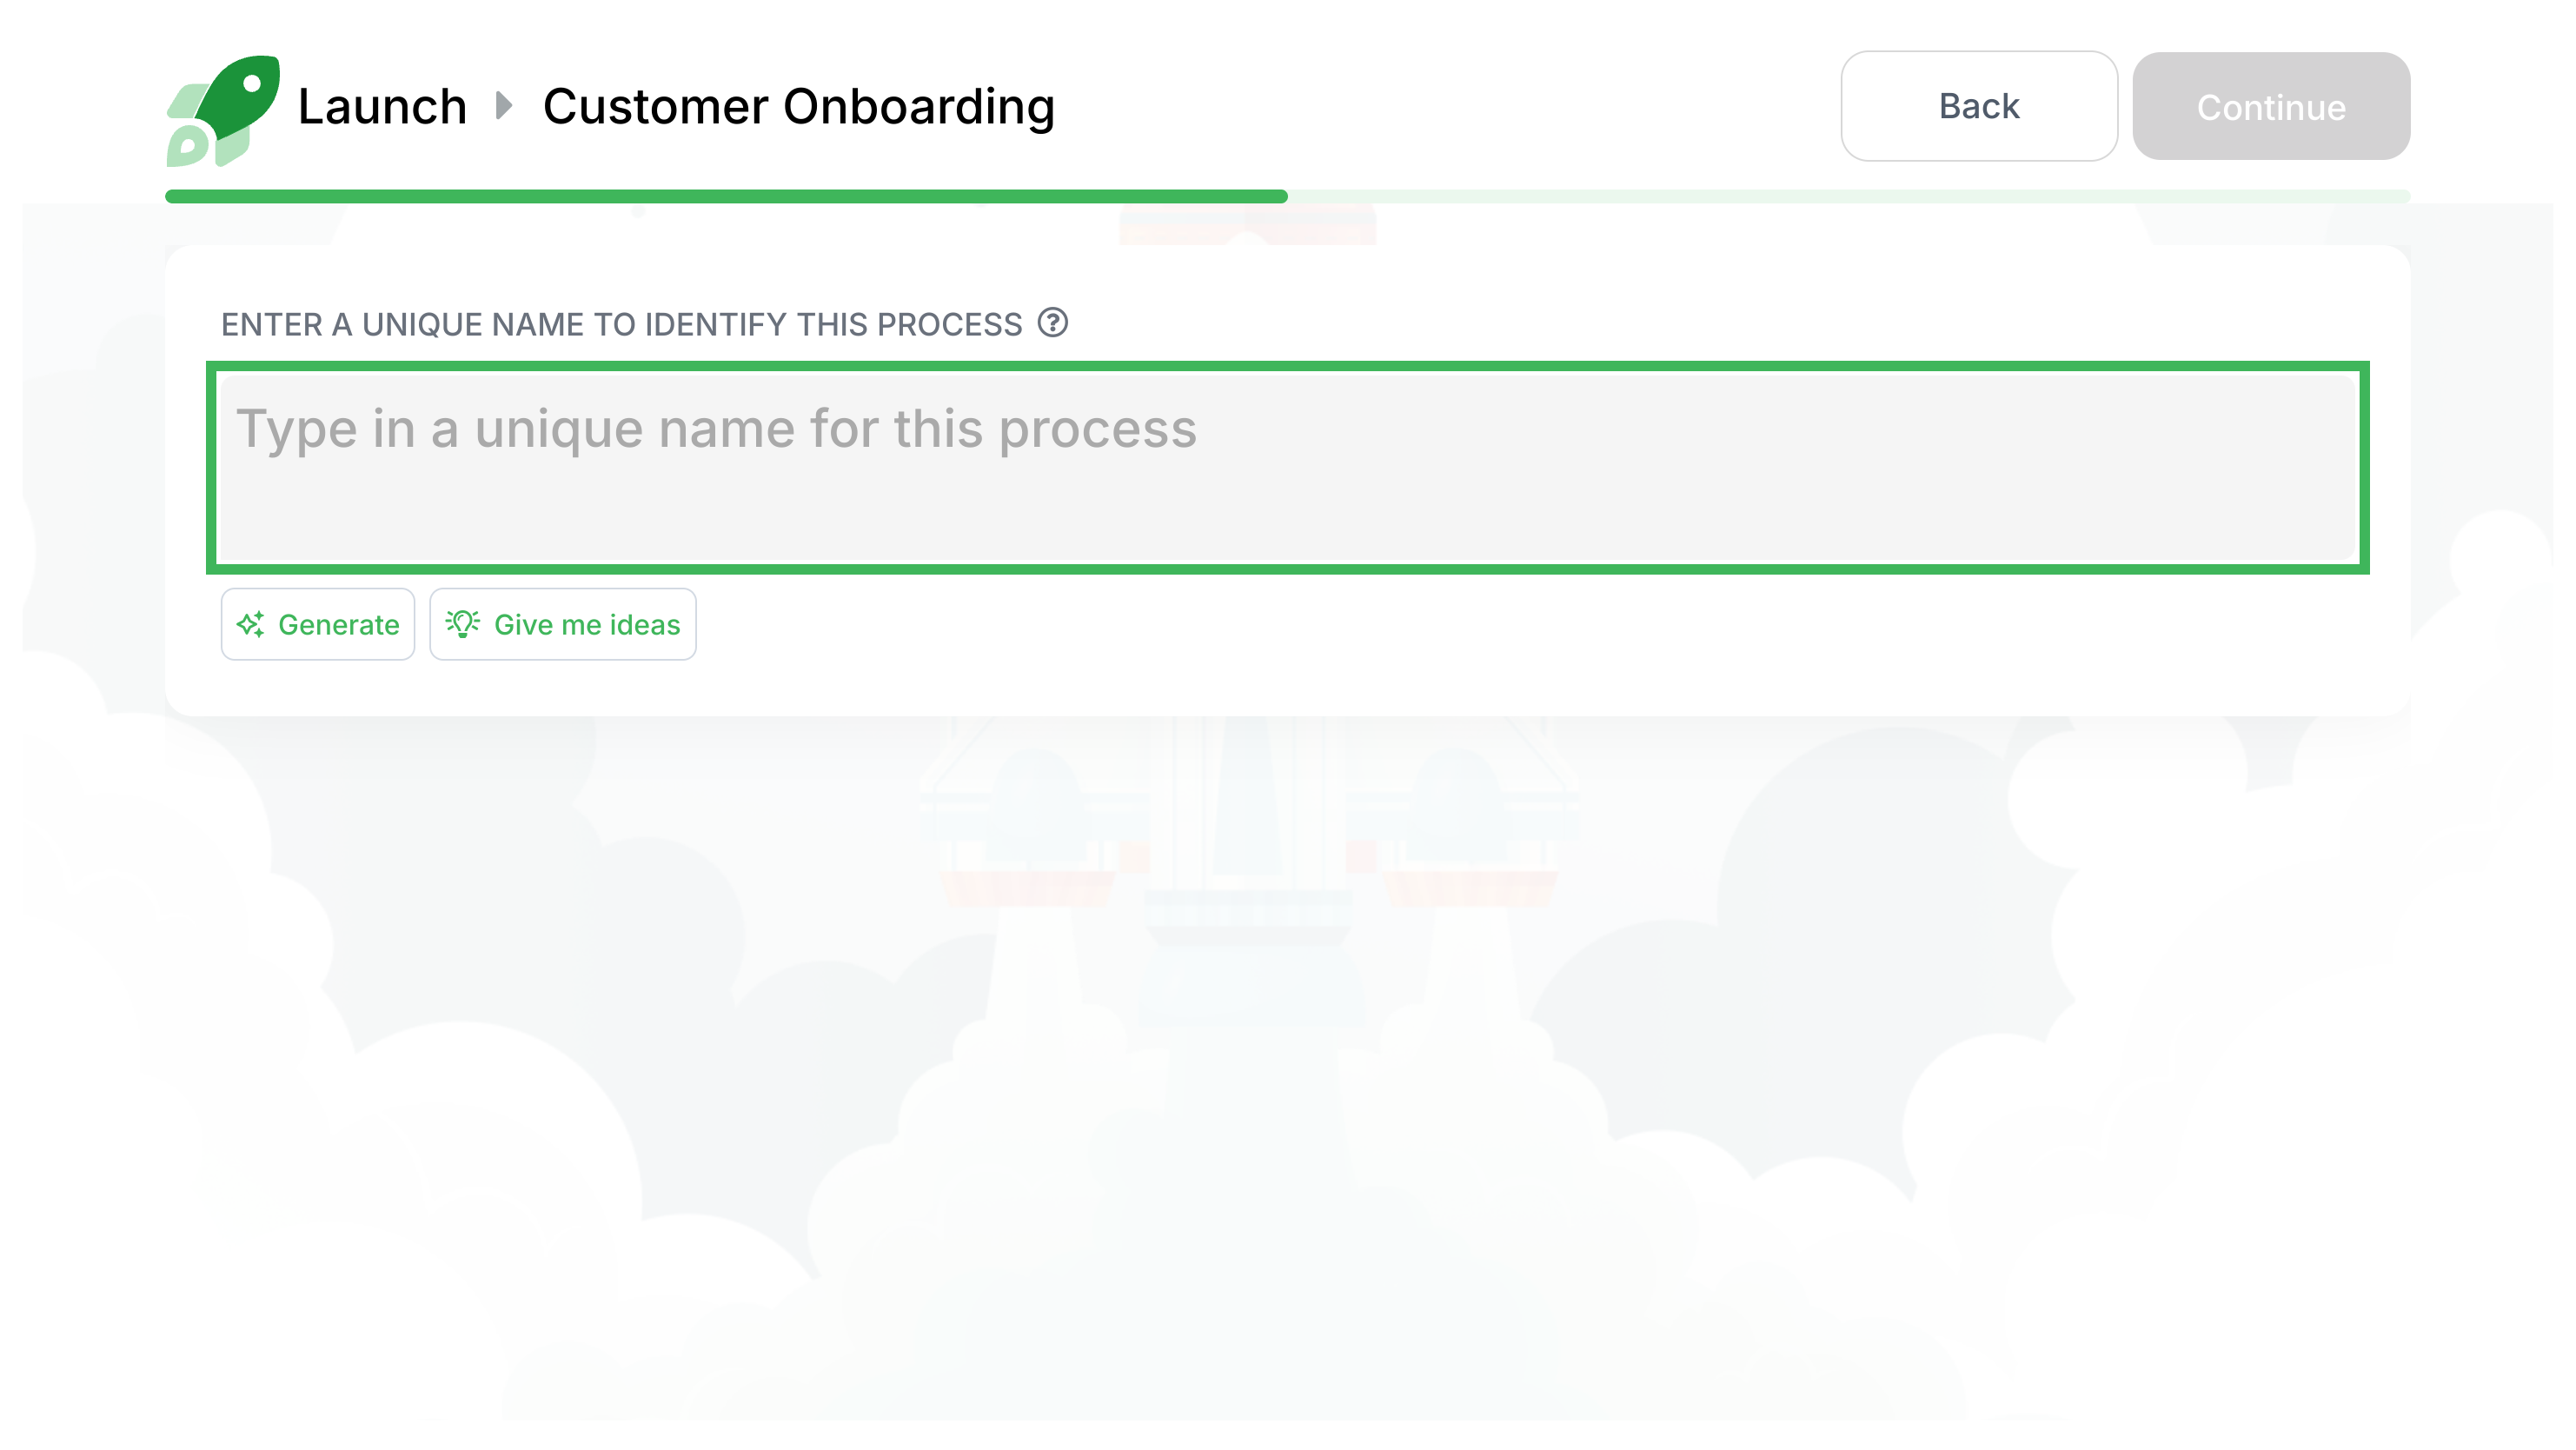
Give this instance a clear Name (max 550 characters). Pick something specific - “Onboard Jane Doe” beats “Employee Onboarding” when you’re tracking multiple runs.
-
You can also change assignees or deadlines for this instance on the launch screen.
-
Click the final Launch button.
-
Tallyfy starts the process, notifies assignees about their first tasks, and opens the process view.
-
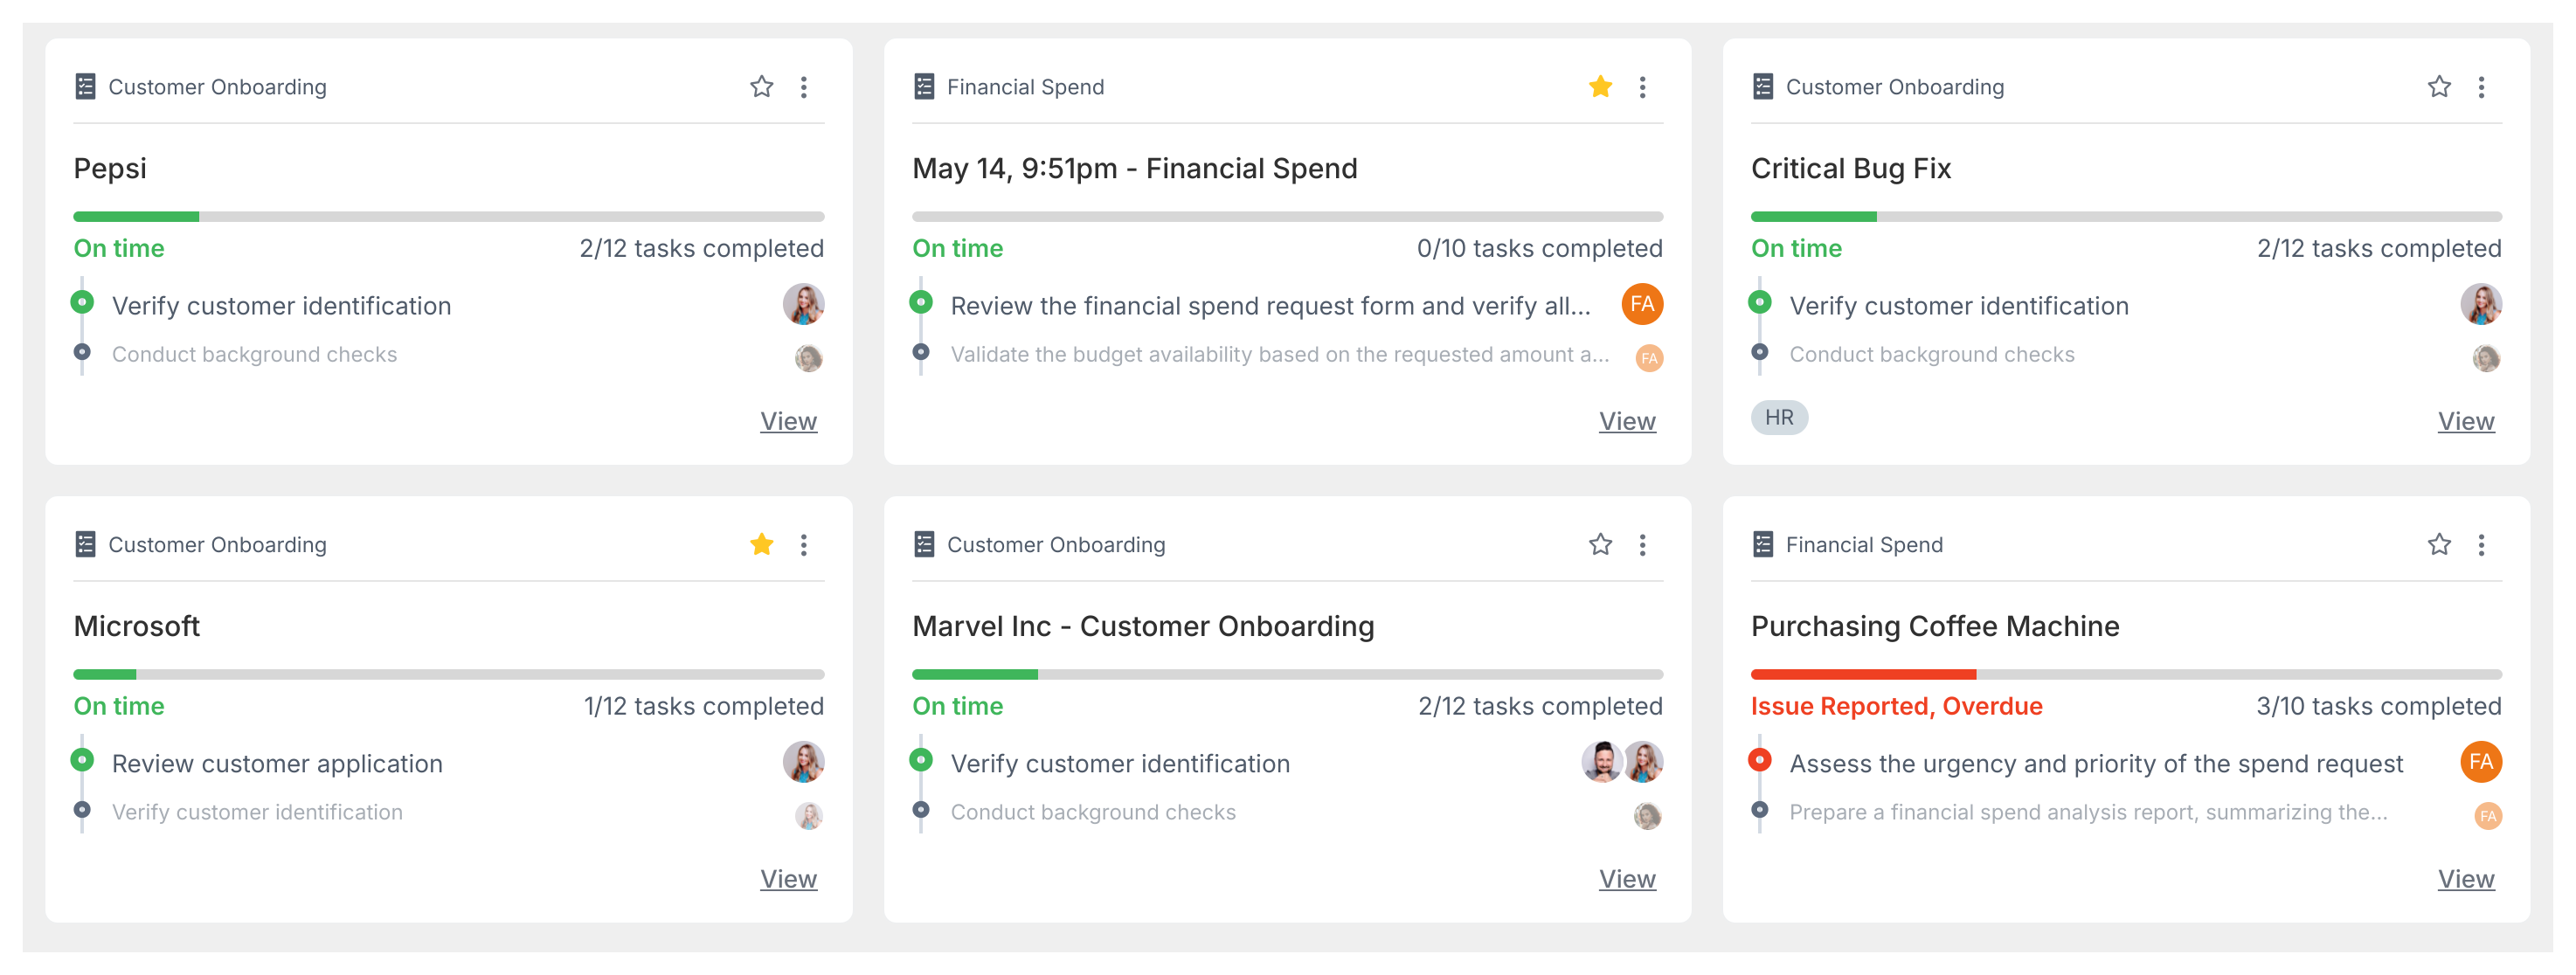
Track all running processes in the Tracker view.
If your process uses conditional rules that hide certain steps, you can still see them. Open the running process and click the Show hidden tasks eye icon in the process toolbar.

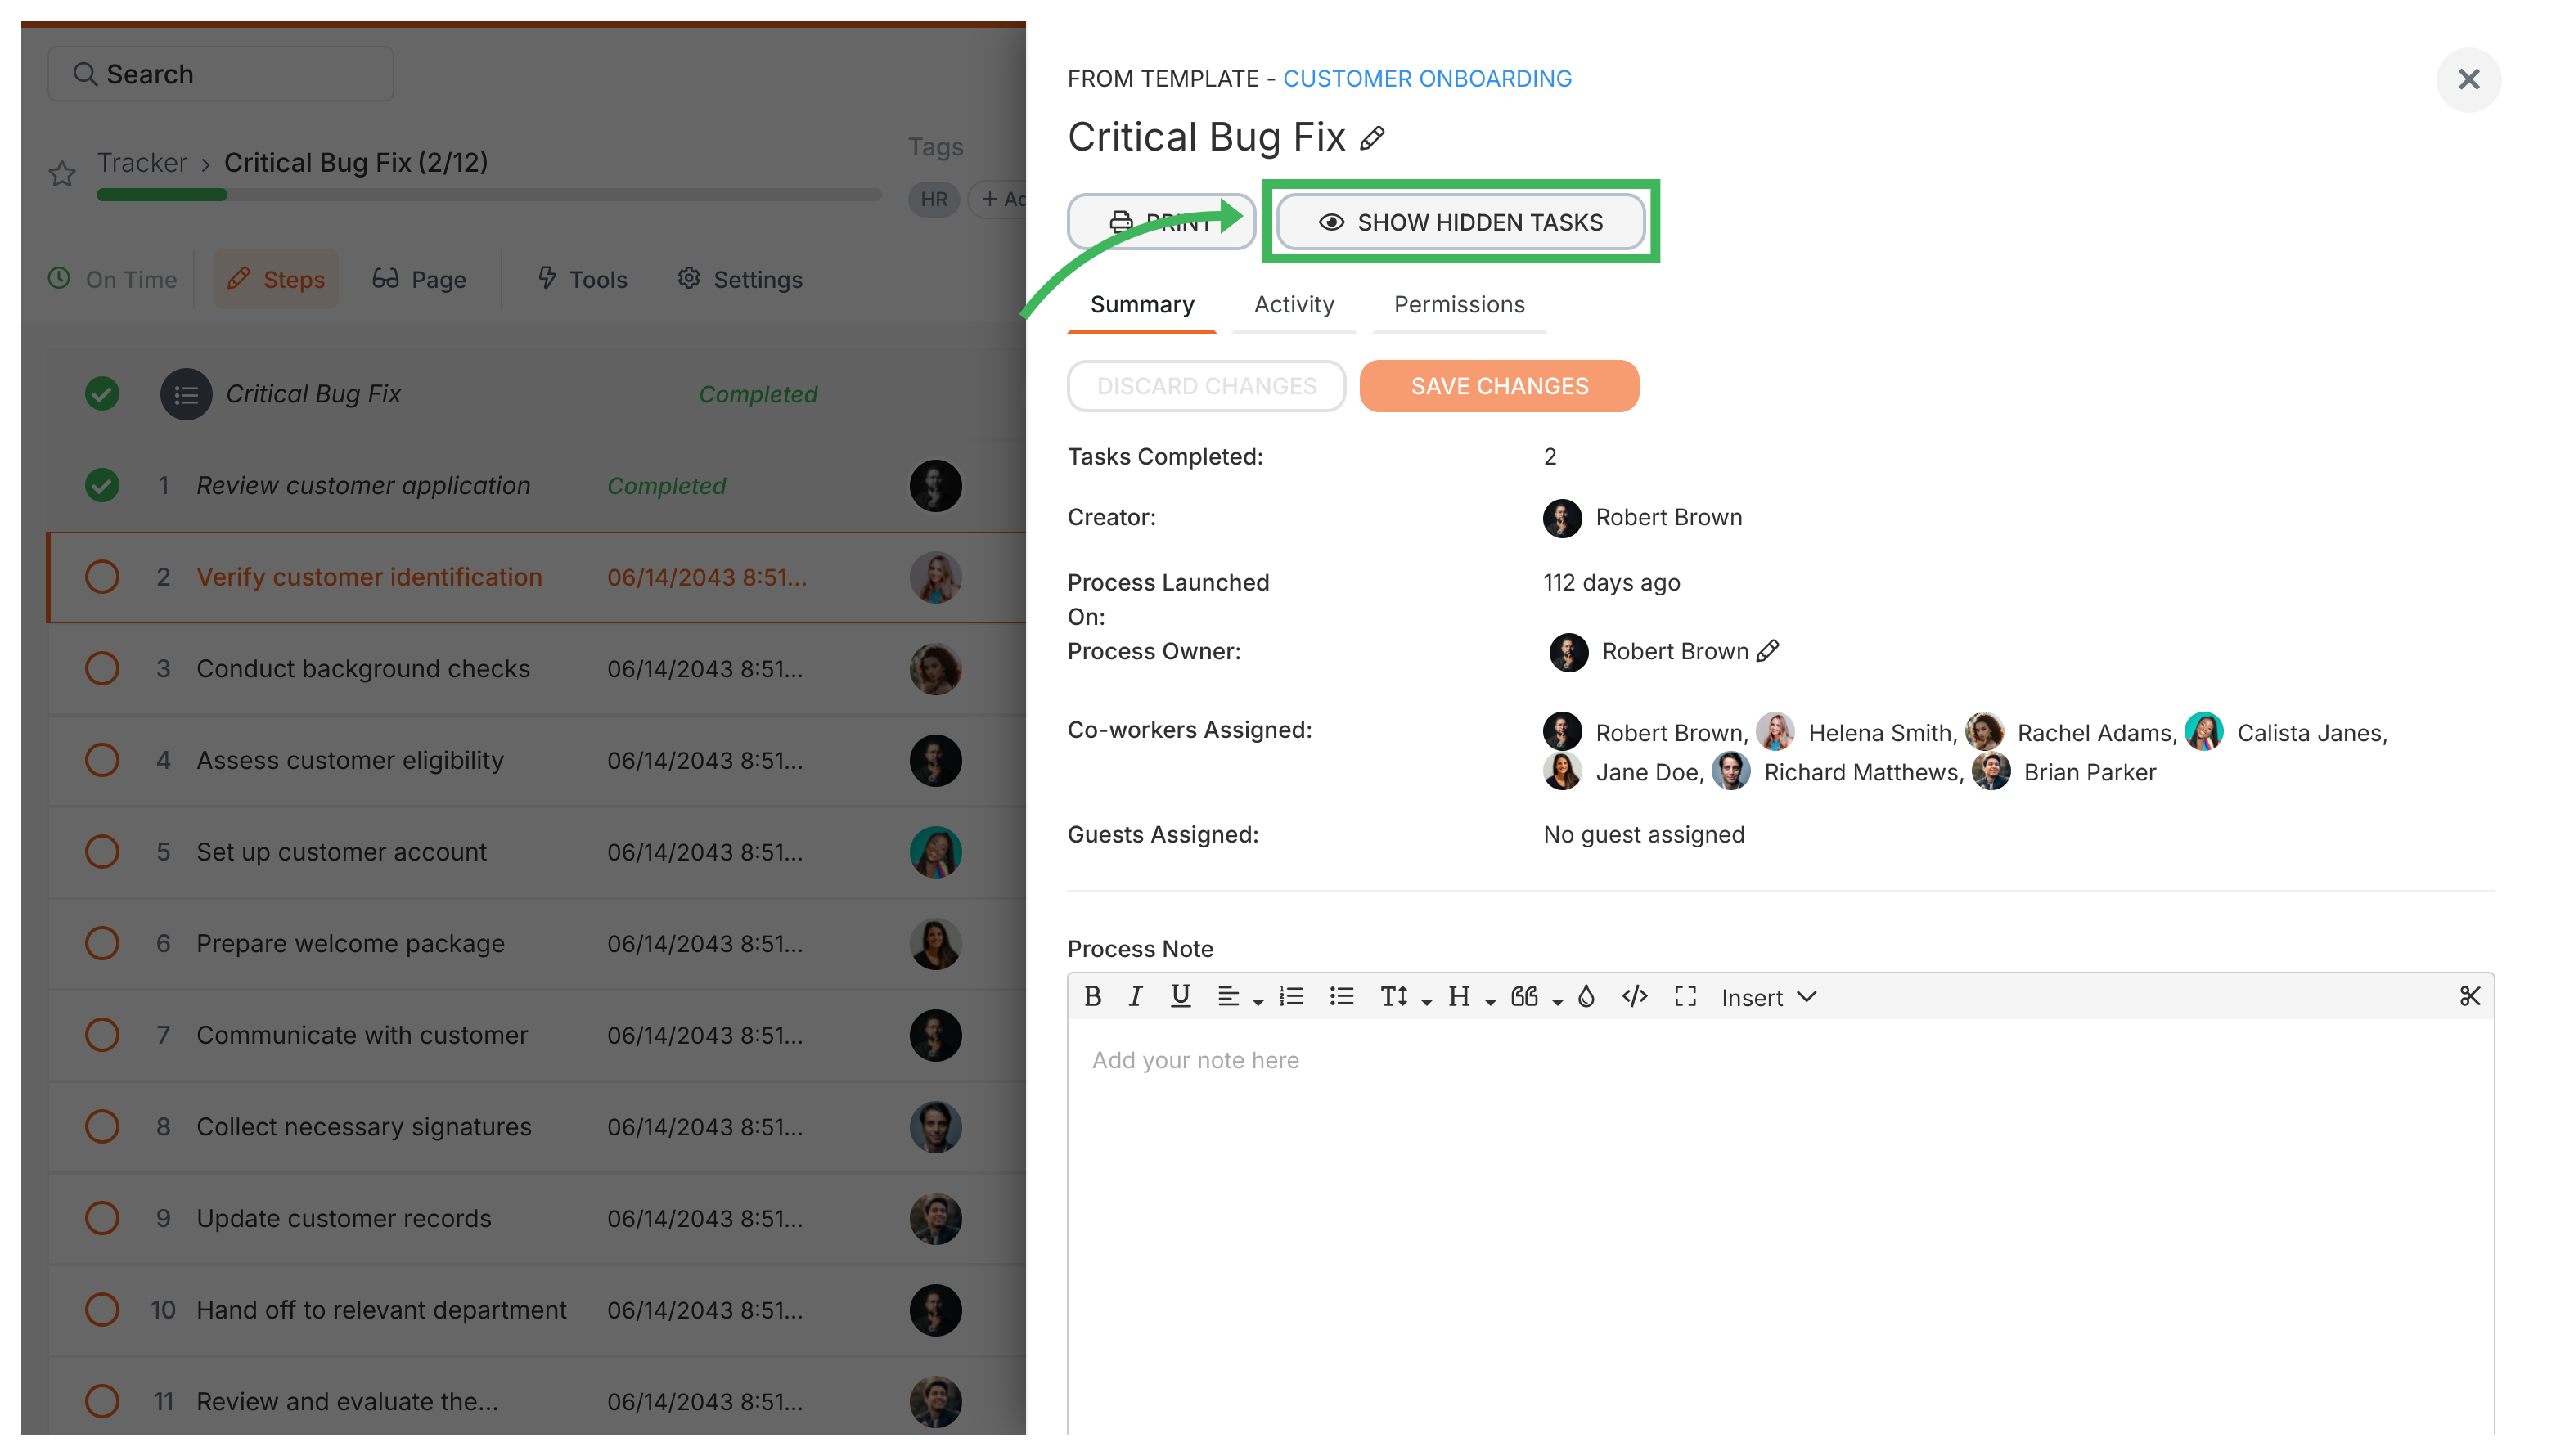
Note: Hidden tasks won’t show descriptions or form fields until their conditional rules activate them.
You can change assignees and deadlines on any task after a process is running:
- Open the running process.
- Click the specific task you want to change.
- Use the options in the task panel to update the assignee or deadline.
Need an extra step that wasn’t in the original template? You can add tasks on the fly:
- Open the running process from the Tracker view.
- Scroll to the bottom of the task list.
- Click the Add task button.
- Name the new task and set its details - assignee, deadline, description, etc.
- This task only exists in this process instance. It doesn’t change the original template.
You can add any task type this way - standard, approval, email, or expiring.

Launching > Edit before launch
Tallyfy lets you customize every detail of a process instance during launch. Change names…
Tallyfy lets you launch reusable templates into independent trackable processes, each with its…
Tracking And Tasks > Processes
A process is a live, running instance of a template that you launch and track daily. Each…
Was this helpful?
About Tallyfy
- 2025 Tallyfy, Inc.
- Privacy Policy
- Terms of Use
- Report Issue
- Trademarks