Authentication > Integrate Okta SSO
Tallyfy integrates with Okta through SAML 2.0 SSO. Create an Okta SAML app and exchange…
Let your team sign into Tallyfy with their OneLogin credentials using SAML-based Single Sign-On (SSO). The setup takes about 30 minutes.
This diagram shows the OneLogin-Tallyfy SAML setup and authentication flow.

Sign in to your OneLogin portal
Open the Administration menu
Go to Applications > Applications
Click Add App

Search for “SAML Custom Connector” (or “SAML Test Connector” in older OneLogin versions)
Select SAML Custom Connector (Advanced)
Set the Display Name to “Tallyfy”
Click Save

You’ll need Tallyfy’s SAML values to configure OneLogin:
Contact Tallyfy Support to access your organization’s profile
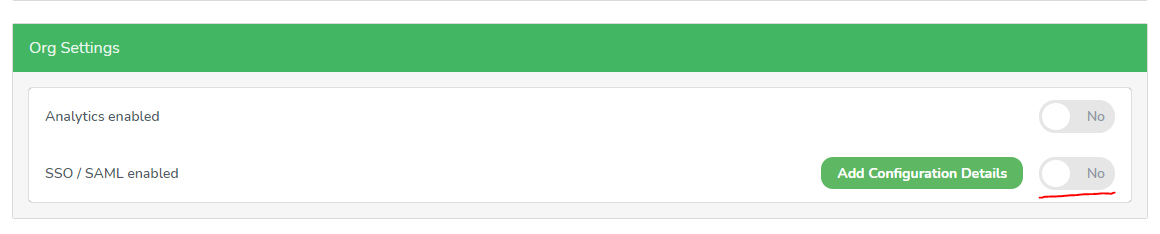
Go to the Org Settings tab
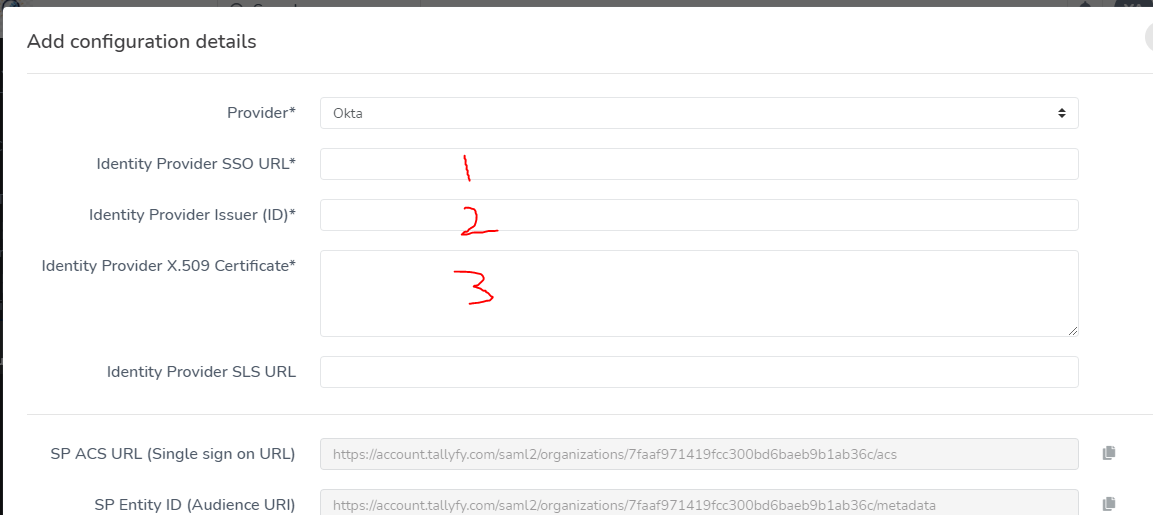
Click Add Configuration Details
Find the default SAML values section


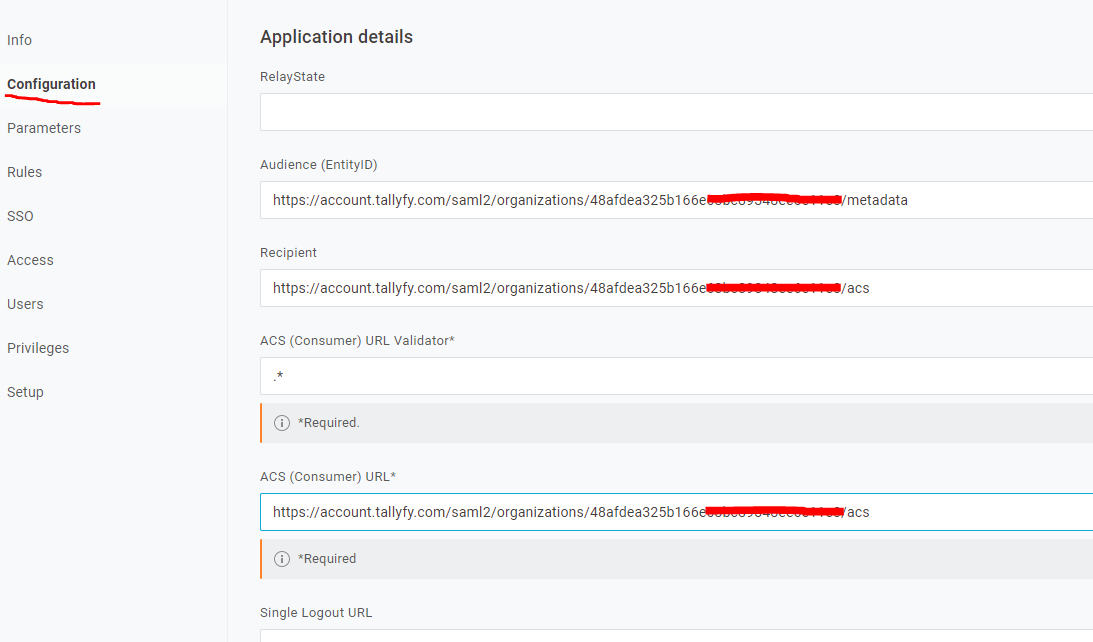
Go to the Configuration tab in your OneLogin application connector
Enter the Tallyfy SP ACS URL into the ACS (Consumer) URL field
Enter the same URL into the Recipient field
Enter the Tallyfy SP Entity ID into the Audience (EntityID) field
Enter the ACS URL again into the ACS (Consumer) URL Validator field
Click Save
Add these three parameters and check Include in SAML assertion for each:
| Parameter Name | Value |
|---|---|
| FirstName | First Name |
| LastName | Last Name |
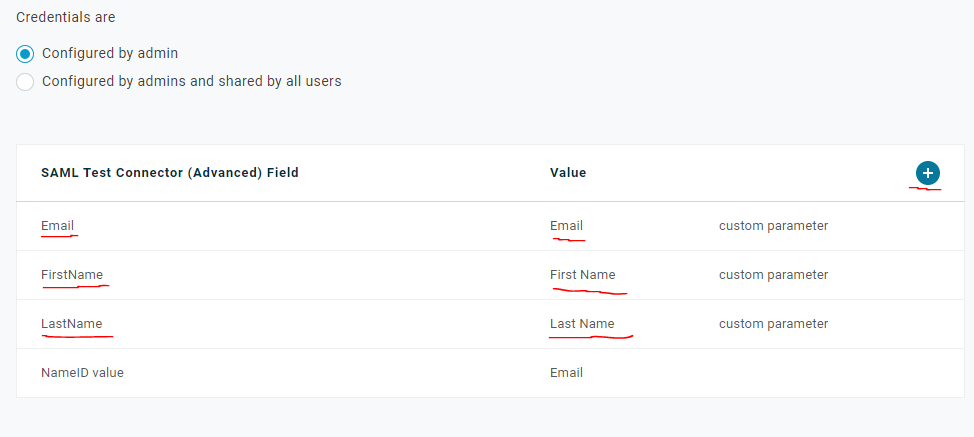
To add each parameter:
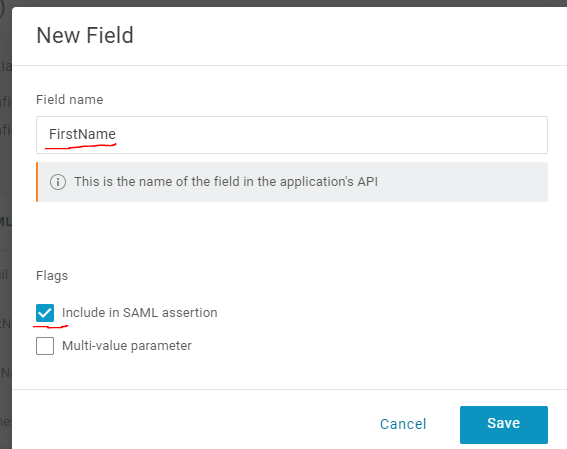
Click the + button in the top-right corner of the parameters table
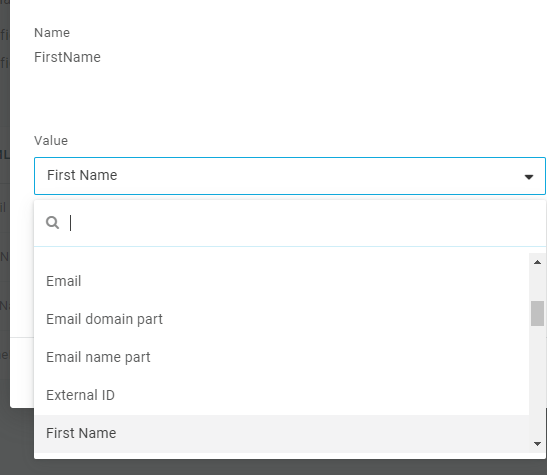
Enter the parameter name (e.g., “Email”) and map it to the matching user attribute
Check Include in SAML assertion
Click Save
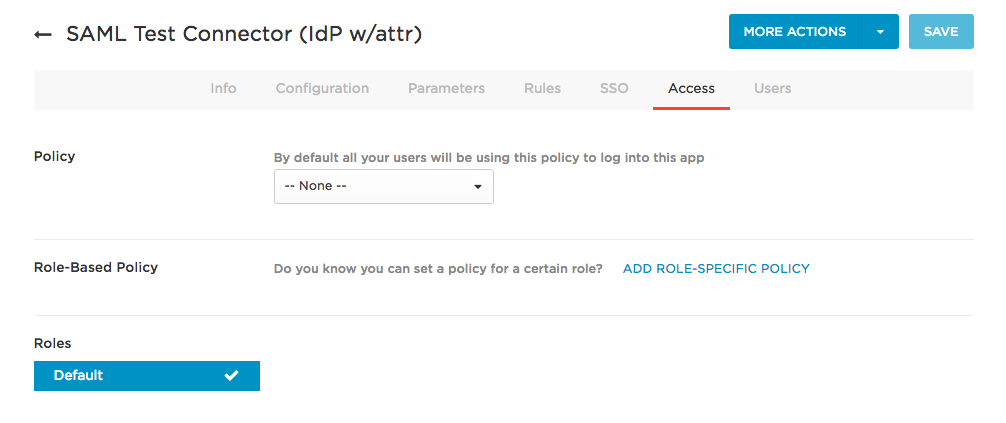
Go to the Access tab in your OneLogin application
Select the appropriate roles or users
In this example, we’re using the Default role
Click Save
Go to the SSO tab in your OneLogin application
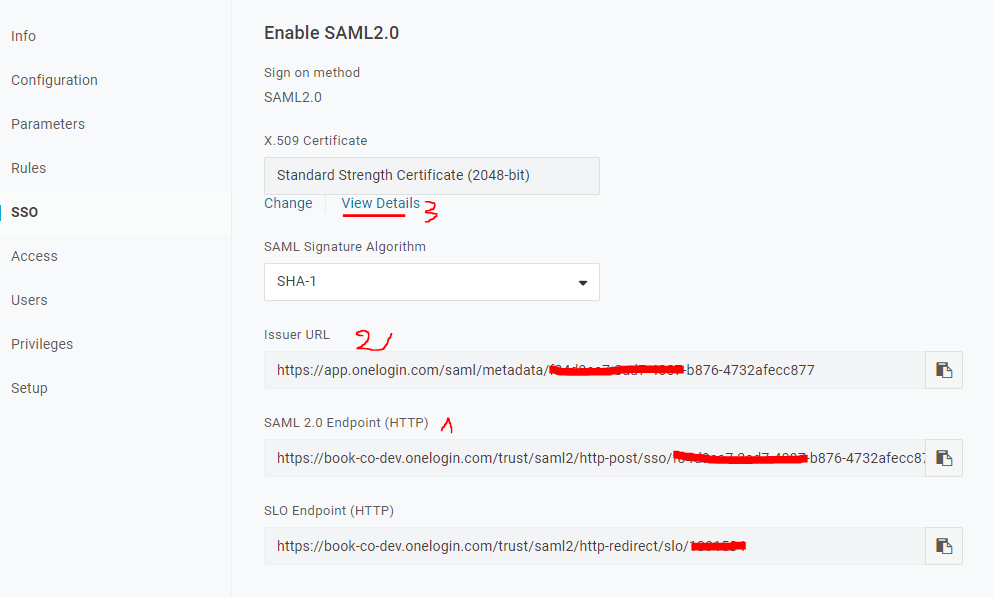
Note the SAML 2.0 Endpoint (HTTP)
Note the Issuer URL
Note or download the X.509 Certificate
Send the SAML 2.0 Endpoint (HTTP) to Tallyfy Support
Send the Issuer URL to Tallyfy Support
Send the X.509 Certificate to Tallyfy Support
Tallyfy Support will configure these in your organization’s SAML settings
Once Tallyfy Support confirms your SAML settings are configured, flip the switch:
Toggle the SAML activation switch to enable SSO
After completing the setup:
Get the Tallyfy login URL from the SAML configuration modal (Tallyfy Support provides this)
Share this URL with team members who have access to the OneLogin application

When users access Tallyfy through this URL:
Running into auth issues? Check these common culprits:
Authentication > Integrate Okta SSO
Authentication > Integrate Microsoft Entra ID SSO
Authentication > Integrate Google Workspace
Authentication > Integrate JumpCloud SSO