Administrators only
Okta SAML/SSO integration
Connect Okta with Tallyfy using SAML-based Single Sign-On (SSO) for automatic authentication and user provisioning. Takes about 30 minutes.
- Okta administrator account
- Tallyfy Professional or Enterprise plan
- SAML configuration values from Tallyfy Support
- Create an Okta SAML application
- Configure settings in both systems
- Turn on SSO and test it
Phase 1: Create Okta SAML application
-
Sign in to the Okta Admin Console
-
Switch to Classic UI from the dropdown in the top left header

-
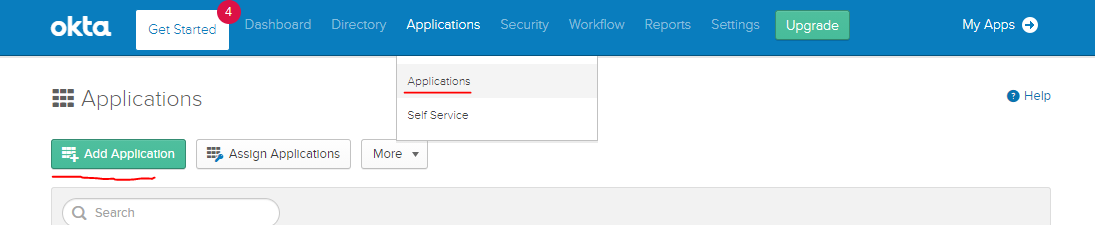
Go to Applications > Applications
-
Click Add Application
-
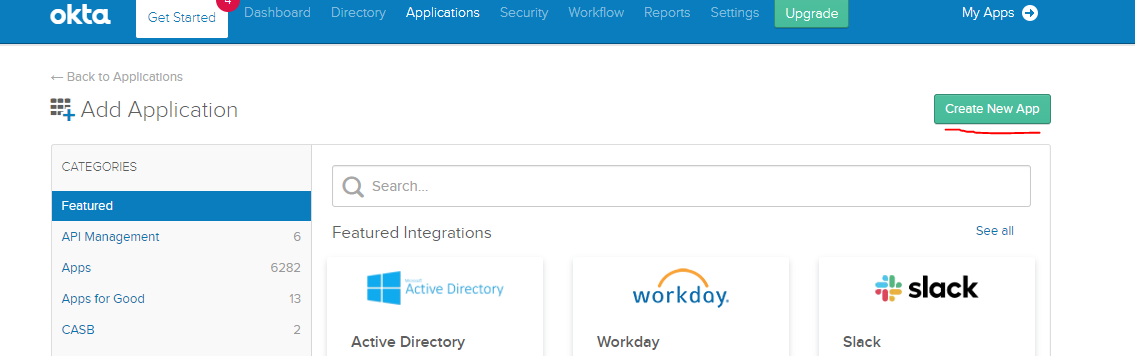
Select Create New App
-
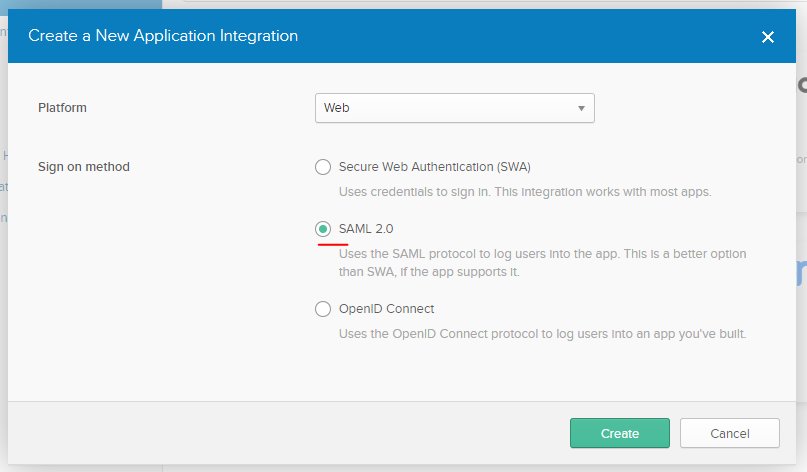
In the dialog, select Web for Platform
-
Select SAML 2.0 for Sign-on method
-
Click Create
- Enter “Tallyfy” as the application name
- Optionally upload the Tallyfy logo
- Click Next
Step 1: Obtain Tallyfy SAML values
Grab Tallyfy’s SAML values first - these tell Okta where to send login data:
- Contact Tallyfy Support to access your organization’s profile
- Go to the Org Settings tab
- Click Add Configuration Details
- Find the default SAML values section
Step 2: Enter SAML settings in Okta
Now configure Okta with those values:
-
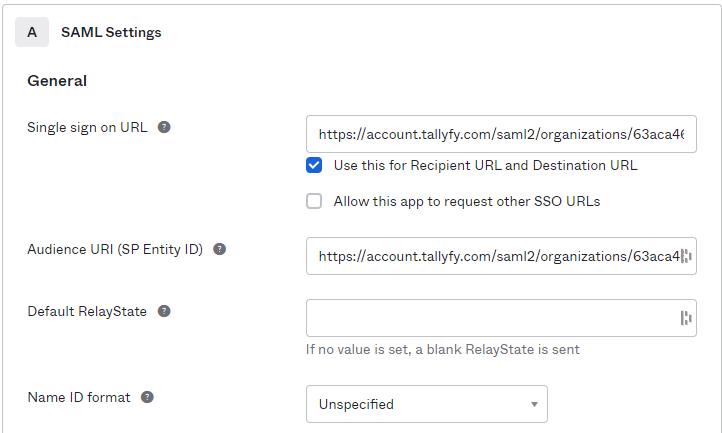
Single Sign On URL: Enter the value from Tallyfy’s “SP ACS URL” field
-
Keep Use this for Recipient URL and Destination URL checkbox selected
-
Audience URI (SP Entity ID): Enter the value from Tallyfy’s “SP Entity ID” field
-
Click Show Advanced Settings
-
Change Authentication context class to X.509 Certificate
Tell Okta which user info to send to Tallyfy:
| Name | Name Format | Value |
|---|
| email | Unspecified | user.email |
| FirstName | Unspecified | user.firstName |
| LastName | Unspecified | user.lastName |
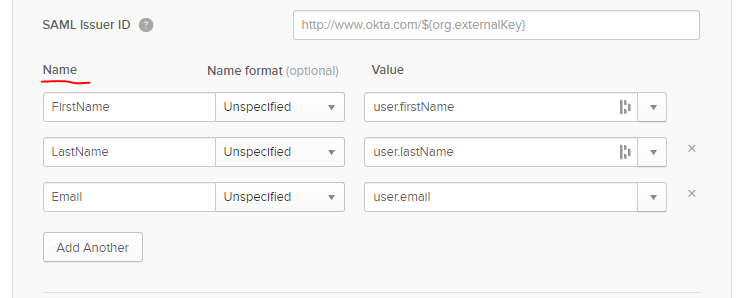
- After adding the attributes, click Next
Step 4: Complete Okta configuration
- Select I’m an Okta customer adding an internal app
- Check This is an internal app that we have created
- Click Finish
Step 1: Get Okta SAML details
-
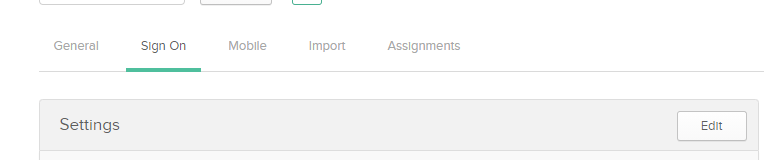
Go to the Sign On tab in your Okta application
-
Scroll down and click View Setup Instructions
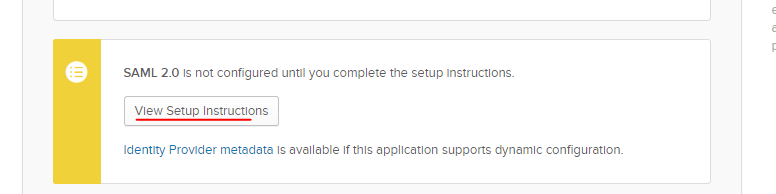
-
The page shows the identity provider’s SAML config details
Step 2: Send details to Tallyfy Support
- Send the Identity Provider Single Sign-On URL to Tallyfy Support
- Send the Identity Provider Issuer to Tallyfy Support
- Send the X.509 Certificate to Tallyfy Support
- Tallyfy Support configures these values in your organization’s SAML settings
Step 3: Enable SAML authentication
After Tallyfy Support confirms your settings are configured:
- Toggle the SAML activation switch to enable SSO for your organization
User provisioning and access
Once SSO is active:
- Get the Tallyfy login URL from the SAML configuration modal (Tallyfy Support provides this)
- Share this URL with users who have access to the Okta application
Here’s how it works for your users:
- Already have a Tallyfy account? They’ll log in automatically
- No account yet? Tallyfy creates one on their first login
The full authentication process from setup to user access:

Key points:
- Steps 1-6 are the one-time setup between your Admin and Tallyfy Support
- Steps 7-14 happen every time a user logs in
- Tallyfy auto-creates accounts for new users (step 13) using the email and name attributes from Okta
Can’t log in? Check these first:
- Is the user assigned to the Okta application?
- Are attribute mappings exactly right? Names and formats matter.
- Are users hitting the SSO URL, not the regular Tallyfy login page?
- Still stuck? Contact Tallyfy Support.