Variables in Tallyfy are placeholders that automatically carry data entered in one process step…
Insert variables
Click the button in any step title or description to insert data from earlier form fields. That’s the core of it. Variables automatically pull information from one step into another within your process.
They turn generic workflows into personalized ones. Someone fills out a form field in step 1, and you can display that exact value in steps 5, 10, or 20 - no retyping needed.
- A template open in edit mode
- At least one form field in an earlier step (your data source)
- A later step where you want that data to appear
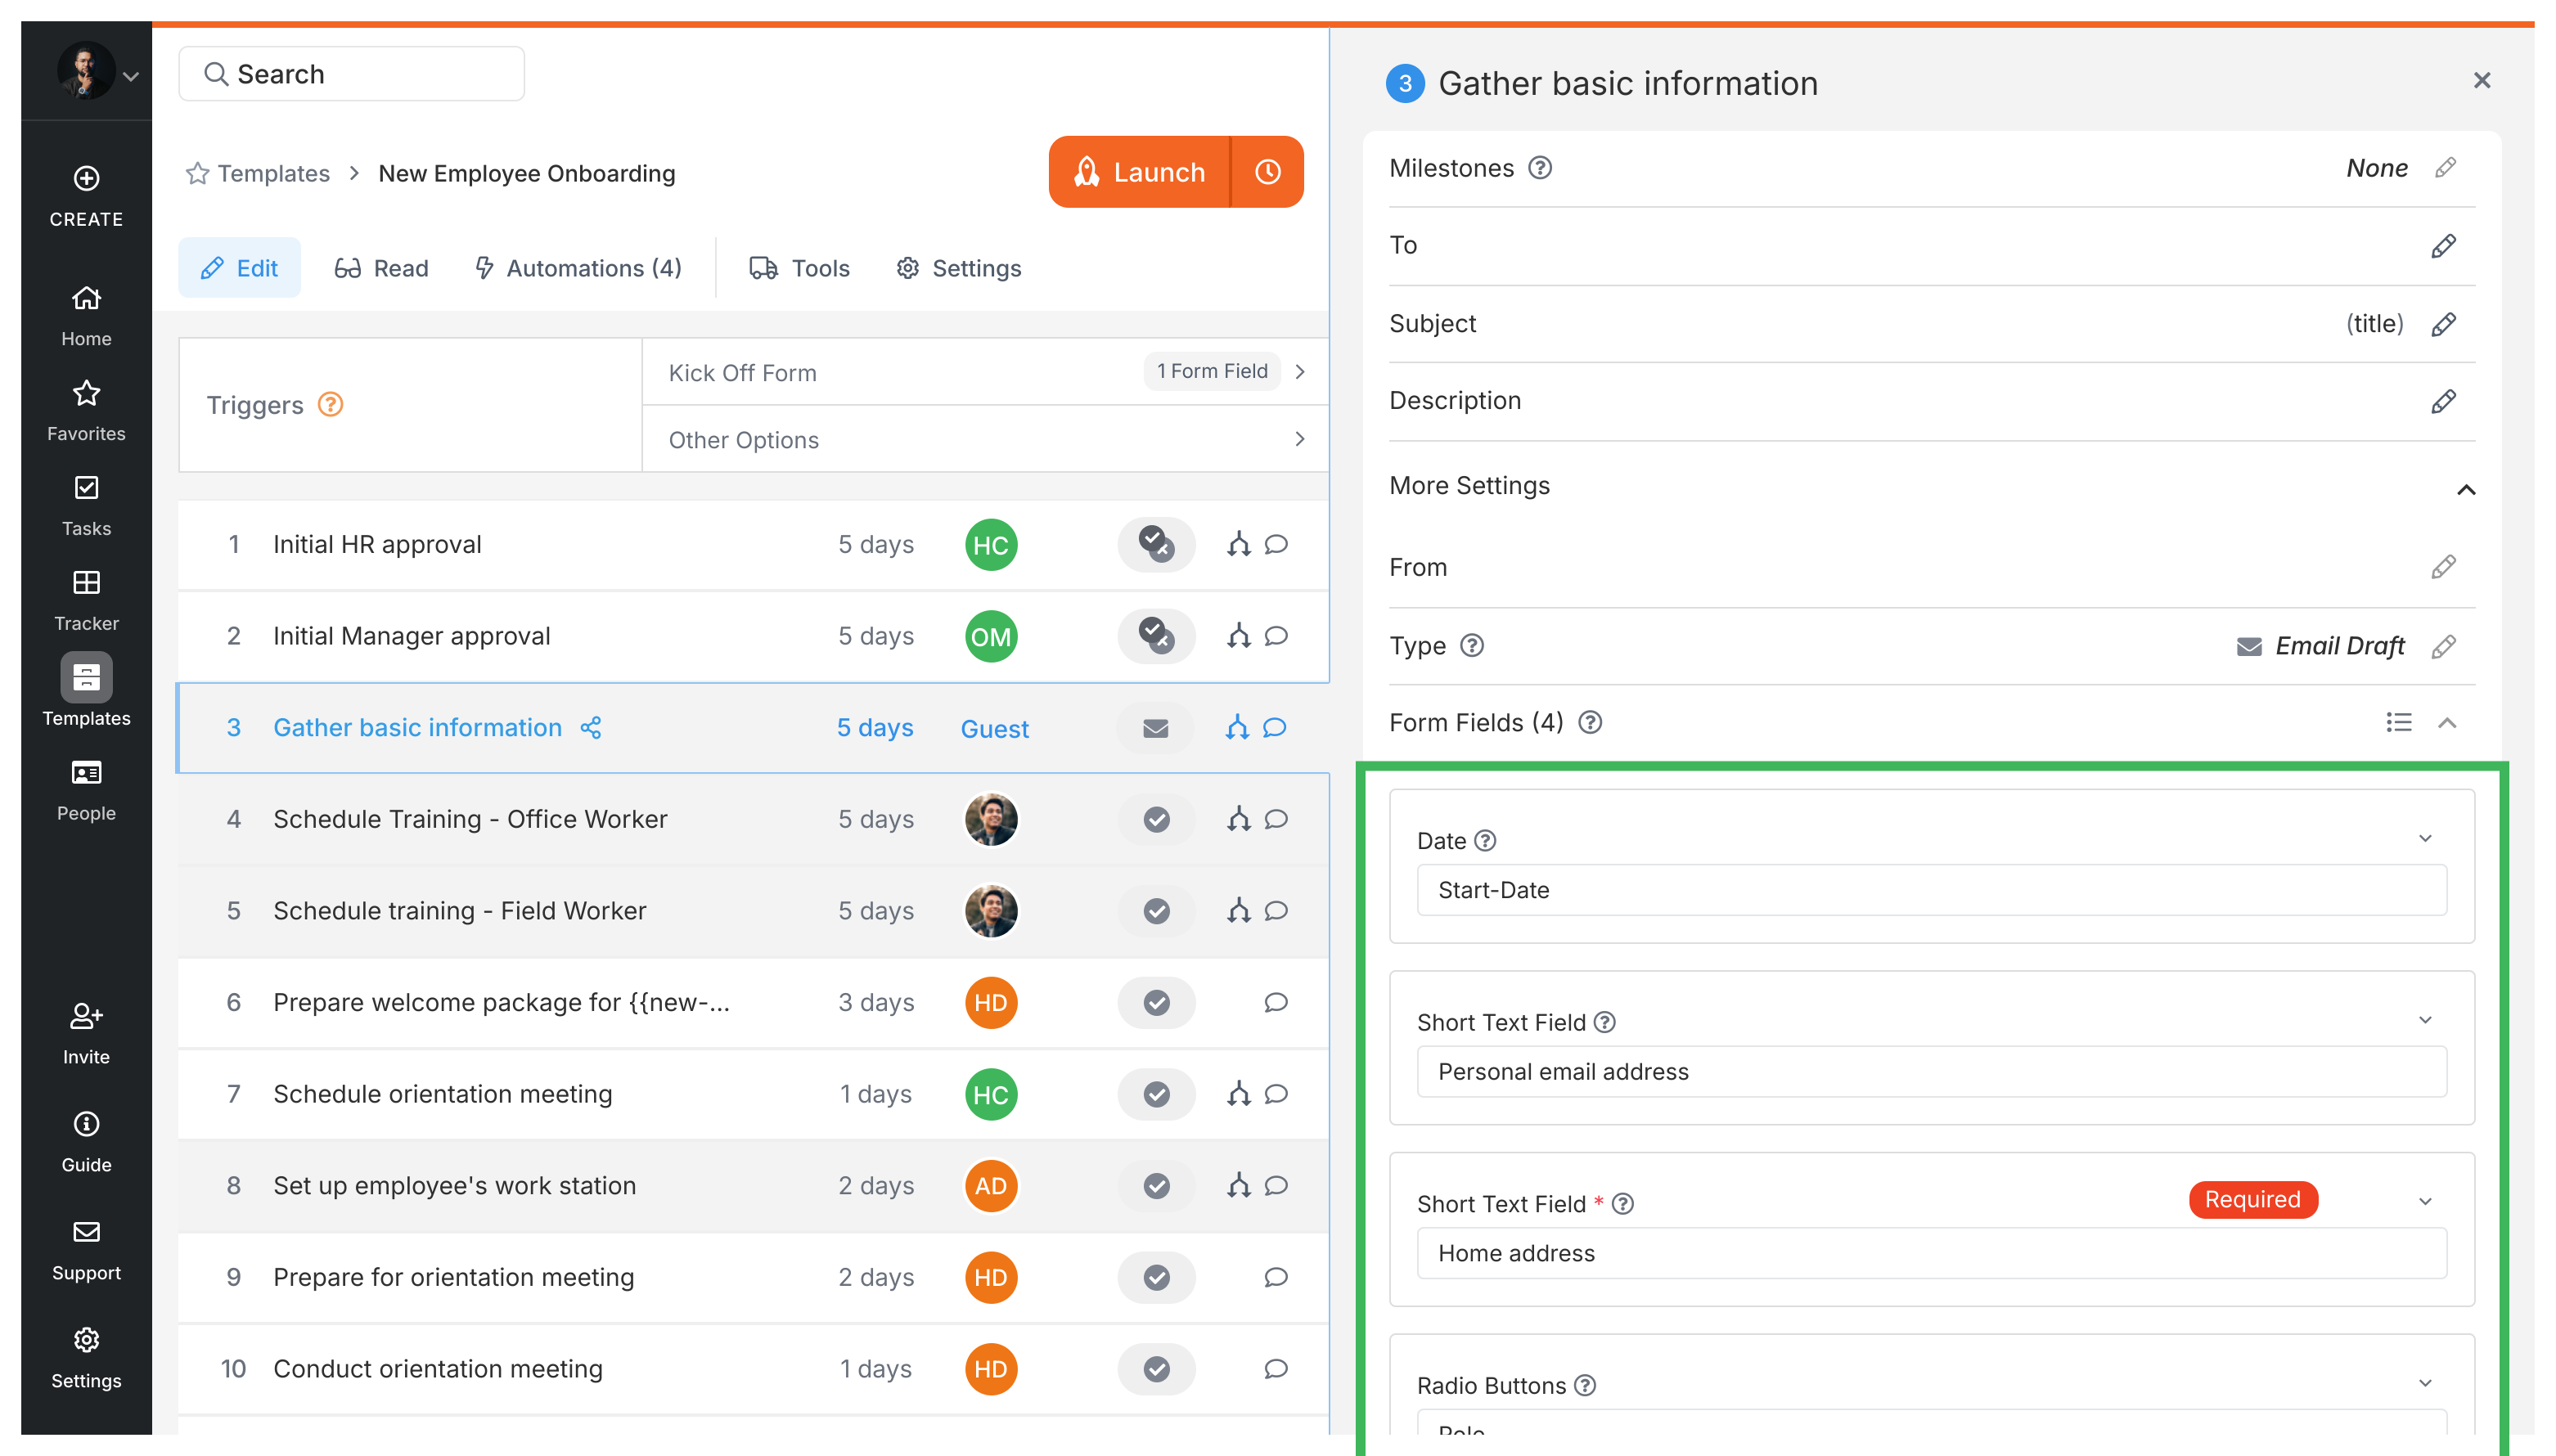
- Source: The form field where someone enters information
- Target: Any step title or description where you want that info to appear
- Format: Variables use
{{field-alias}}syntax in double curly brackets
When someone fills in the source field, that value appears wherever you’ve placed the variable. Change the source? It updates everywhere instantly.
When you click , you’ll see two categories:
- Kick-off form fields: Data entered when someone launches the process
- Form fields from previous steps: Data entered in steps that come before the current one
Tallyfy also supports built-in system variables1:
{{current-task-id}}- the unique ID of the current task{{current-process-id}}- the unique ID of the running process{{DATE}}- the date the process was launched{{TEMPLATE_NAME}}- the name of the template
- Open your template in Edit mode.
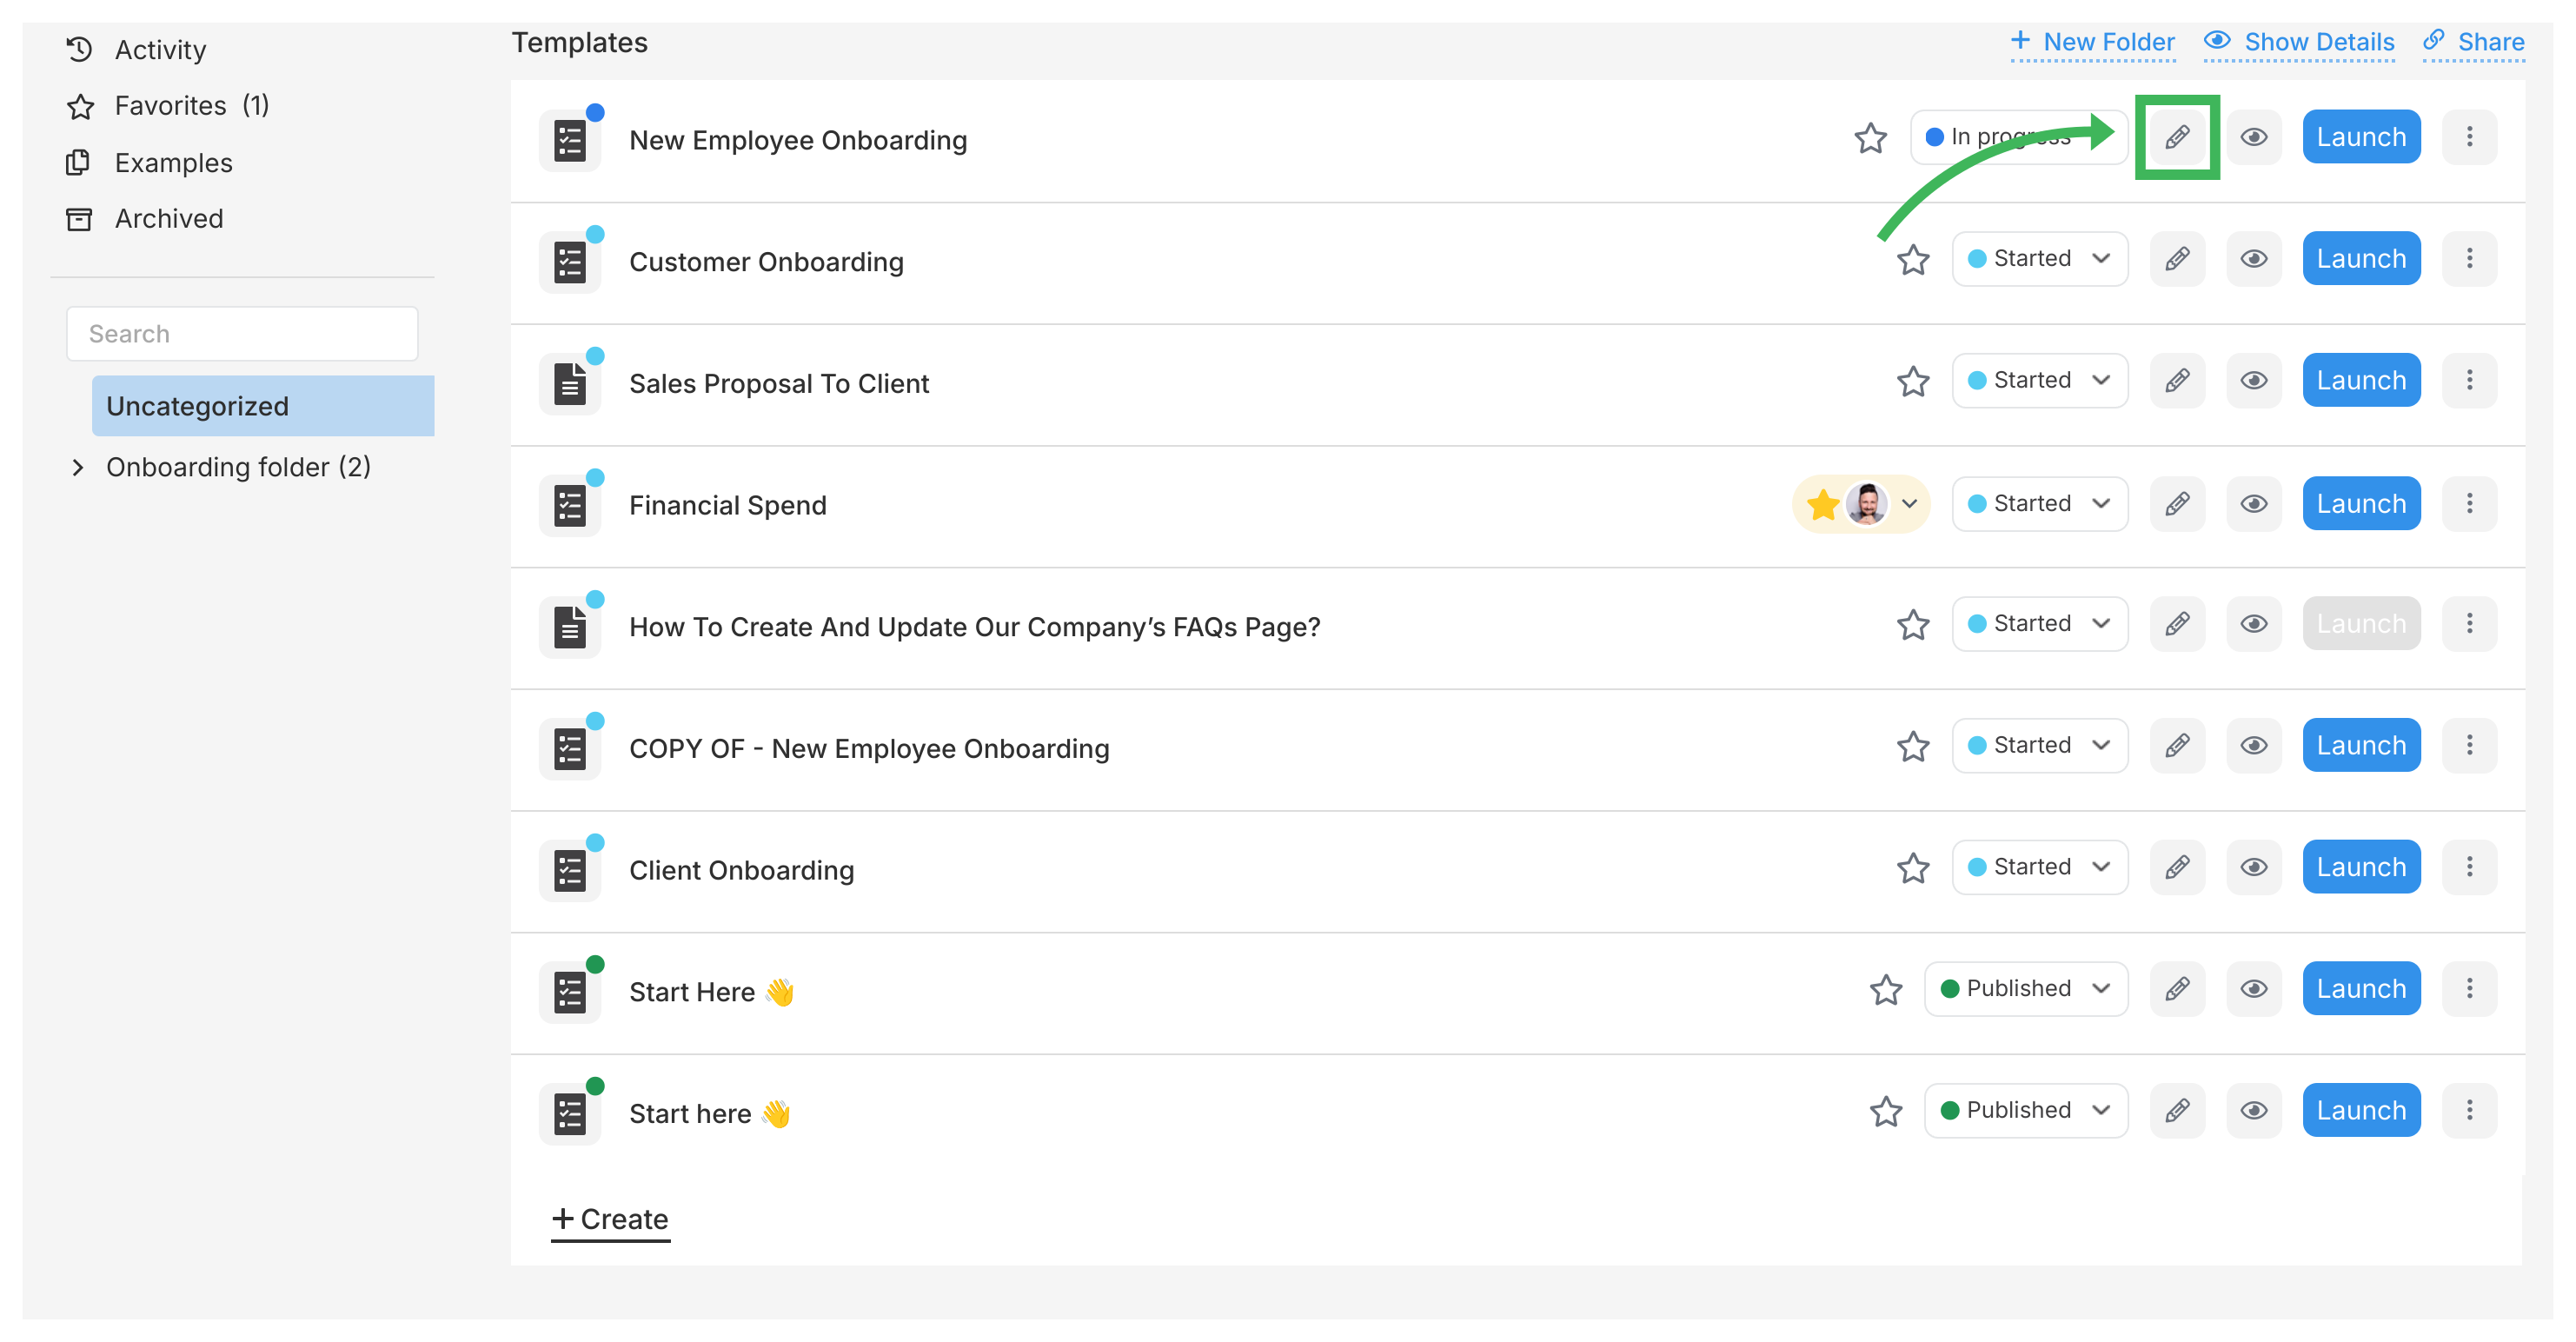
- Make sure you have a form field in an earlier step.
- Go to a step that comes after the step with the form field.
- Click the step title to edit it.
- Place your cursor where you want the variable to appear.
- Click the button near the title field.
- Select the form field from the dropdown.
- Tallyfy inserts the variable. Save your changes.
- Open your template in Edit mode.
- Confirm the source form field exists in an earlier step.
- Go to a later step and click into its description box.
- Place your cursor where you want the variable.
- Click the button in the text editor toolbar.
- Select the form field from the dropdown.
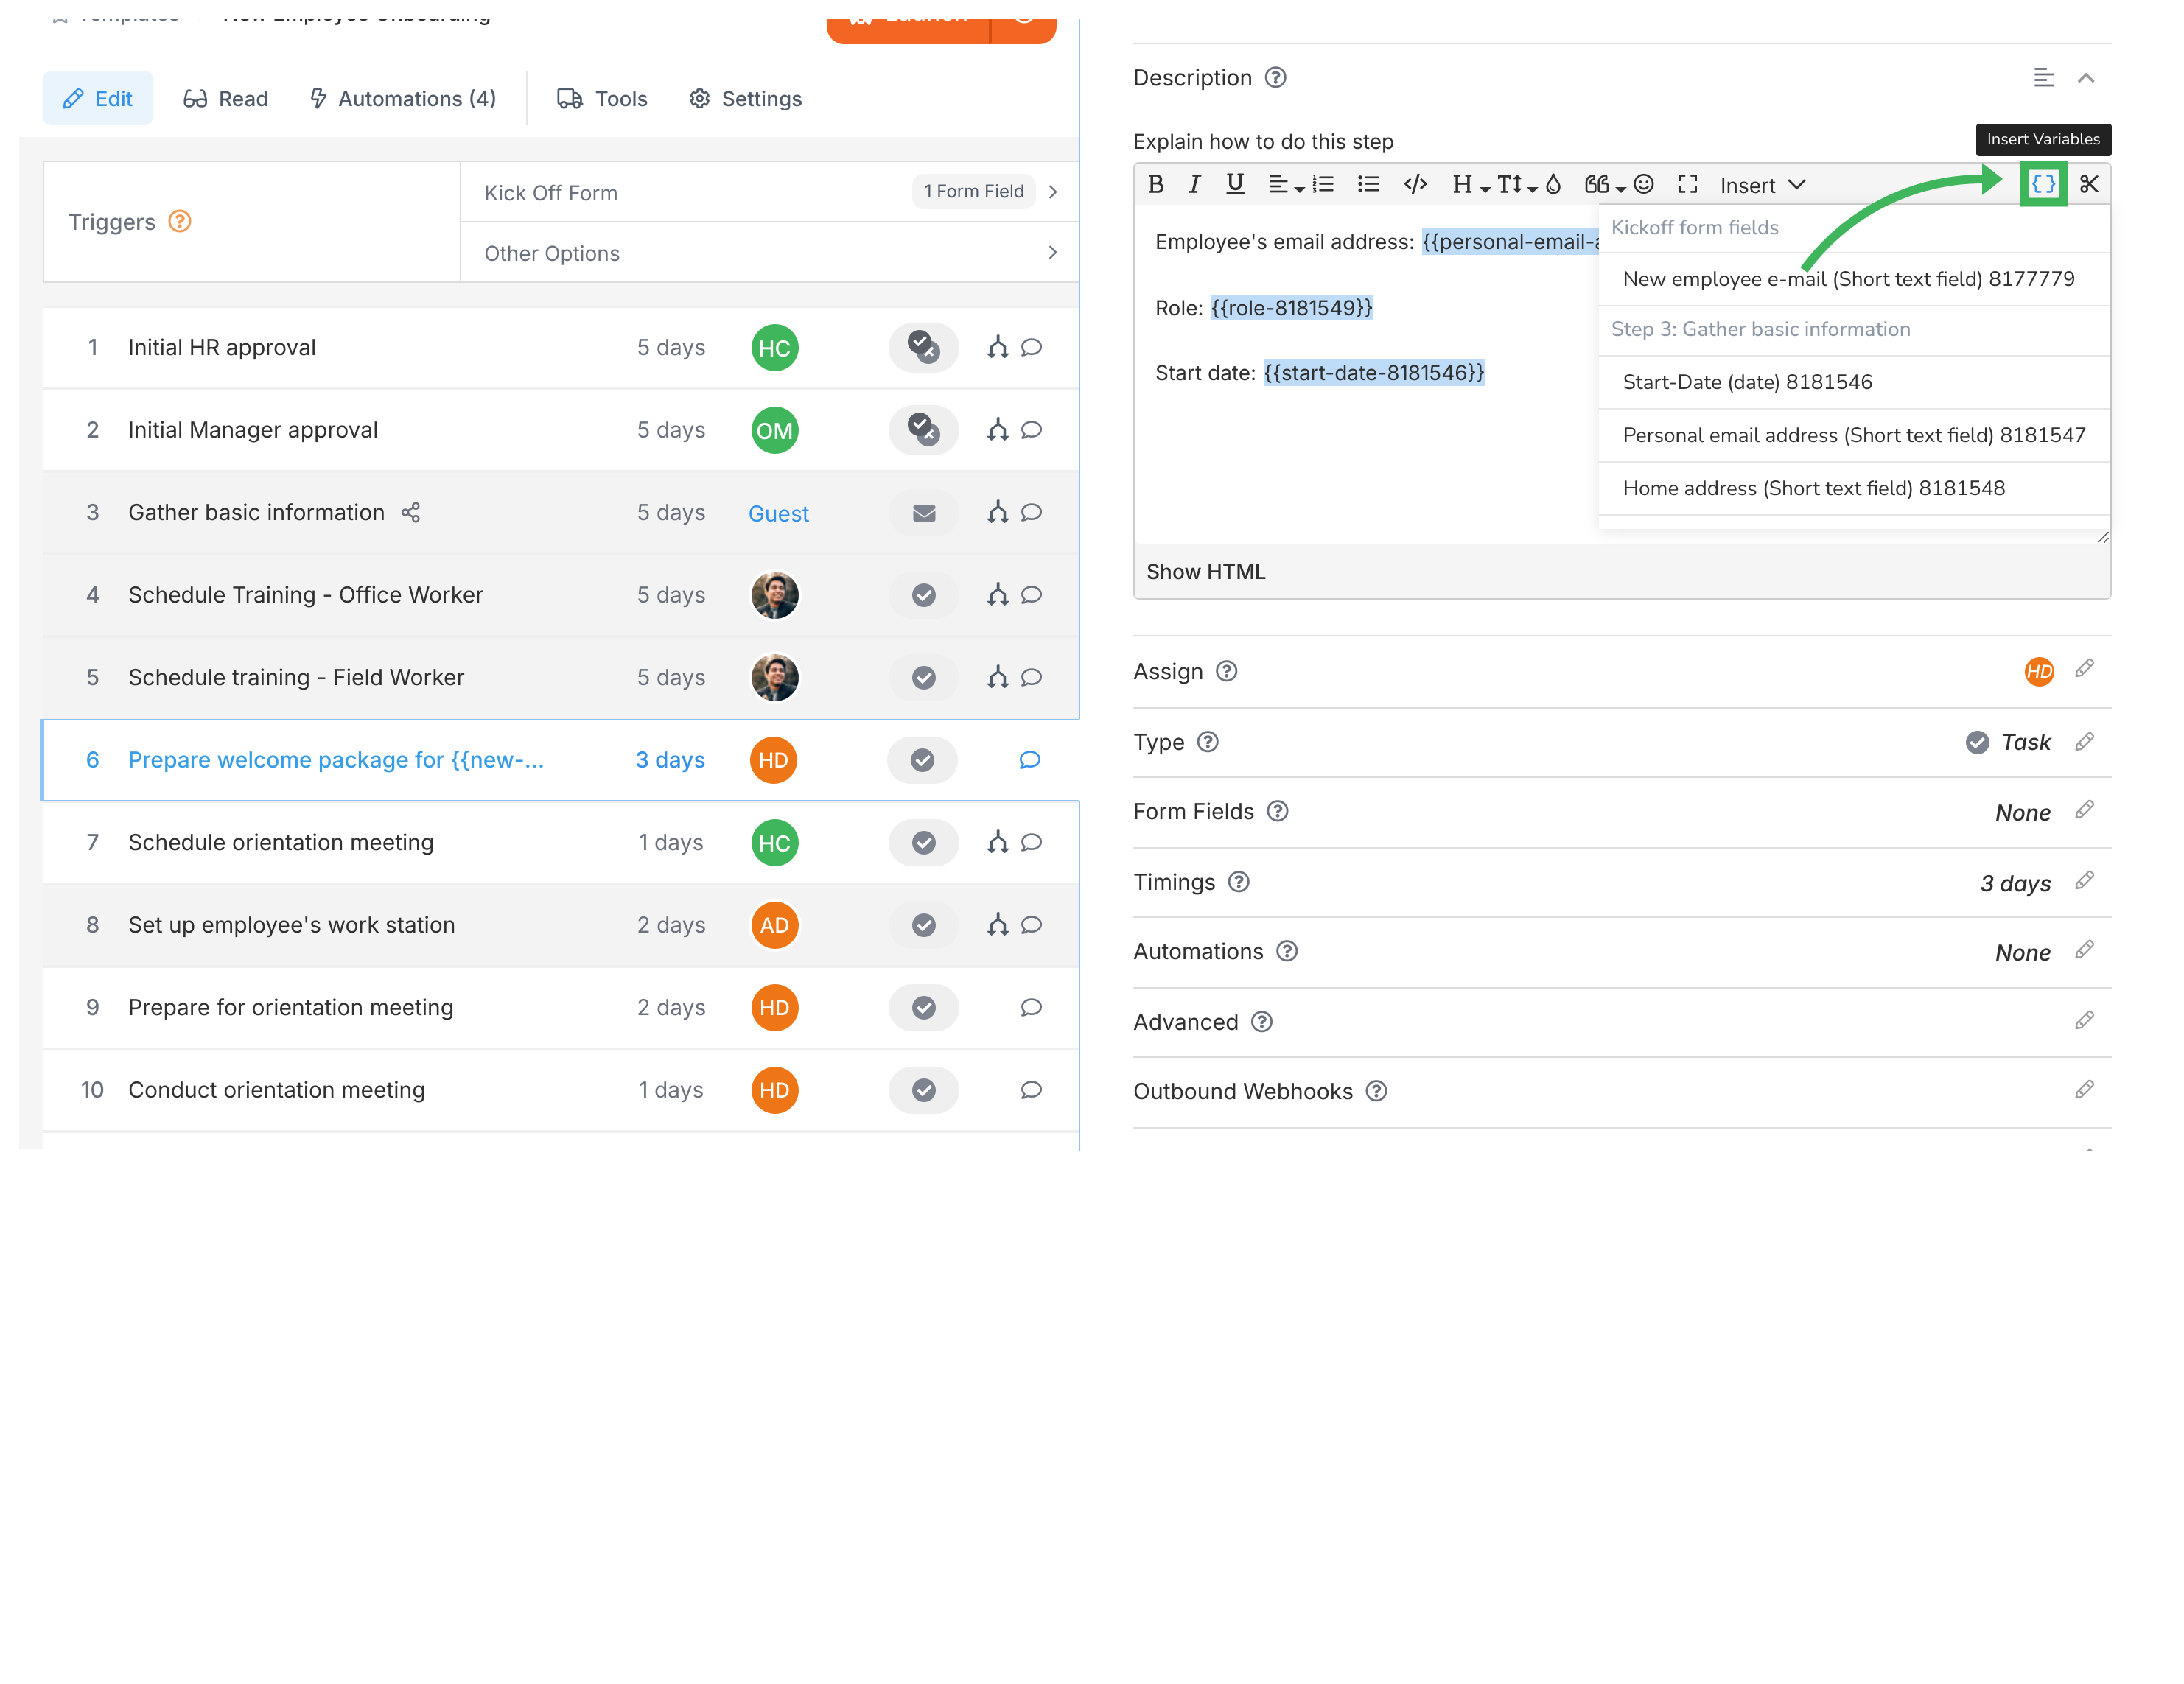
- Tallyfy inserts the variable. Changes save automatically.
- Someone fills out a form field in an early step
- Tallyfy stores that value
- Later steps with variables show the actual values instead of
{{field-alias}}placeholders - Update the source field and the change flows through everywhere
- “Get approval for Project:
{{project-name}}” - “Review document for Client:
{{client-name}}” - “Schedule meeting with
{{department-name}}lead”
- “Review the proposal for
{{client-name}}, focusing on{{focus-area}}.” - “Call
{{customer-name}}at{{phone-number}}to discuss order{{order-number}}.” - “Prepare the
{{document-type}}based on the request from{{requesting-department}}.”
Variables pair well with auto-naming. Your processes name themselves based on form data:
- “Onboarding -
{{employee-name}}-{{department}}” - “Support Ticket -
{{ticket-number}}-{{client-name}}”
No more “Process #12345” confusion.
- Name your form fields clearly - “Customer Name” beats “Field 1”
- Test-run your template before going live
- Think about empty fields - if someone skips “Department,” will “Contact the lead” still make sense?
- Surround variables with context: “Contact
{{name}}at{{phone}}” not just “{{name}}{{phone}}”
One template can handle multiple scenarios when you combine variables with conditional automations.
Example - Region-specific checklists:
- Kick-off form asks: “Which region?” (dropdown: North, South, East, West)
- Instructions say: “Complete the
{{region}}region compliance checklist” - Conditional rules show only that region’s requirements
- One template does the job of four.
Dynamic email notifications can also use variables:
- Subject: “Action required:
{{task-name}}for{{client-name}}” - Body: “The
{{document-type}}for{{project-name}}needs your review by{{due-date}}”
Variables showing as raw text? (like seeing {{client-name}} instead of “Acme Corp”)
This means the variable lost its connection to the source field. Fix it:
- Delete the broken variable text
- Click the button again
- Re-select the field from the dropdown
- Save your changes
Common causes:
- Renaming or deleting the source form field
- Copying template content from another template
- Manually typing
{{...}}instead of using the insert button - Template import/export operations that break references
Always use the button rather than typing variable syntax manually.
Tasks > Set default content for form fields
Pre-fill form fields with static text, dynamic variables from earlier steps, or system values…
Edit Task > The rich text editor
Tallyfy’s built-in rich text editor lets you format text and add images and videos and dynamic…
Edit Processes > Auto-name a process
Tallyfy’s auto-naming feature lets you define a naming pattern in any template using static text…
Was this helpful?
About Tallyfy
- 2025 Tallyfy, Inc.
- Privacy Policy
- Terms of Use
- Report Issue
- Trademarks