Snippets in Tallyfy are reusable rich-text blocks that admins create once and any member can…
Use snippets
Snippets are reusable text blocks you create once and insert anywhere - template steps, task descriptions, comments, and documents. Open the References panel in any rich text editor and select the snippet you want.
Think compliance disclaimers, contact info, or standard instructions. Write it once, reuse it everywhere.
- Admin members can create, edit, and delete snippets for the whole organization
- All other members can insert existing snippets wherever they’re editing rich text
- Go to Settings > Organization > Snippets.
- Click Create Snippet.
- Enter a clear, descriptive Title.
- Type or paste content into the rich text editor.
- Use the formatting toolbar (bold, italic, lists, links, images, tables, etc.) as needed.
- Click Save Changes.
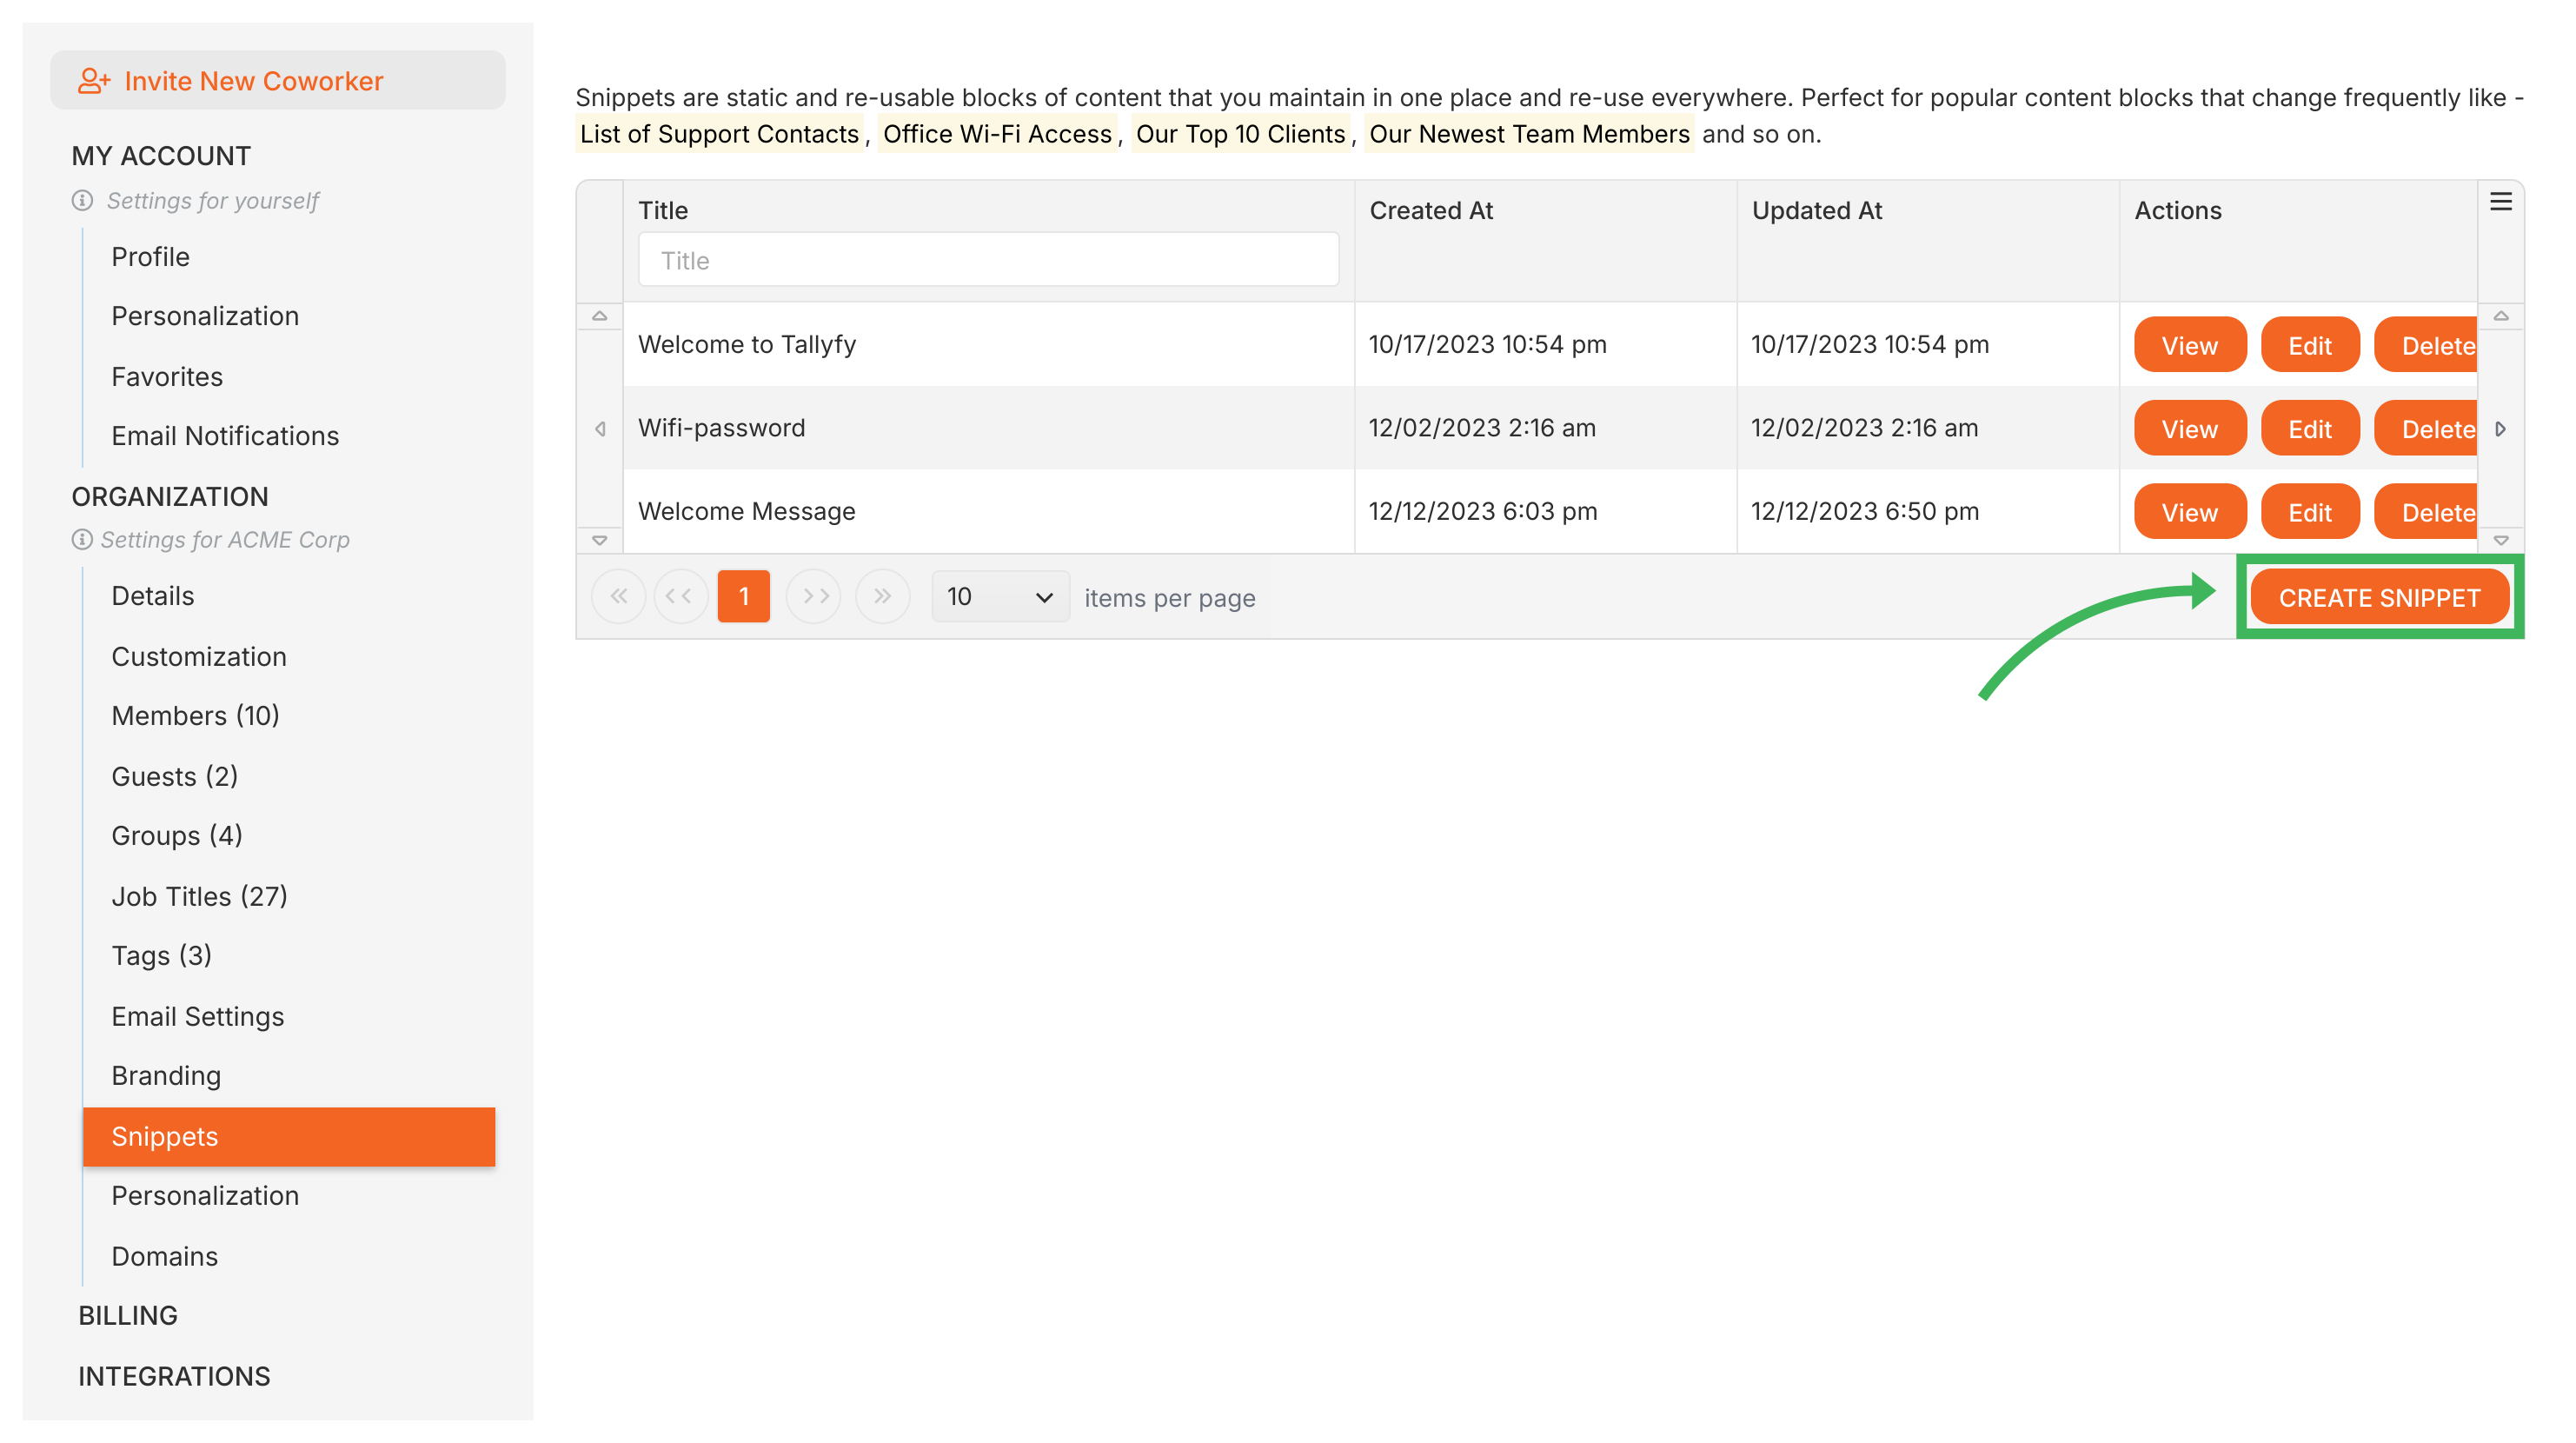
On the Snippets settings page, you can:
- View all snippets in a searchable, sortable table
- Edit any snippet - changes appear when content is next viewed1
- Delete outdated snippets
- Control whether a snippet is visible in public templates via the Visible in Public Templates checkbox
- Click where you want the snippet text to appear in the editor.
- Open the References panel below the editor.
- Expand the Snippets section.
- Click the snippet you want. It’s inserted as a named reference block.
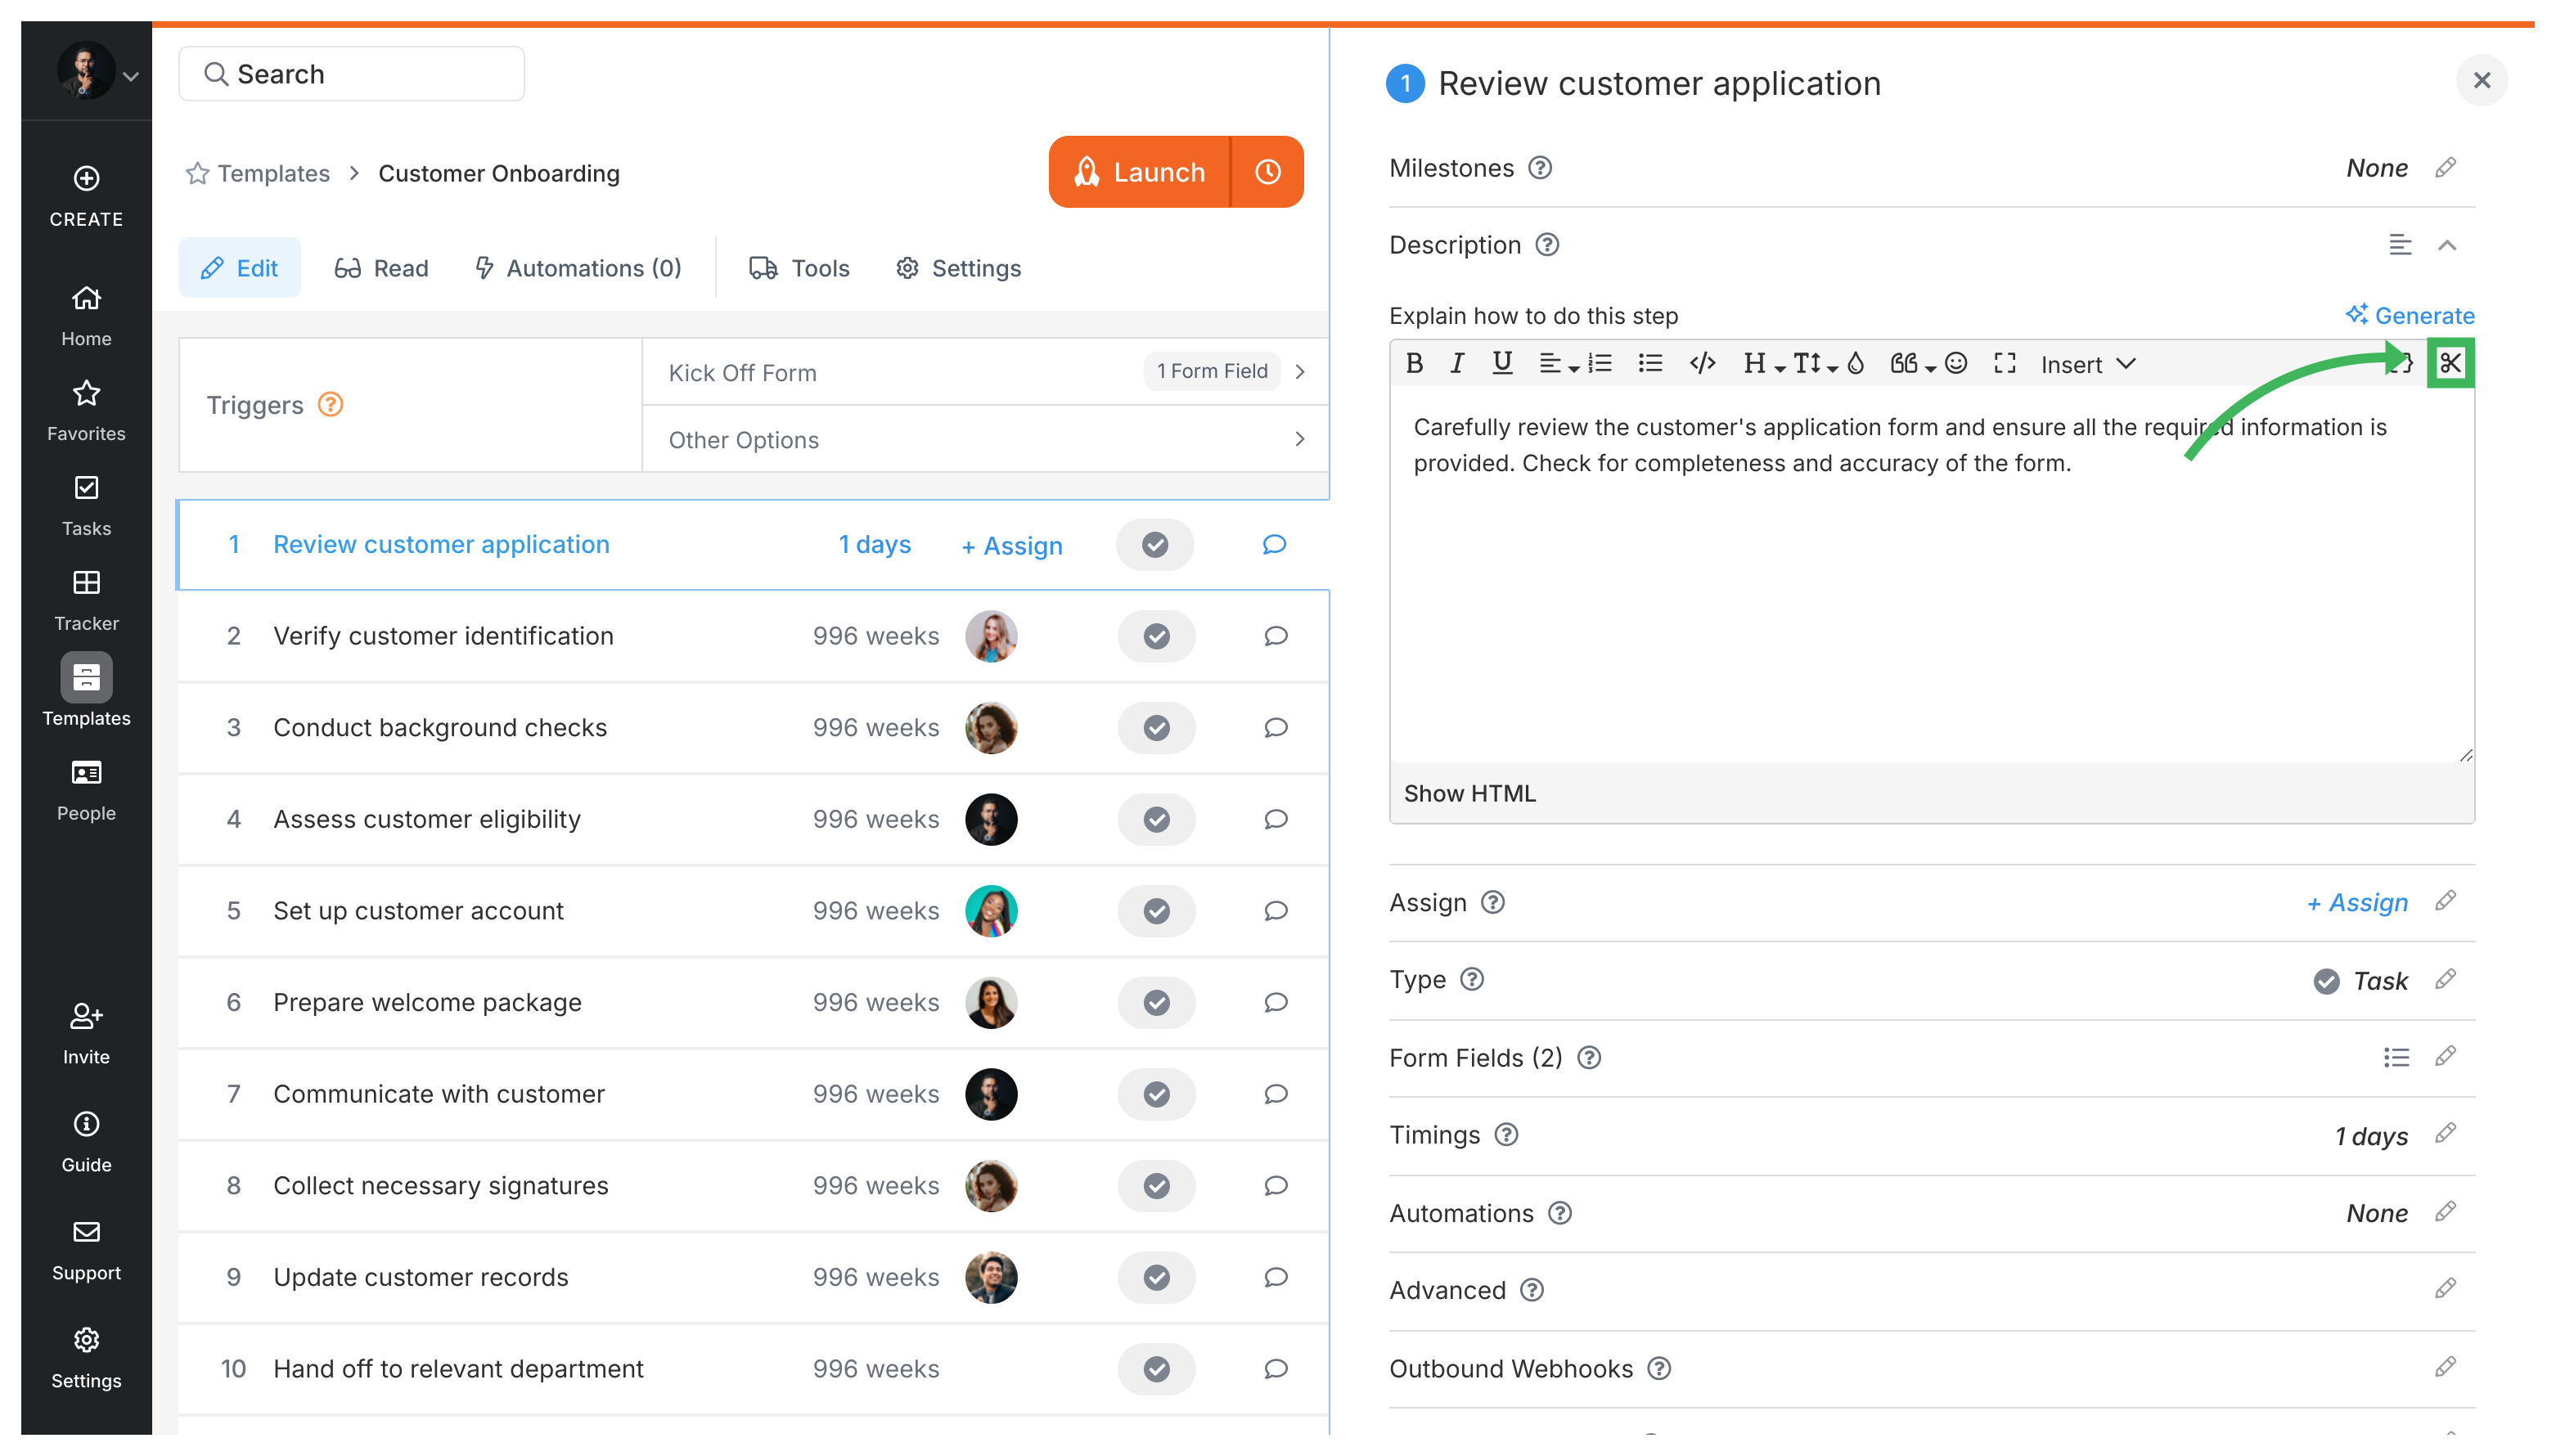
Anywhere you see Tallyfy’s rich text editor:
- Template descriptions and step descriptions
- Guidance text for form fields
- Launch instructions shown before starting a process
- Task comments
- Document template content
You can also link to entire templates from the same References panel. Useful when your workflow mentions another process - embed a reference instead of copying content.
- Click where you want the template reference.
- Open the References panel.
- Expand the Templates section.
- Select the template you want to link to.
Name them descriptively. “Legal disclaimer for contracts” beats “Legal text 1.”
Keep them focused. A three-paragraph warranty disclaimer works. An entire employee handbook doesn’t.
Single source of truth. If a support phone number appears in 12 processes, make it a snippet. Update once.
Review periodically. Check quarterly that they’re still current and relevant.
Build smart templates with locked standard text and editable fill-in-the-blank fields instead of…
Tallyfy lets you build custom onboarding snippets that show personalized welcome messages or…
Tallyfy templates are reusable blueprints you create once and launch repeatedly. They assign…
-
Snippet content is fetched fresh when viewed, so edits propagate on next view. Running processes retain the content from when they were launched. ↩
Was this helpful?
About Tallyfy
- 2025 Tallyfy, Inc.
- Privacy Policy
- Terms of Use
- Report Issue
- Trademarks