Click the menu icon (three dots) on the template card
Choose Move from the menu
Select the destination folder
Click Move
Managing existing folders
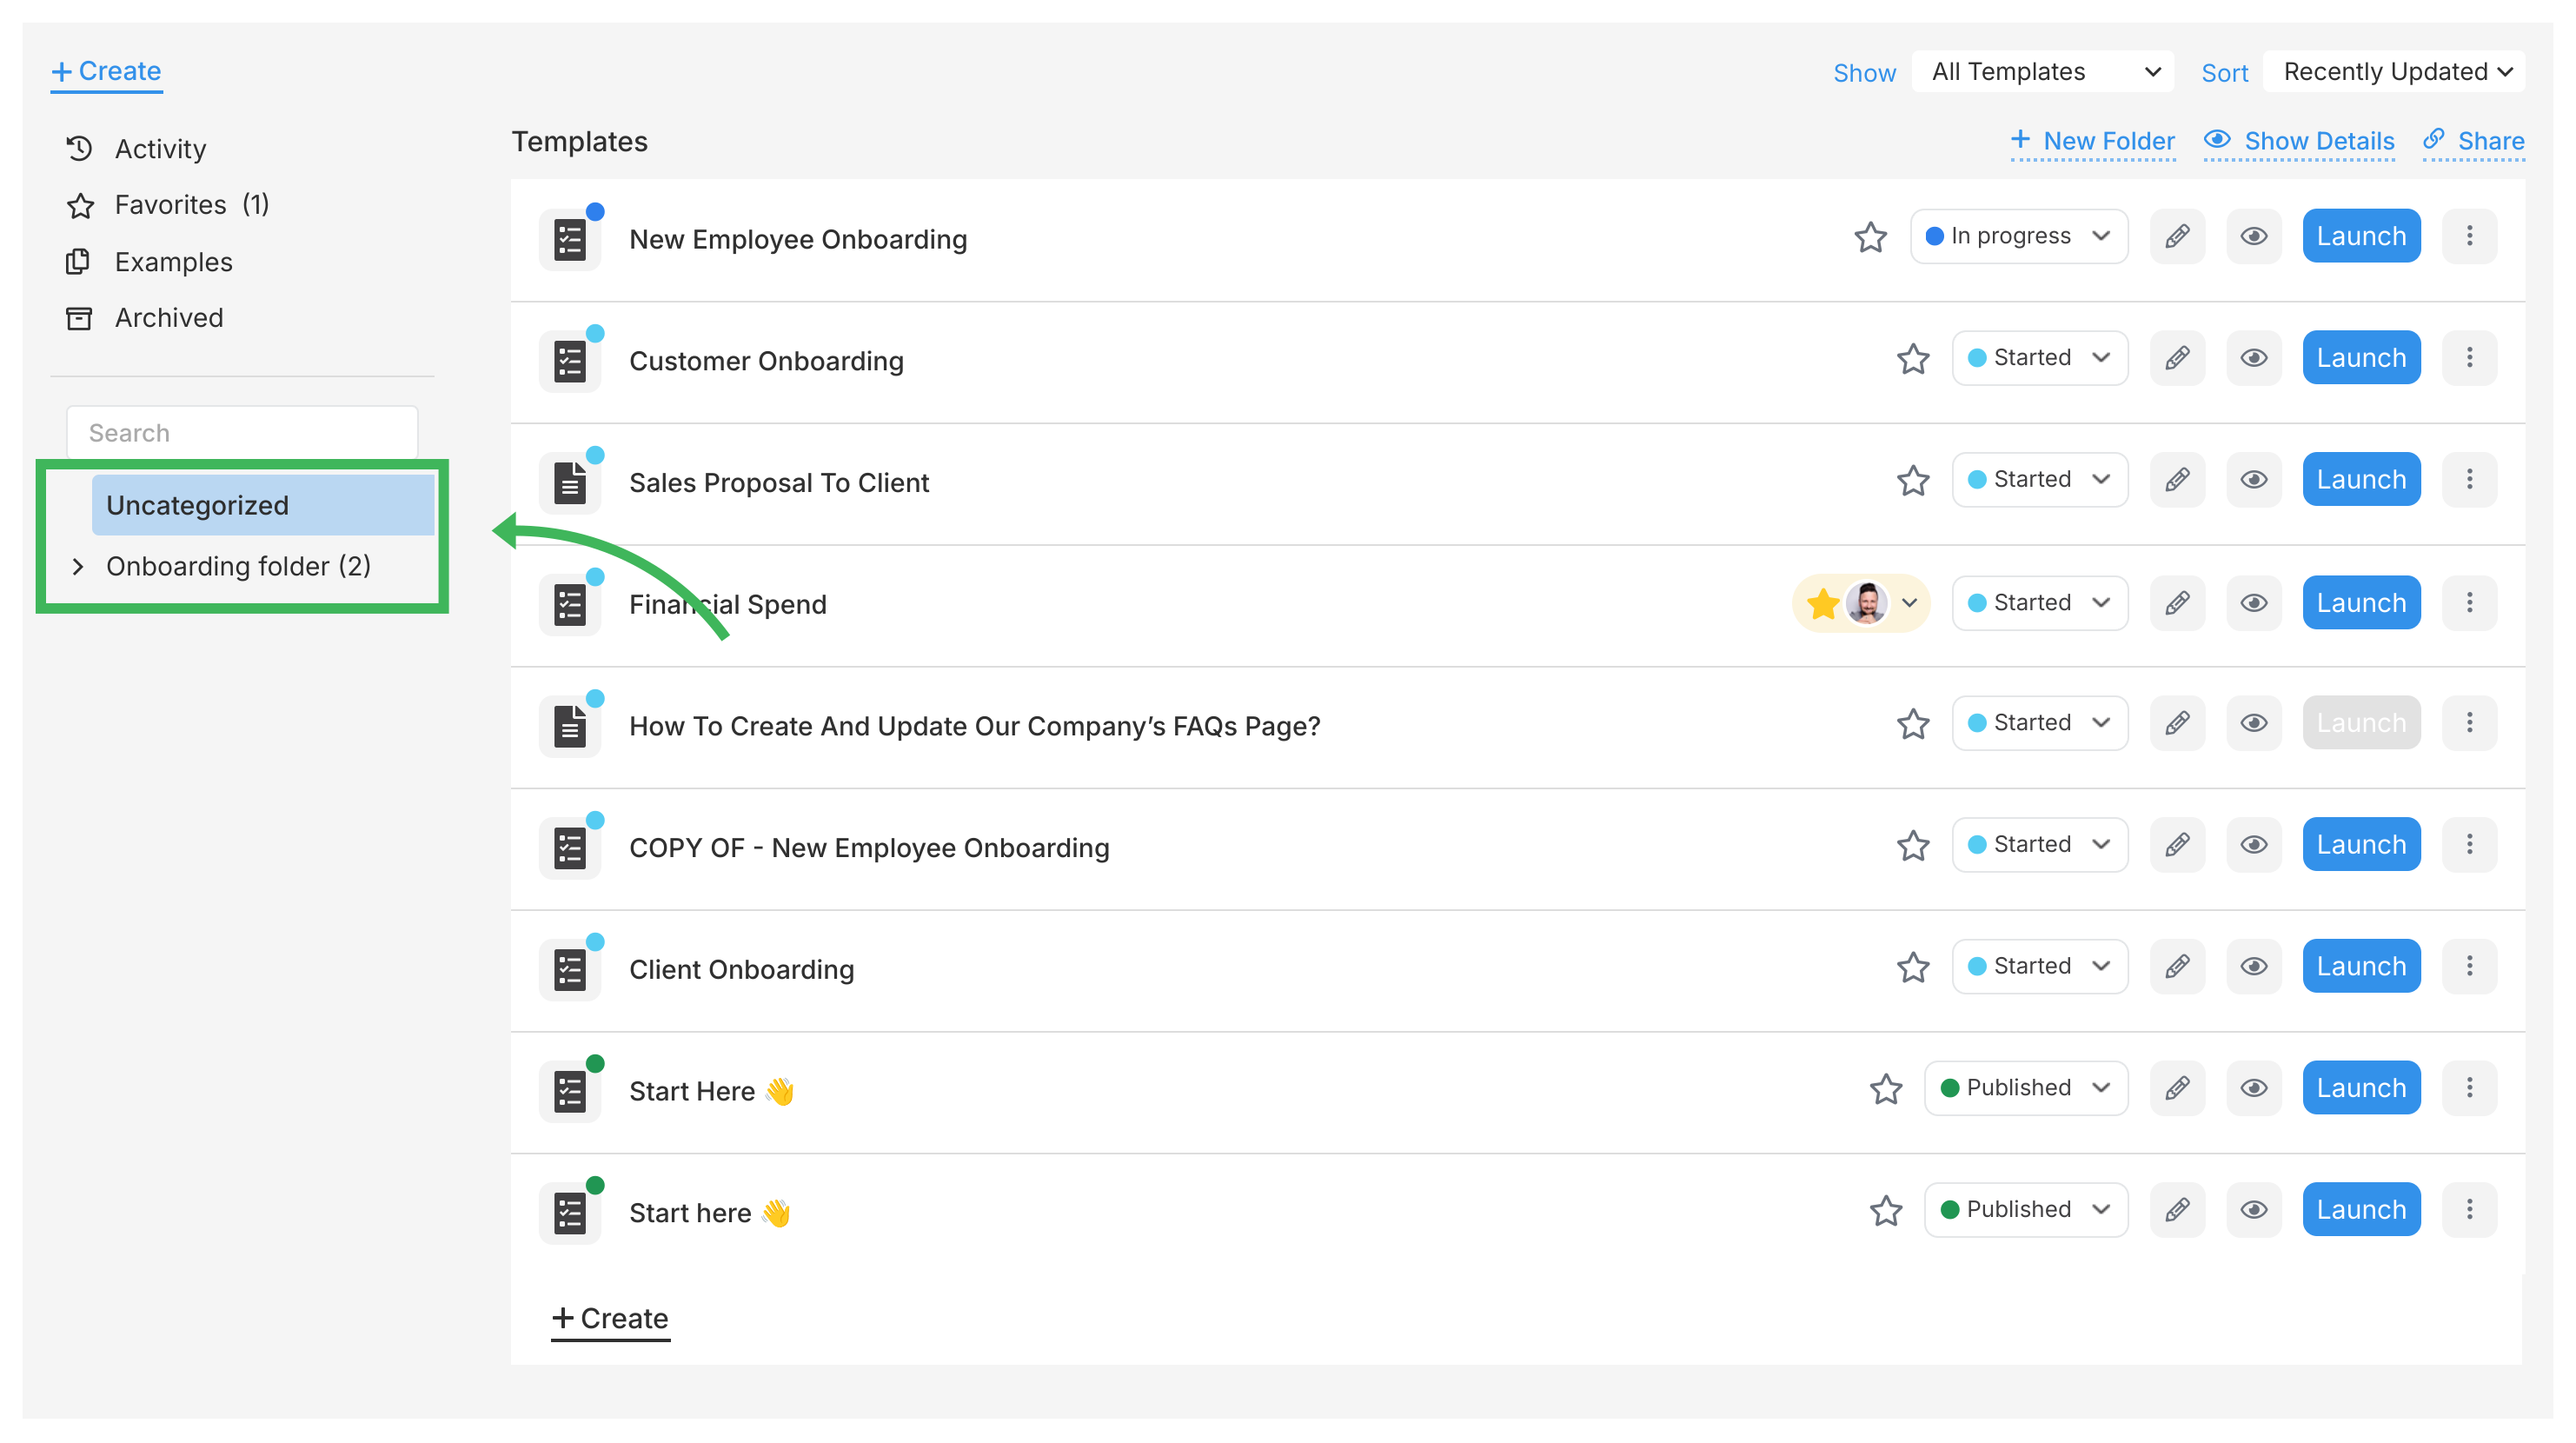
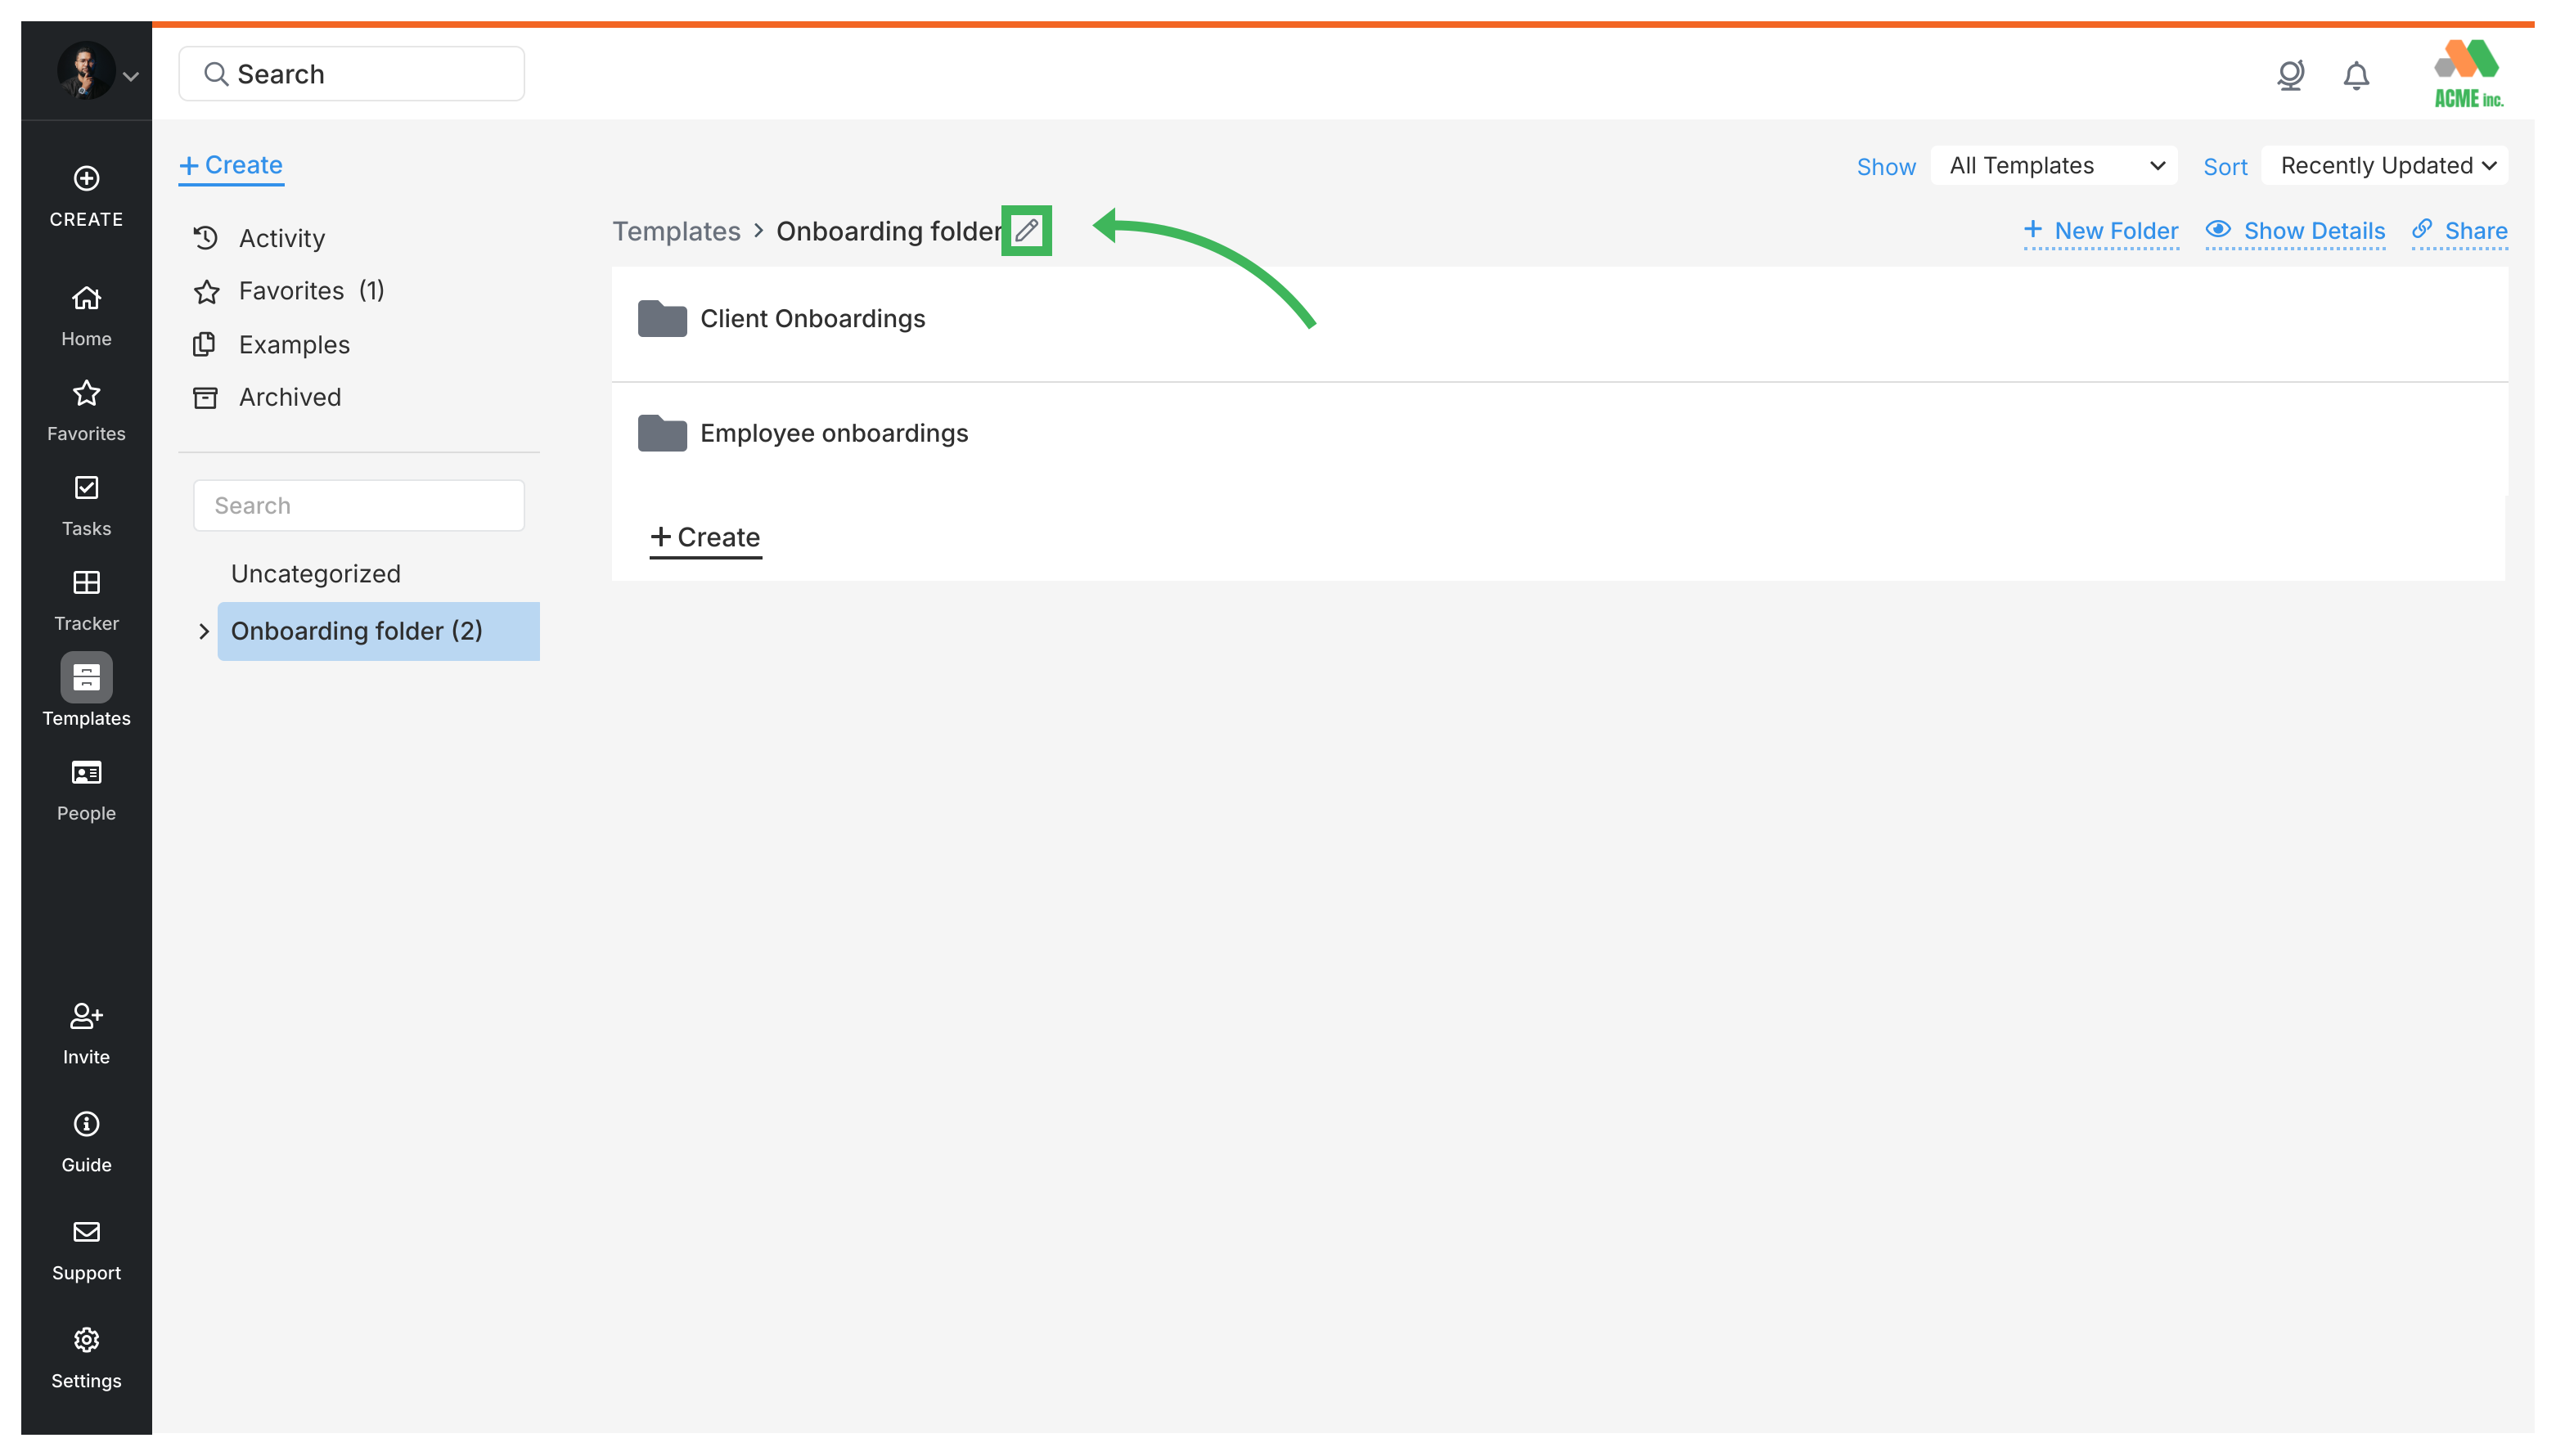
Click the folder you want to manage in the left panel
Click the pencil icon next to the folder’s name
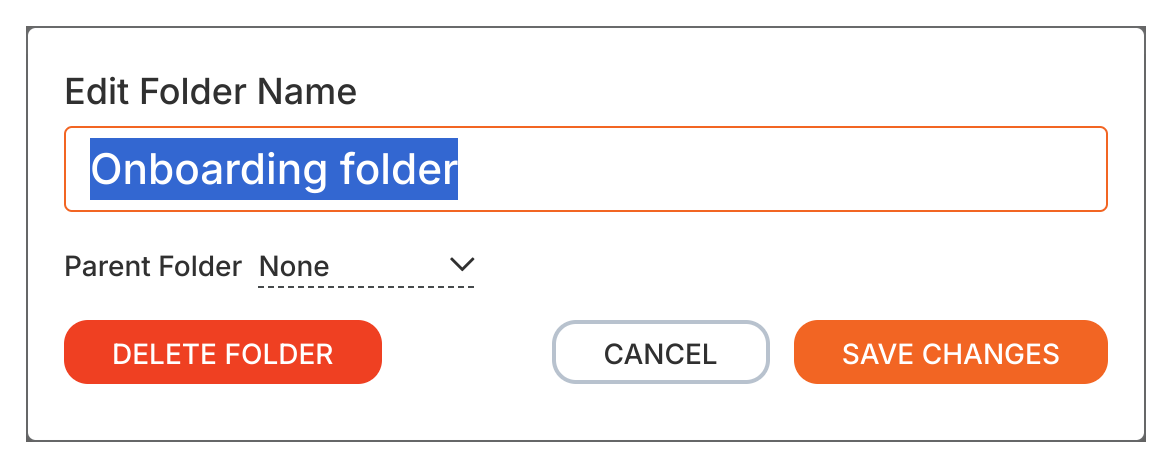
From here you can:
Rename the folder
Move it to a different parent folder
Delete the folder
Deleting a folder does not delete the templates inside it. They move back to the main library view (unfoldered).
Restoring archived templates
When you unarchive a template, Tallyfy remembers its original folder:
If the folder still exists, the template goes back there
If the folder was deleted, the template lands in the main library view
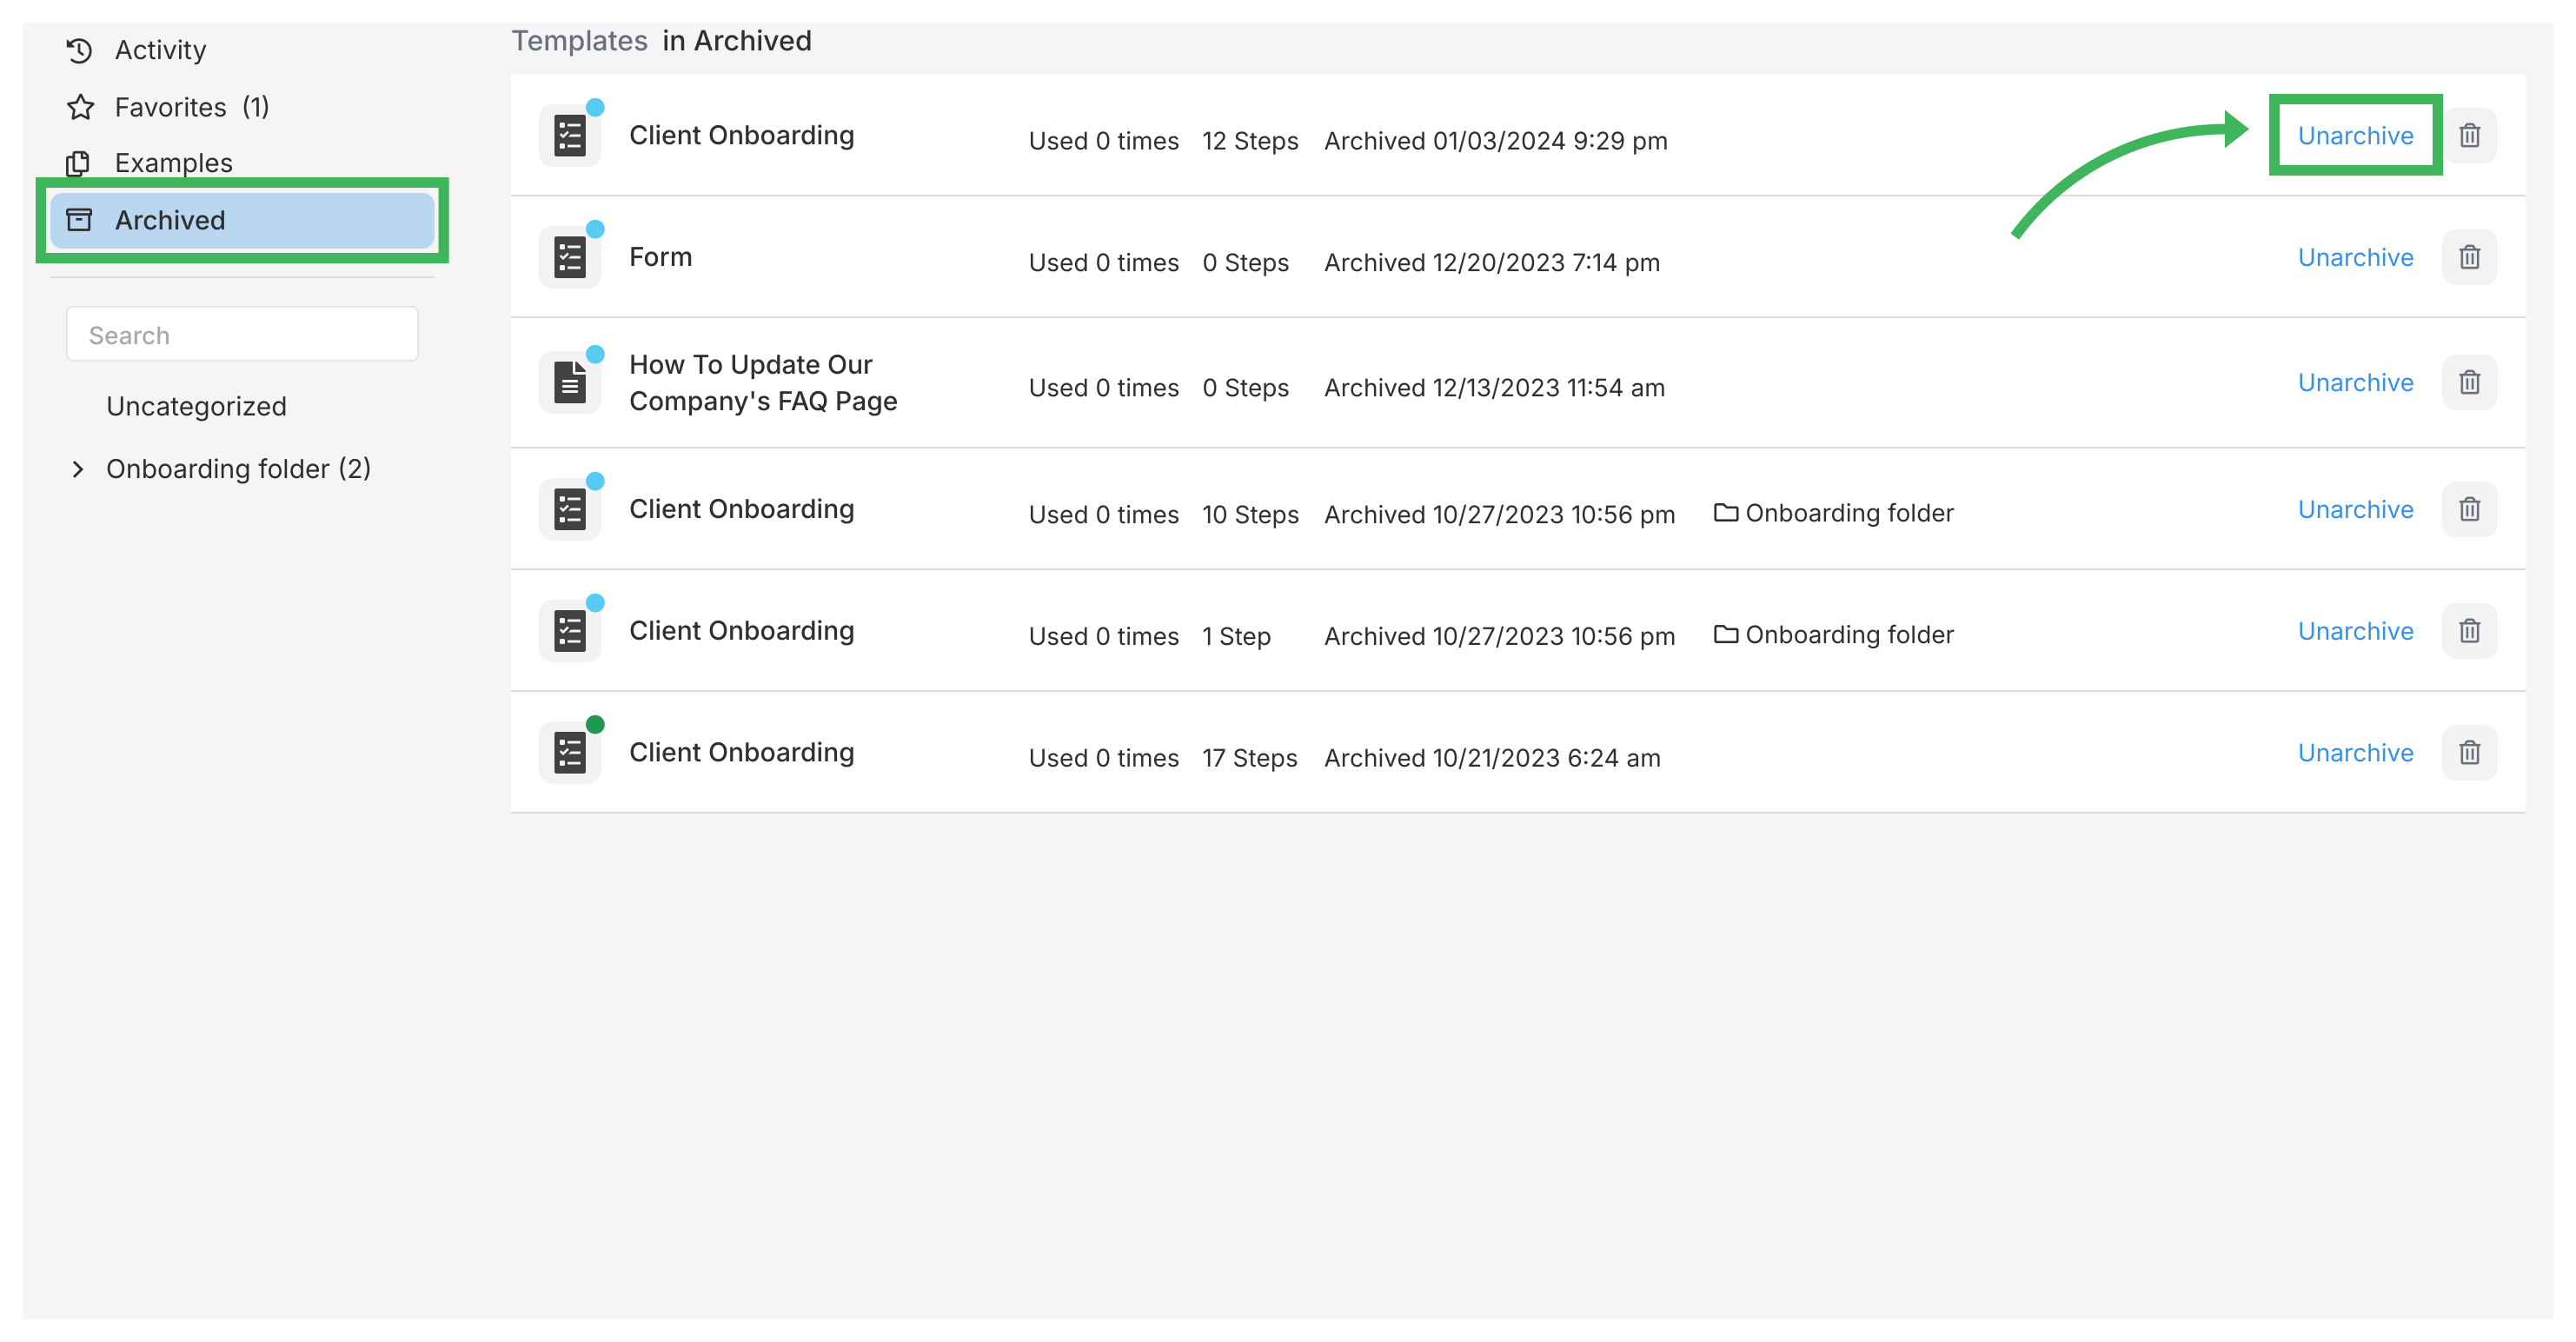
Go to Templates and click the Archived tab
Find the template you want to restore
Click Unarchive
Best practices
Keep folder names short and obvious - “HR Templates” beats “Human Resources Documentation and Processes.” Two or three levels of nesting works well. More than that creates a maze.
Organize by department (HR, Sales, IT) or by function (Approvals, Onboarding, Reviews). Pick one approach and stick with it. You can also use tags alongside folders for extra categorization.
Review your folder structure every few months. Delete empty folders and merge similar ones.