Click the Insert button in the editor toolbar to add images, videos, files, tables, and links directly into task descriptions in Tallyfy templates . This makes instructions clearer, especially for visual or complex steps.
Media Type What it does Upload limit Image Displays inline (JPG, PNG, GIF) 100MB File Shows a download link (Docs, PDFs, etc.) 100MB Video Plays inline (uploaded or linked) 100MB Link Clickable web link N/A Table Rows and columns for structured data N/A Embed URL Live preview of external content (YouTube, Twitter, etc.) N/A Page Break Controls page breaks for printing/PDF N/A
Open the template in Edit mode
Click the task step where you want to add media
Click inside the description box
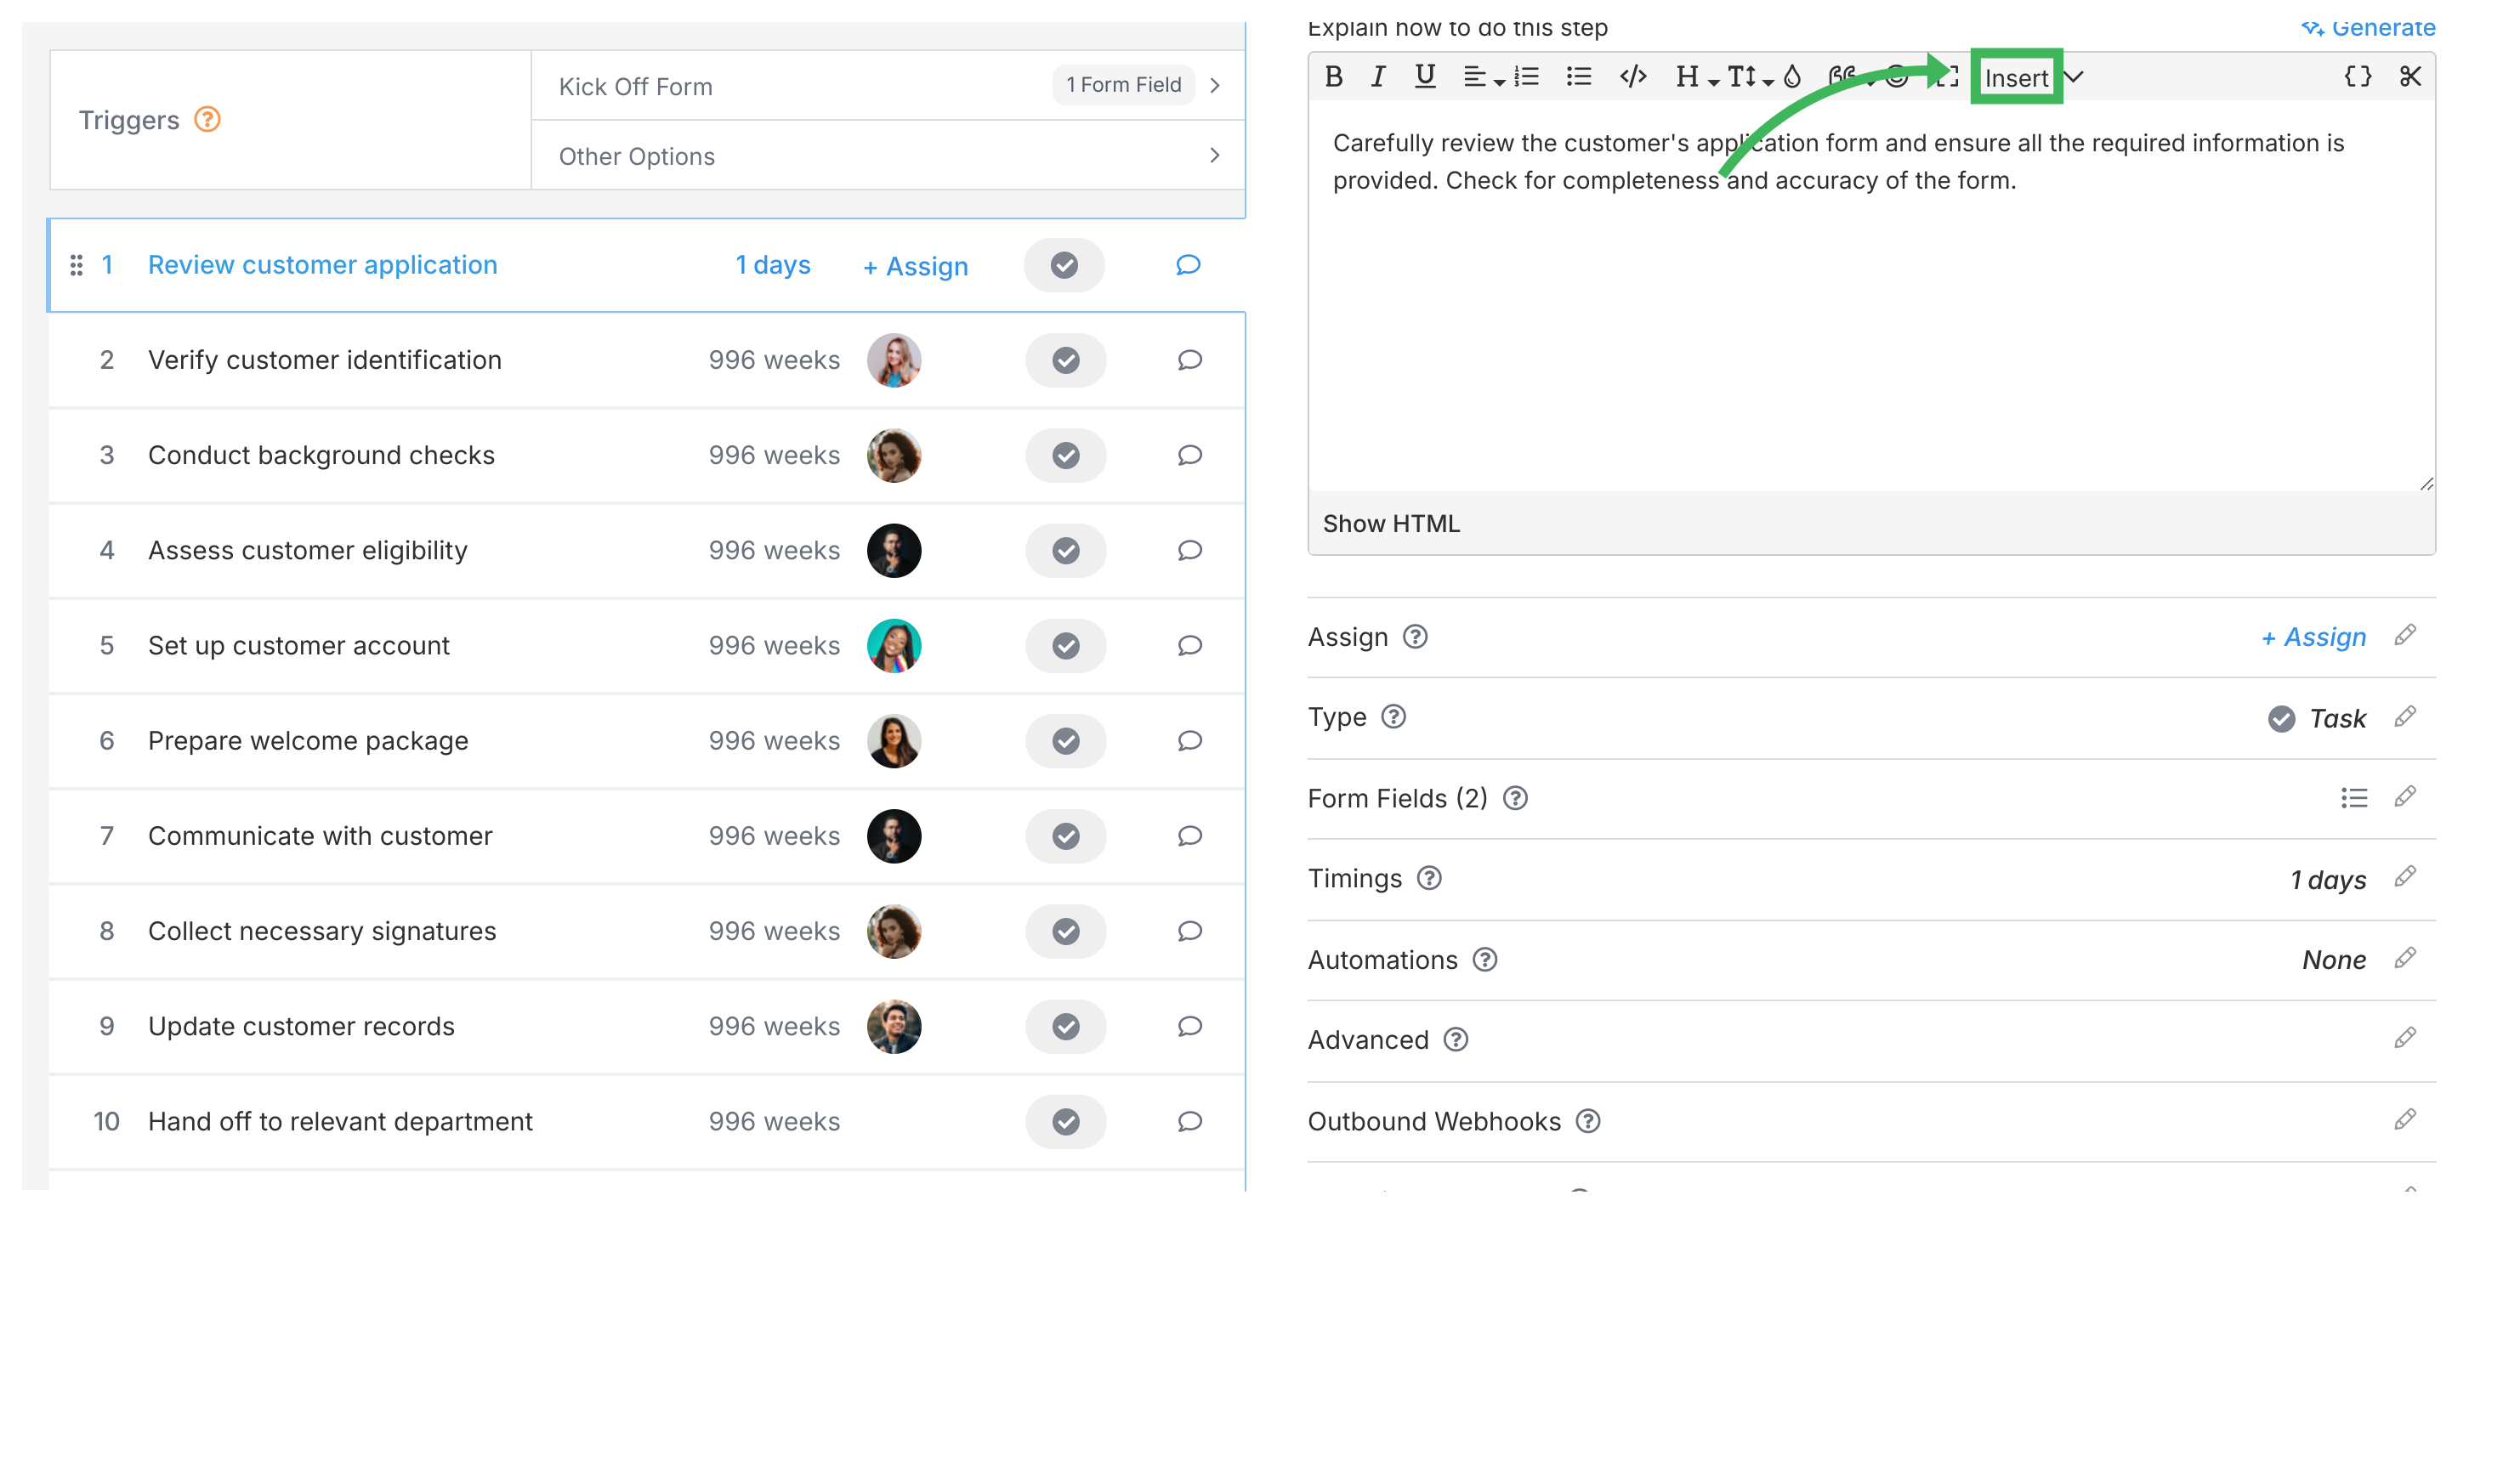
Click Insert in the editor toolbar
Choose the media type from the dropdown
Choose Image from the Insert menu
Either:
Upload an image file from your computerURL - paste the web address of an image online
(Recommended) Add alt text1 Click Insert
Choose File from the Insert menu
Click Upload and pick a file from your computer
A download link appears in the description once uploaded
Choose Video from the Insert menu
Either:
Upload a video file (MP4, WebM) from your computer - max 100MBURL - paste a link from YouTube, Vimeo, or another video site
Click Insert
It’s usually better to upload your video to YouTube or Vimeo first, then paste the link into Tallyfy. Better quality, smoother playback, and it won’t use your storage. Use URL above or Embed URL below.
Choose Table from the Insert menu
Select how many rows and columns you need
Click Insert
Click inside cells to type your data
Choose Link from the Insert menu
Paste the web address in the URL box
(Optional) Type display text in the Text to display box - if left blank, the full URL showsClick Insert
Add page breaks to control where new pages start when printing or saving as PDF.
Click where you want the page break
Choose Page Break from the Insert menu
A line appears showing the break location
Embed URL pulls in a live preview of external content instead of just showing a link.
Choose Embed URL from the Insert menu
Paste the URL (e.g., a YouTube video, Tweet, or Google Map)
Click Insert
Tallyfy works with hundreds of sites - YouTube, Vimeo, Spotify, Instagram, Twitter, Google Maps, and more. Embedded content stays interactive.
Use images to show steps that are hard to explain in words
Attach files people need while doing the task
Use videos to demonstrate how something works
Keep uploaded files under 20MB2
Add alt text to images for accessibility
Use tables to organize structured data