Edit Templates > Assign steps in the Tallyfy template builder
Edit steps
You can add new steps and modify existing ones directly in Tallyfy templates.
To add a step, open your template in Edit mode, scroll to the bottom of the steps list, click Add Step, type a name for your new step, and press Enter. That’s it.
To modify a step:
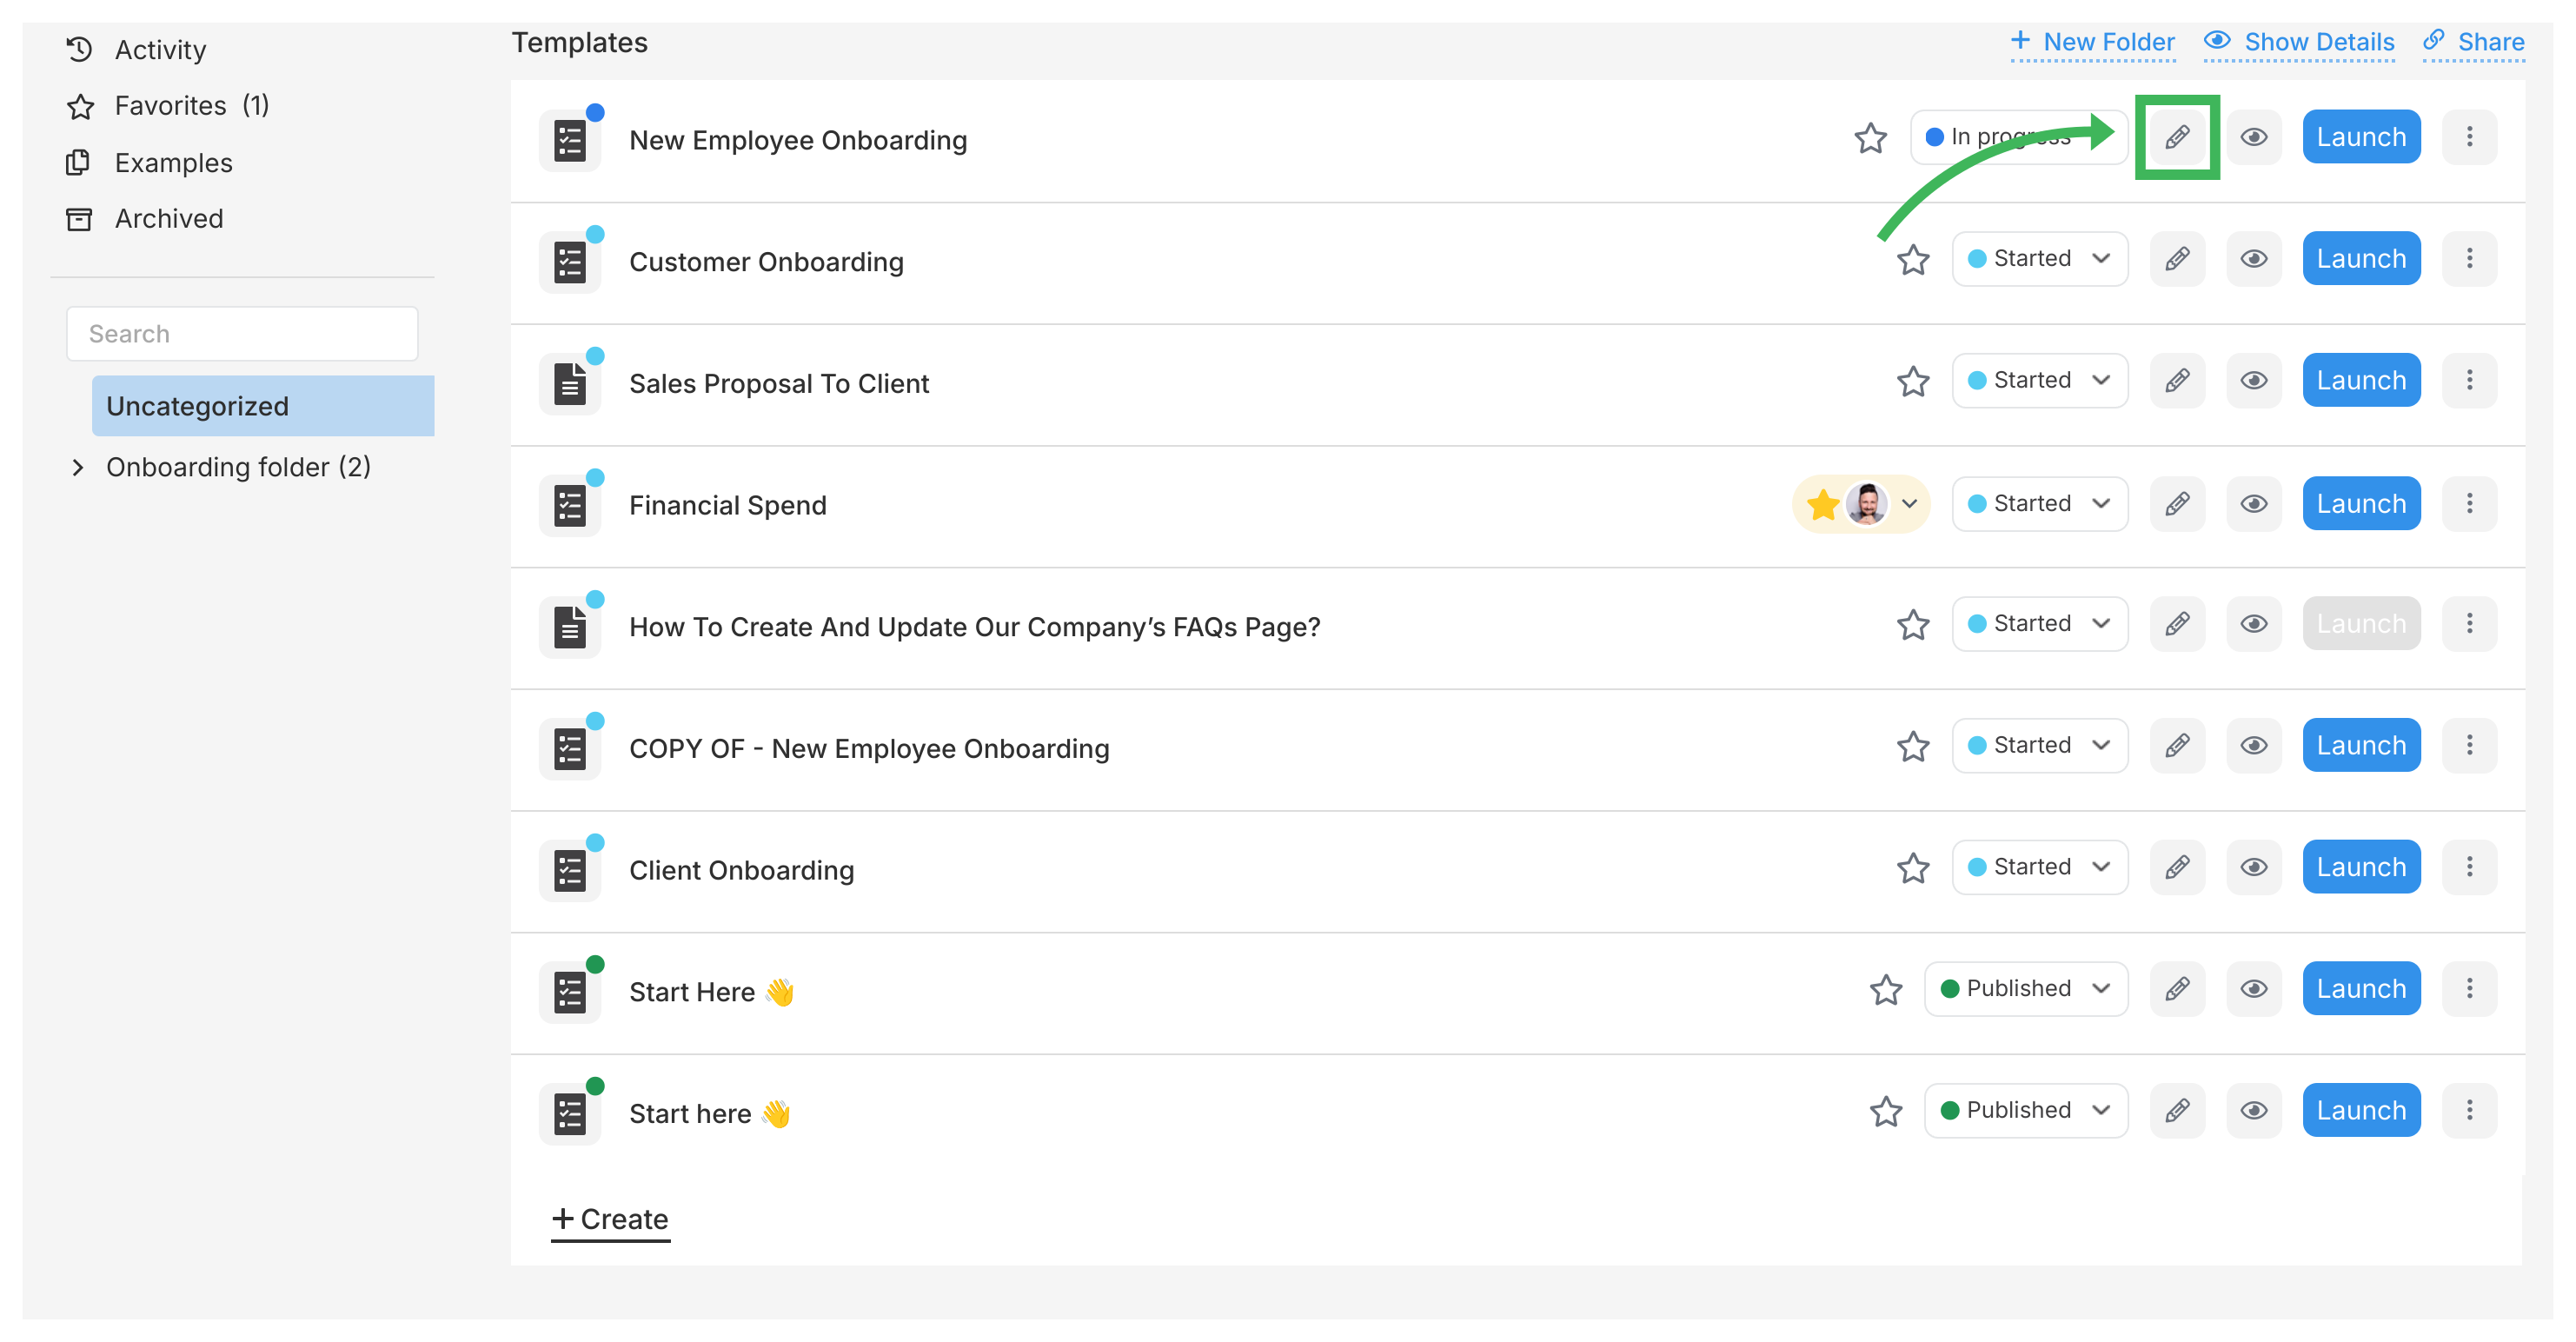
- Navigate to the Templates library interface
- Locate your target template and click the Edit icon (pencil symbol)

Once you’re in edit mode, click any step to open its details panel on the right. You can edit everything about the step from here:
Write the instructions for the task. You can add text, formatting, images, files, links, tables, videos, variables, and snippets.
- Click on the step you want to edit.
- Click into the Description area in the details panel.

- Use the toolbar to format text, add links, images, etc. See Insert Media for details.
- Tallyfy saves changes automatically.
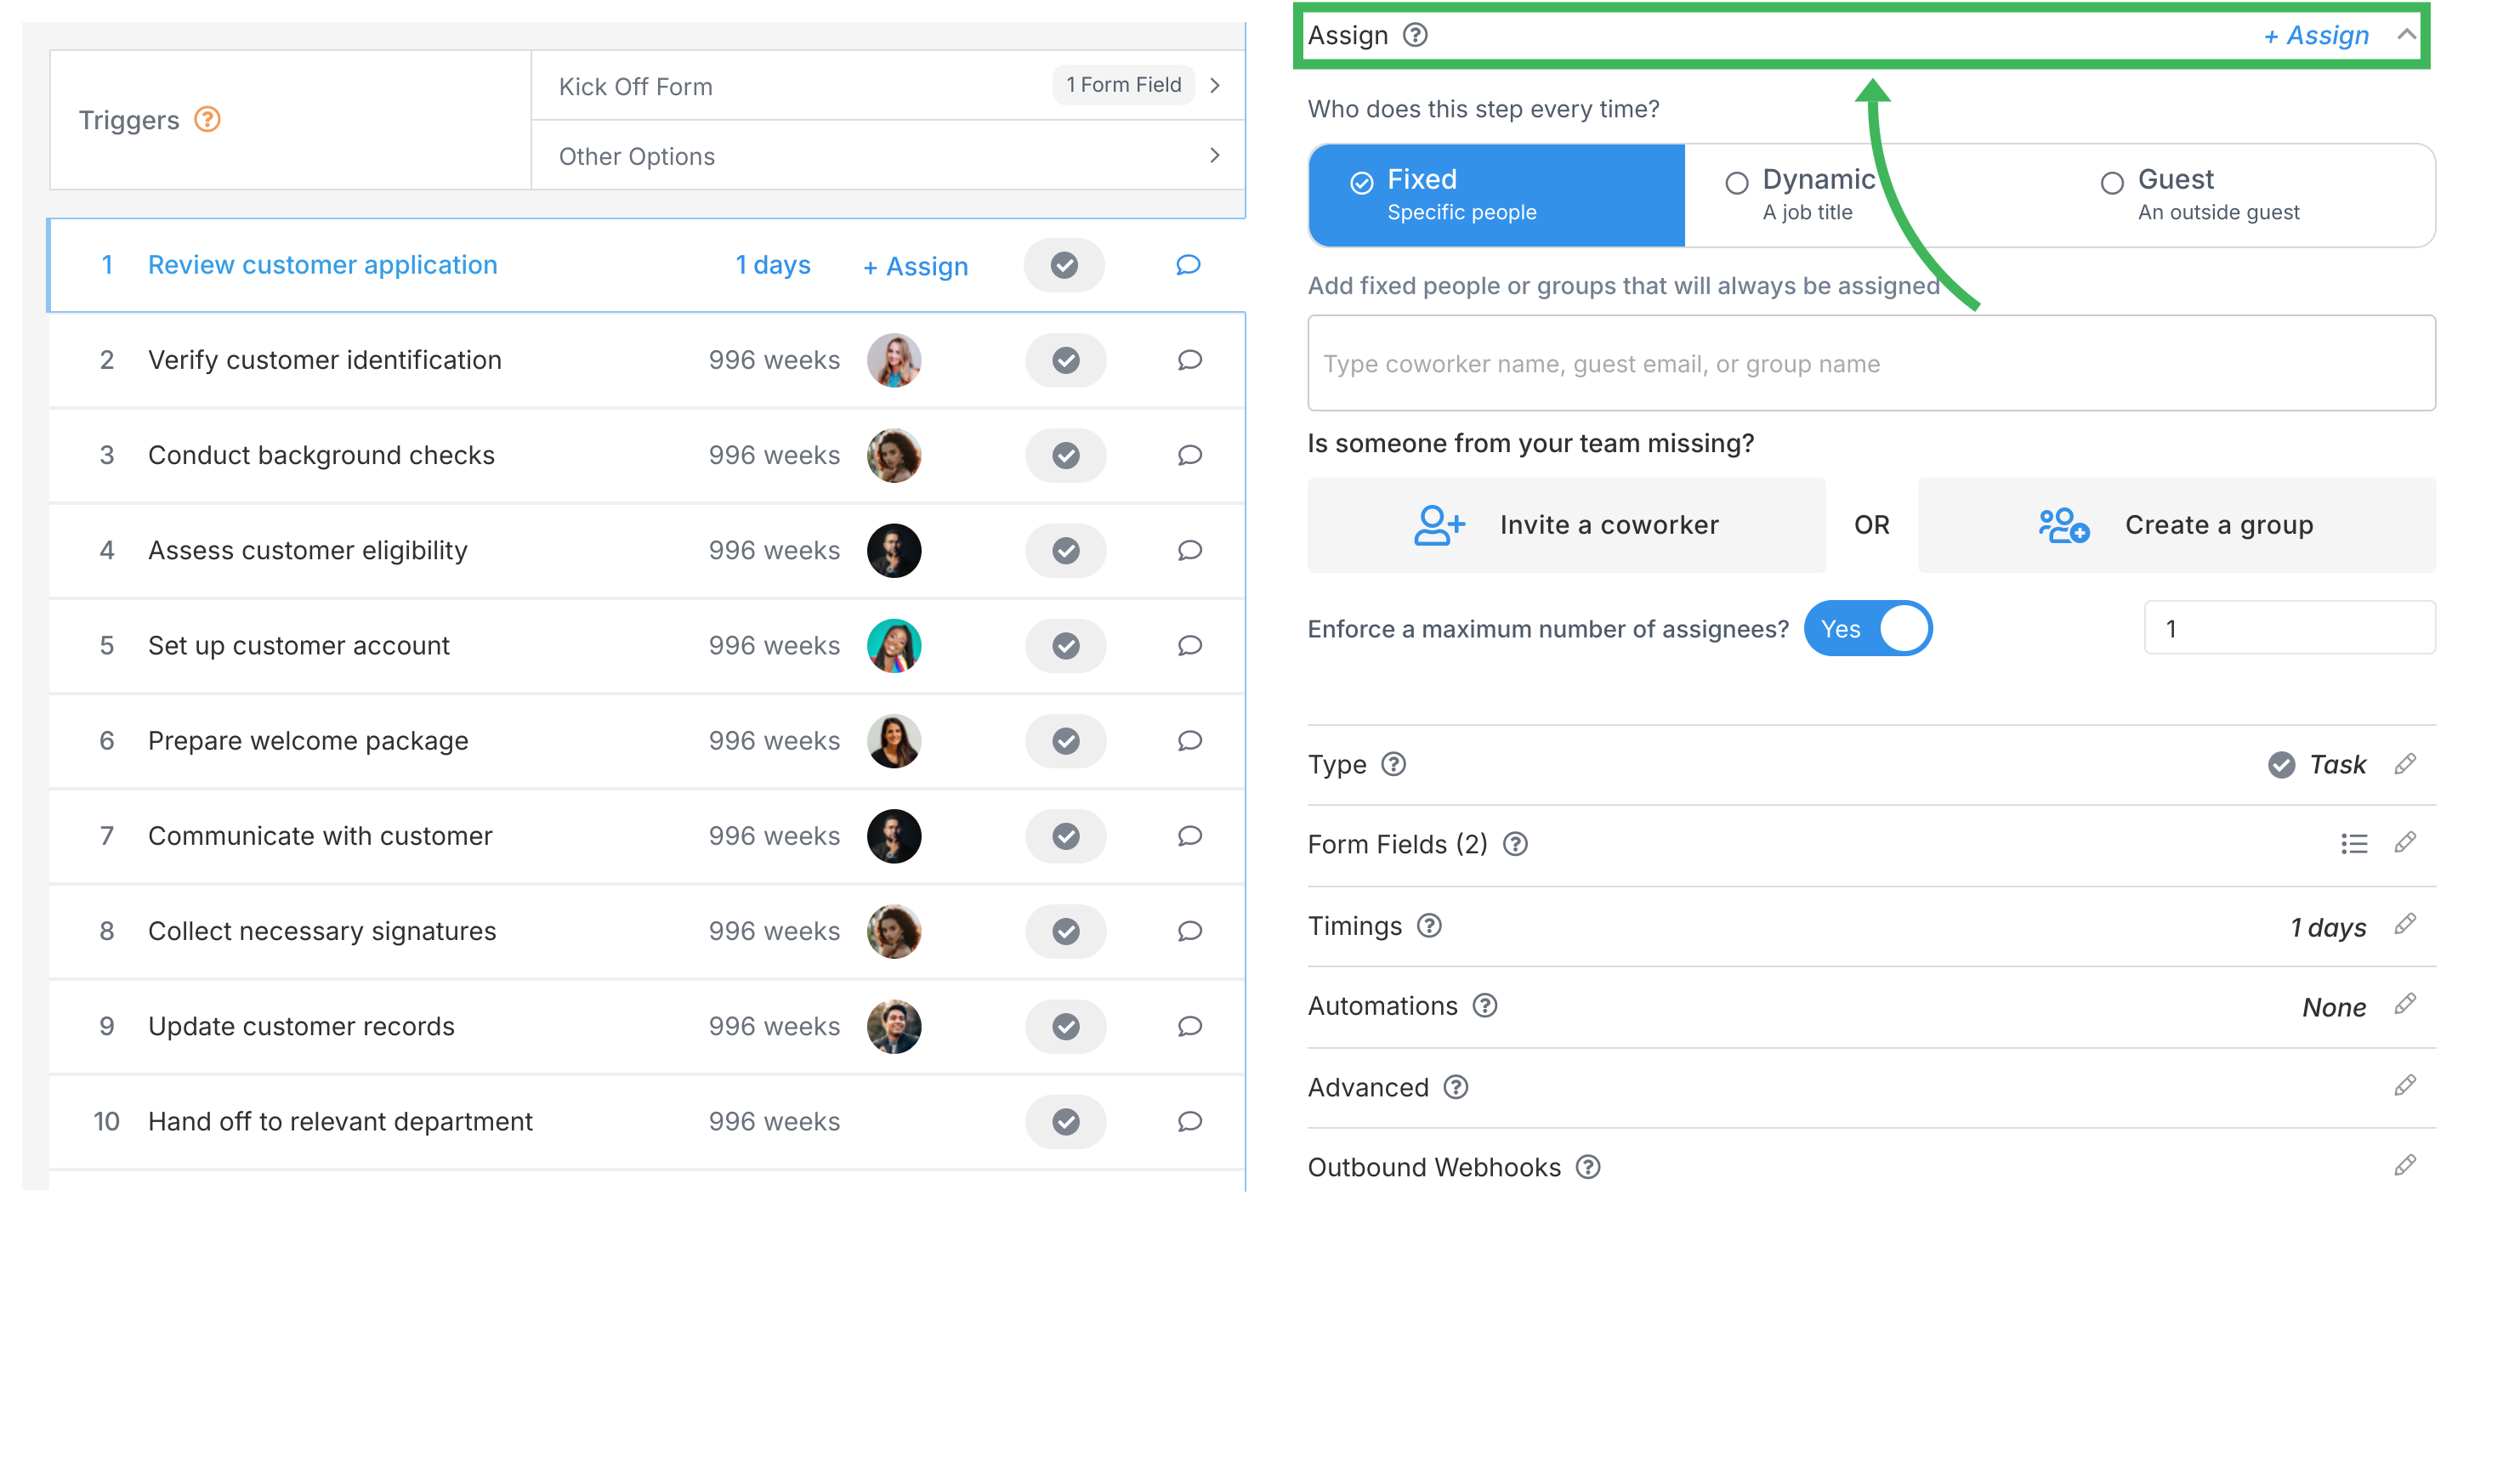
- Click on the step you want to assign.
- Go to the Assign tab in the details panel.
- Choose how to assign:
- If you choose “Nobody right now”: What happens when the process runs depends on the Assign launcher automatically setting (in the Advanced tab). If ON, the person starting the process gets assigned. If OFF, the task stays unassigned.
- Assigning Groups: You need to create the group first in Tallyfy before you can assign a task to it.

Different step types behave differently (e.g., Approve/Reject steps have different buttons). See Step Types Explained for details.
- Click on the step you want to change.
- Click the Type dropdown in the details panel and choose the new type.
- Click on the step.
- Go to the Form fields tab in the details panel.
- Click Add field to add a new one, or click an existing field to edit it.
See Types of Form Fields for more details.
- Click on the step.
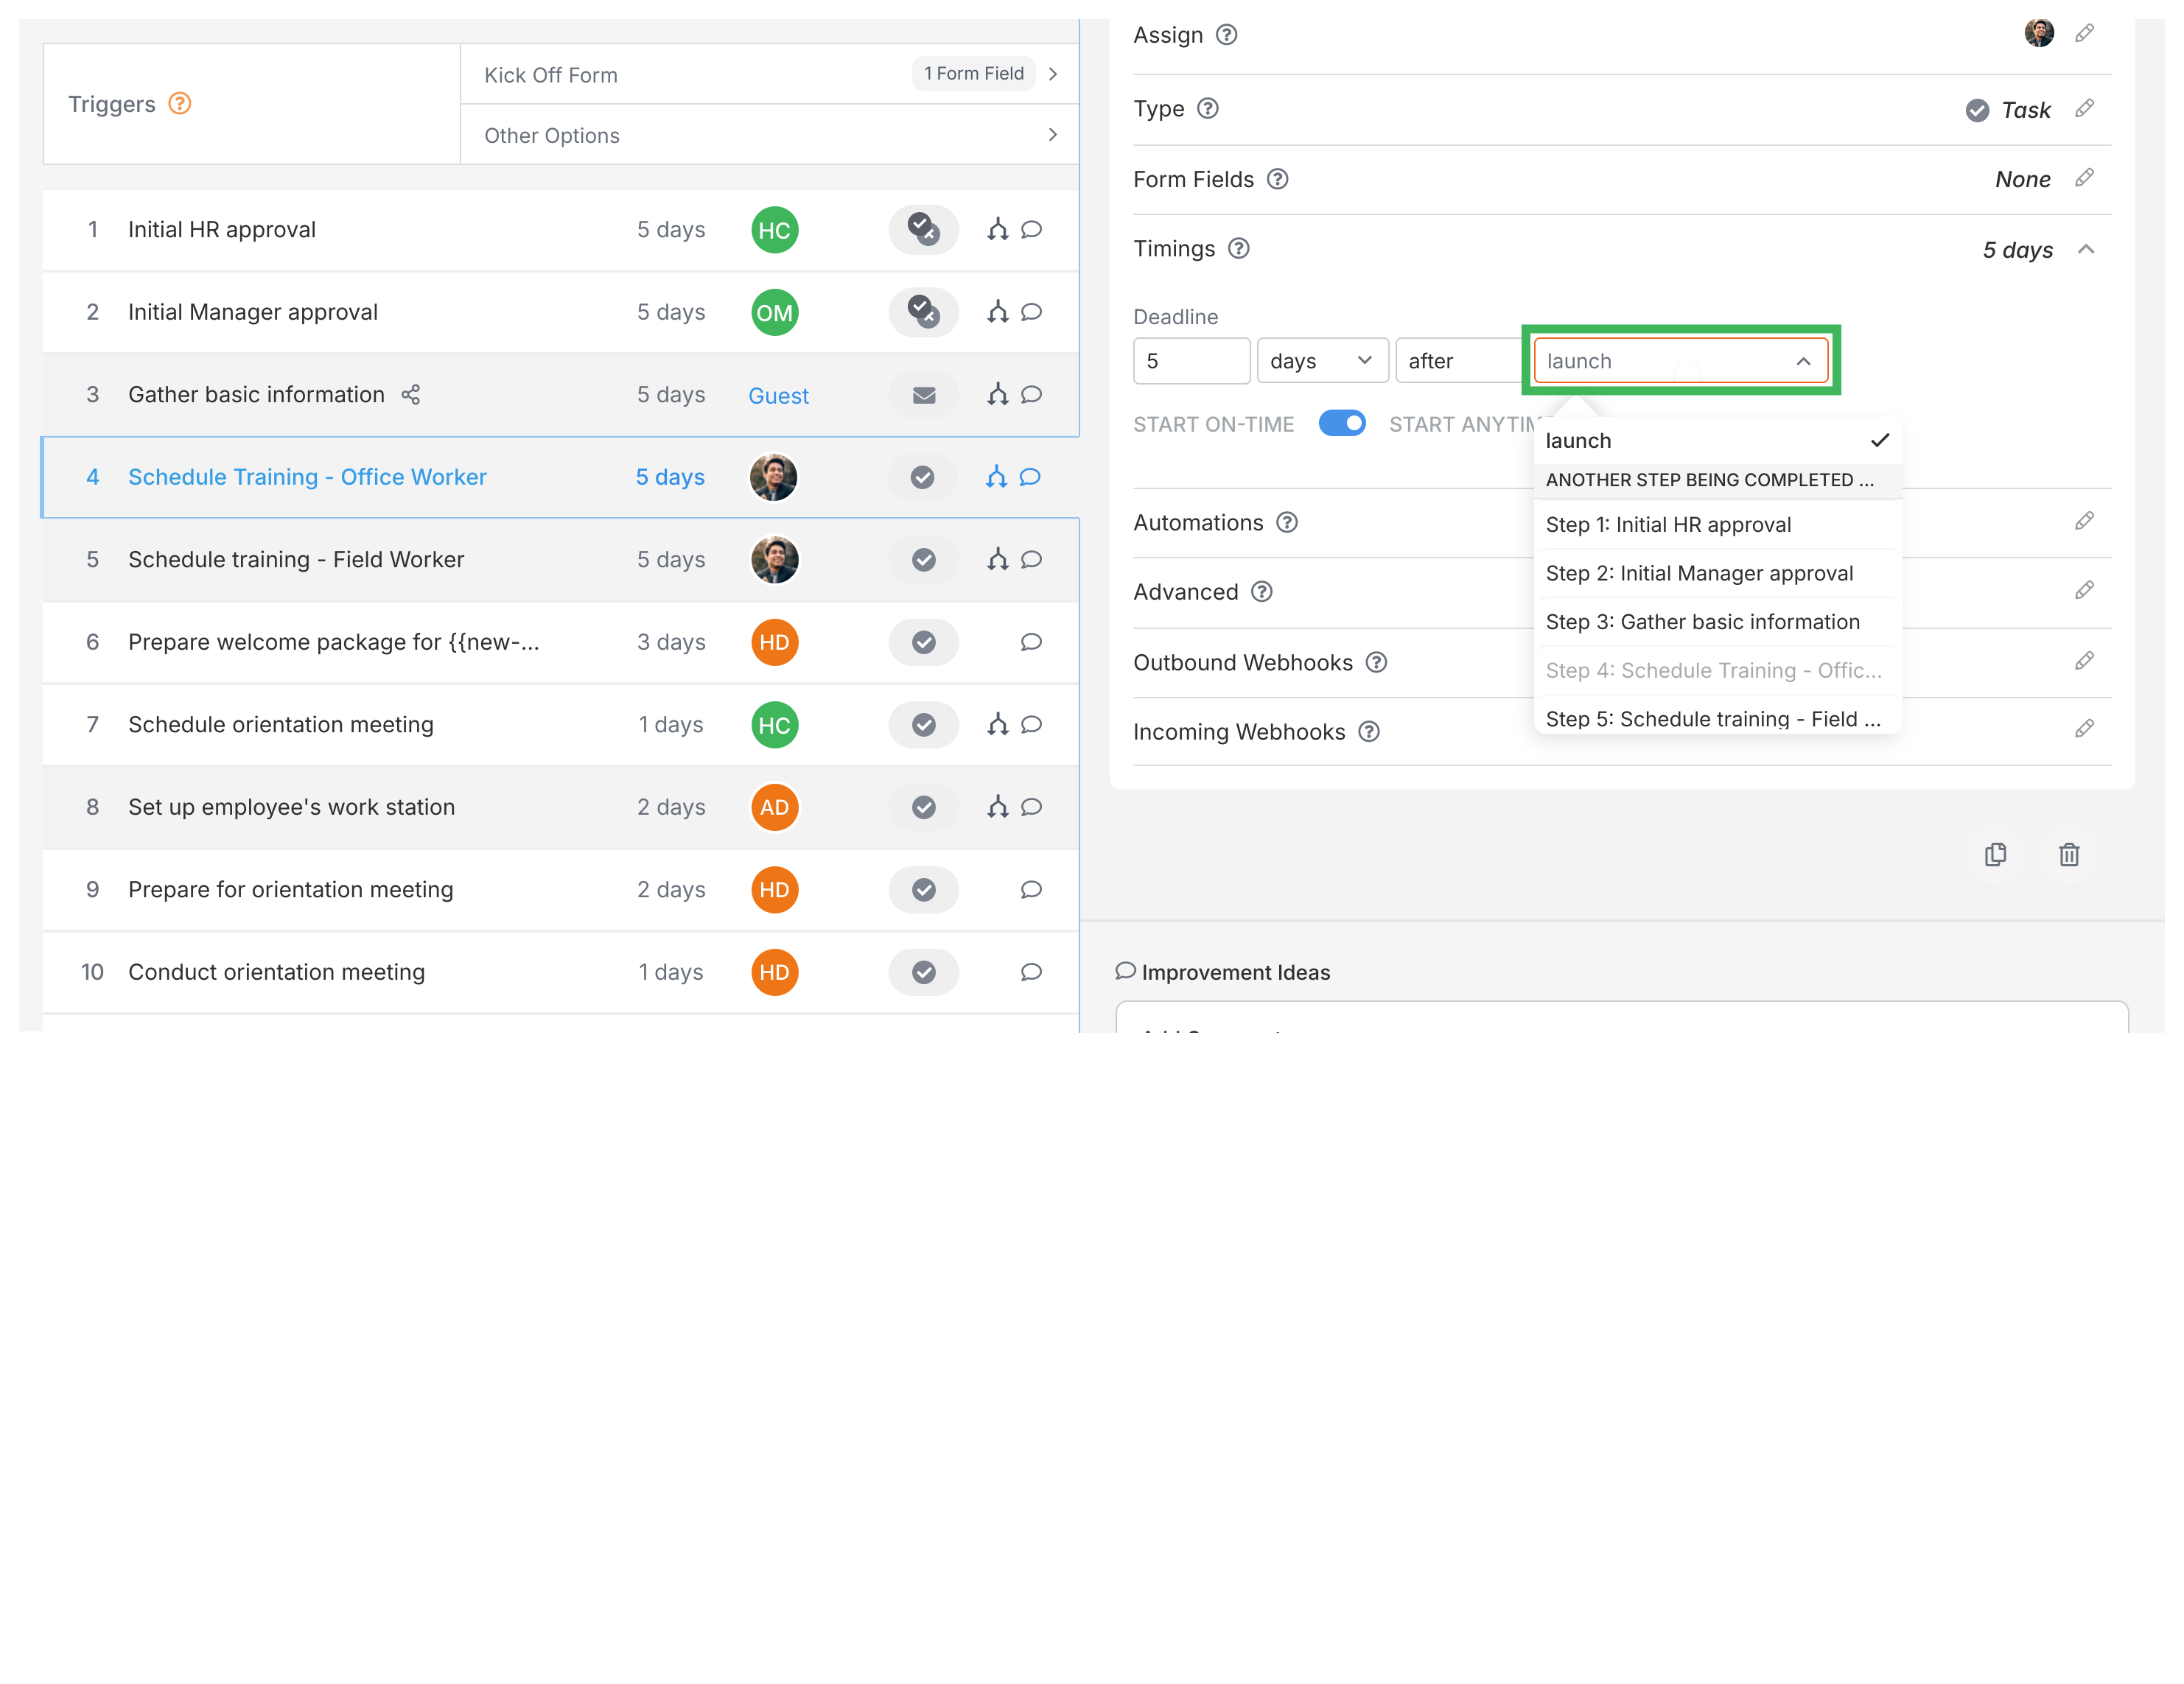
- Go to the Timings tab.
- Set the deadline (when work should be complete) relative to:
- Process Launch: Due X time after the process starts (default).
- Another Step: Due X time after another specific step is completed.
- Future Step Completion: Due X time before a later step in the process is due to be completed. This is useful for working backward from a final deadline (e.g., “Draft due 3 weeks before Publish Date”).


- Choose Start On-Time or Start Anytime to control when work should begin:
- Start On-Time: Suggests a specific start time when work should begin on the task. This provides guidance about when to start working, but doesn’t force it.
- Start Anytime: No suggested start time - work can begin at any time (default).
- Launch another process when this task is complete: Set to “Yes” to automatically start another process (from a different template) when this task finishes. You can choose to add the new tasks into the current process or start a completely separate one. See Launch another process guide.
- All assignees must complete this task: If “Yes”, the task isn’t done until everyone assigned has marked it complete.
- Assign launcher automatically: If a step has no assignees set, turning this ON means the person who starts the process will automatically be assigned. If OFF, it remains unassigned.
- Task is mandatory…: If “Yes”, this step cannot be removed when someone starts the process.
- Only assigned members can complete or edit…: If “Yes”, only people directly assigned can work on or complete the task (except Administrators, who can always access it).
- Emit webhook when completed: If “Yes”, Tallyfy sends an automatic notification to another web service (via a webhook) when this task is done.
- Prevent guests from making or seeing comments: If “Yes”, any guests assigned won’t see or be able to add comments on this task.
- Unique Step Alias: An internal ID for this specific step, mostly used for technical integrations via webhooks or the API.
- Tags: Add organizational tags to this step.
Tallyfy templates allow you to assign tasks to specific people groups job titles or guests with options for automation rules to dynamically change assignments based on process conditions.
Advanced task options in templates provide powerful control over workflow behavior including automatic process launching when tasks complete requiring all assignees to finish before progression automatic launcher assignment mandatory task settings completion restrictions webhook emissions guest comment limitations unique step identification and task tagging for enhanced filtering and organization.
Template Tools in Tallyfy enable bulk editing capabilities that allow users to create multiple steps simultaneously assign team members to numerous tasks at once adjust deadlines across processes and manage template favorites saving hours of manual work through batch processing features.
Edit Task > Assign members or guests after launching
Tallyfy allows you to assign tasks to members and guests at three different stages: during template creation when launching a process or while a process is running with options to set default assignees modify assignments during launch reassign tasks in active processes and control completion permissions through various assignment types and automation settings.
Was this helpful?
About Tallyfy
- 2025 Tallyfy, Inc.
- Privacy Policy
- Terms of Use
- Report Issue
- Trademarks