Tutorials > Create your first template
Tallyfy templates are reusable process blueprints you can build in minutes. Describe what you…
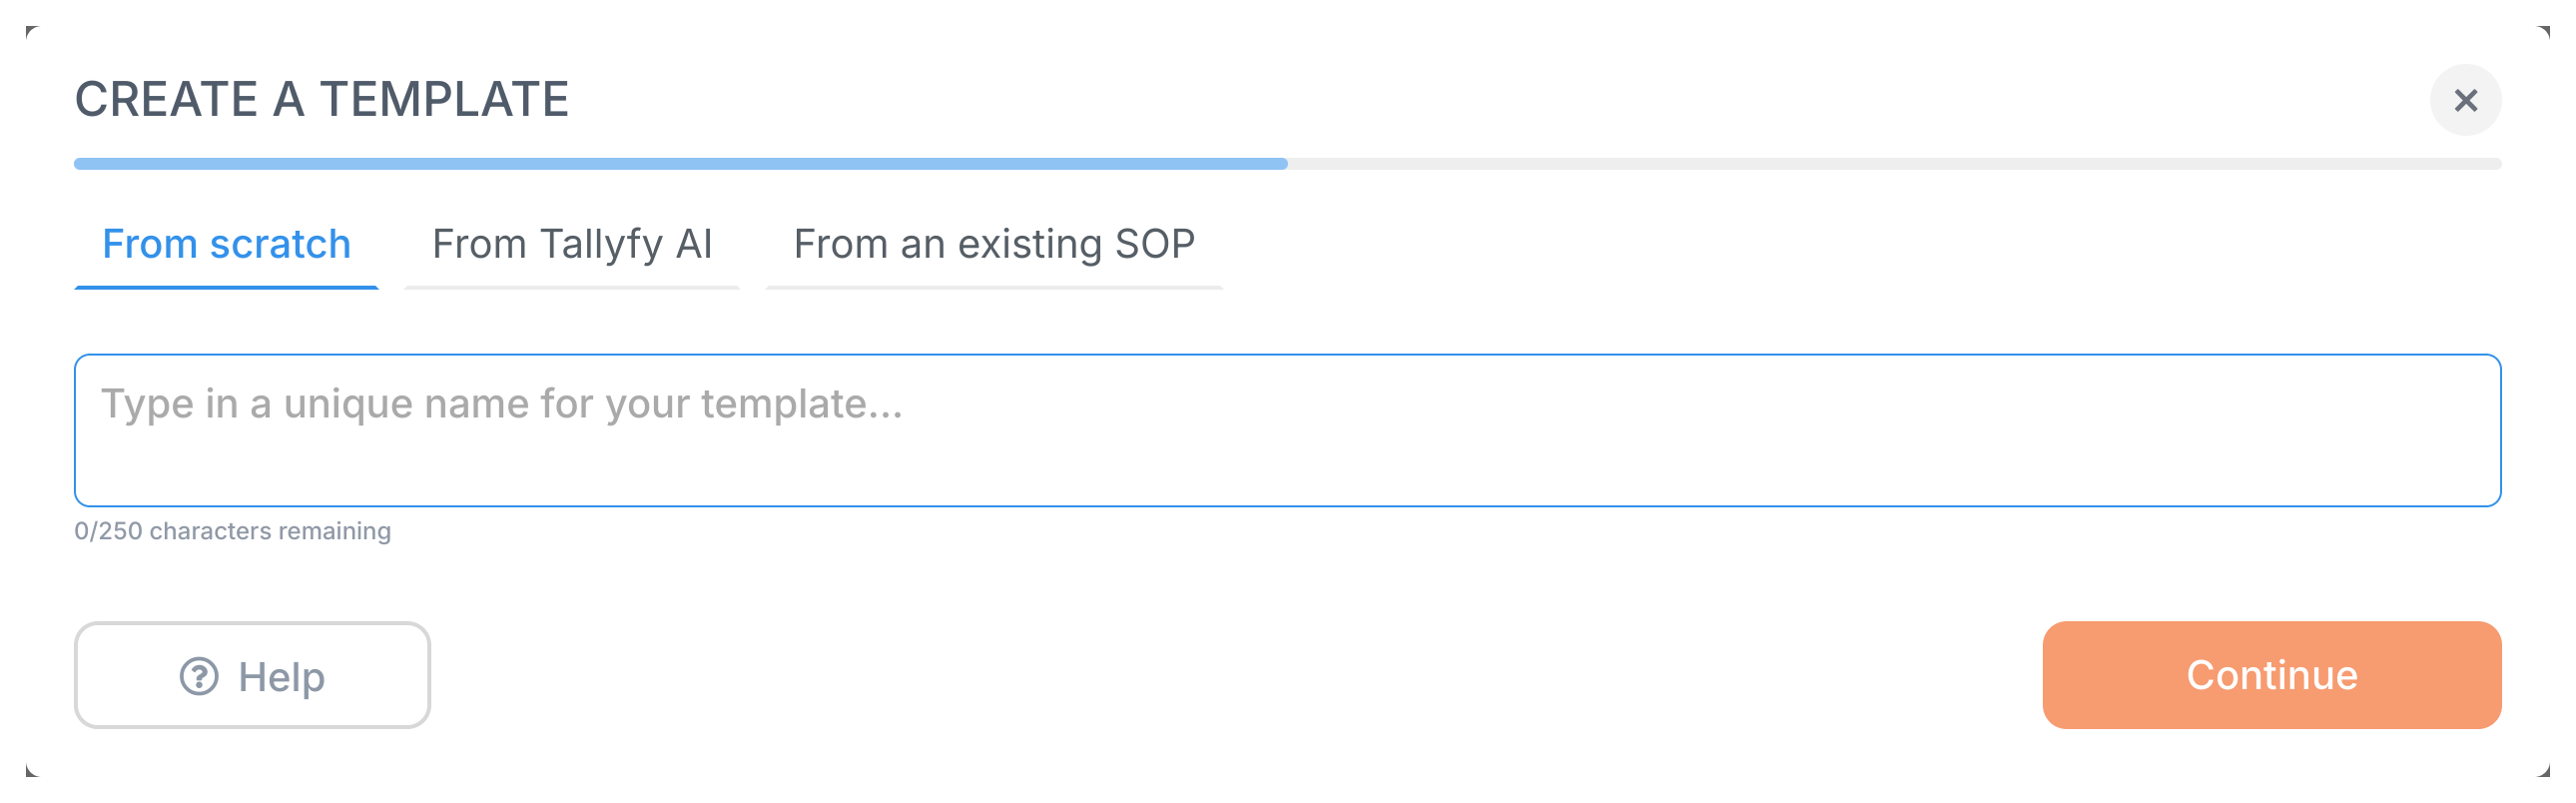
Click +Create and choose from three options: start from scratch, use Tallyfy AI, or upload an existing document. Templates are reusable blueprints you build once, then launch as many times as you need.
Only “Administrator” members and “Standard” members (when allowed by an Admin) can create templates. Members with a “Light” role can only run processes from existing templates.
Choose this when your process is unique or needs precise control over every step, field, and automation rule.
Describe your process and Tallyfy AI generates a working template in seconds. The AI doesn’t just copy your input - it rephrases confusing steps, removes redundancy, and restructures everything for digital execution.
The more specific your description, the better. Instead of “employee onboarding,” try “onboard a remote software developer including laptop setup, account access, and first-week training.”
Got a Word doc or PDF with your process already written out? Upload it and Tallyfy AI transforms it into a trackable workflow. The AI reads your document, then rebuilds it for digital execution - cleaning up redundancies and restructuring for clarity.
Supported file types:
.doc, .docx).pdf)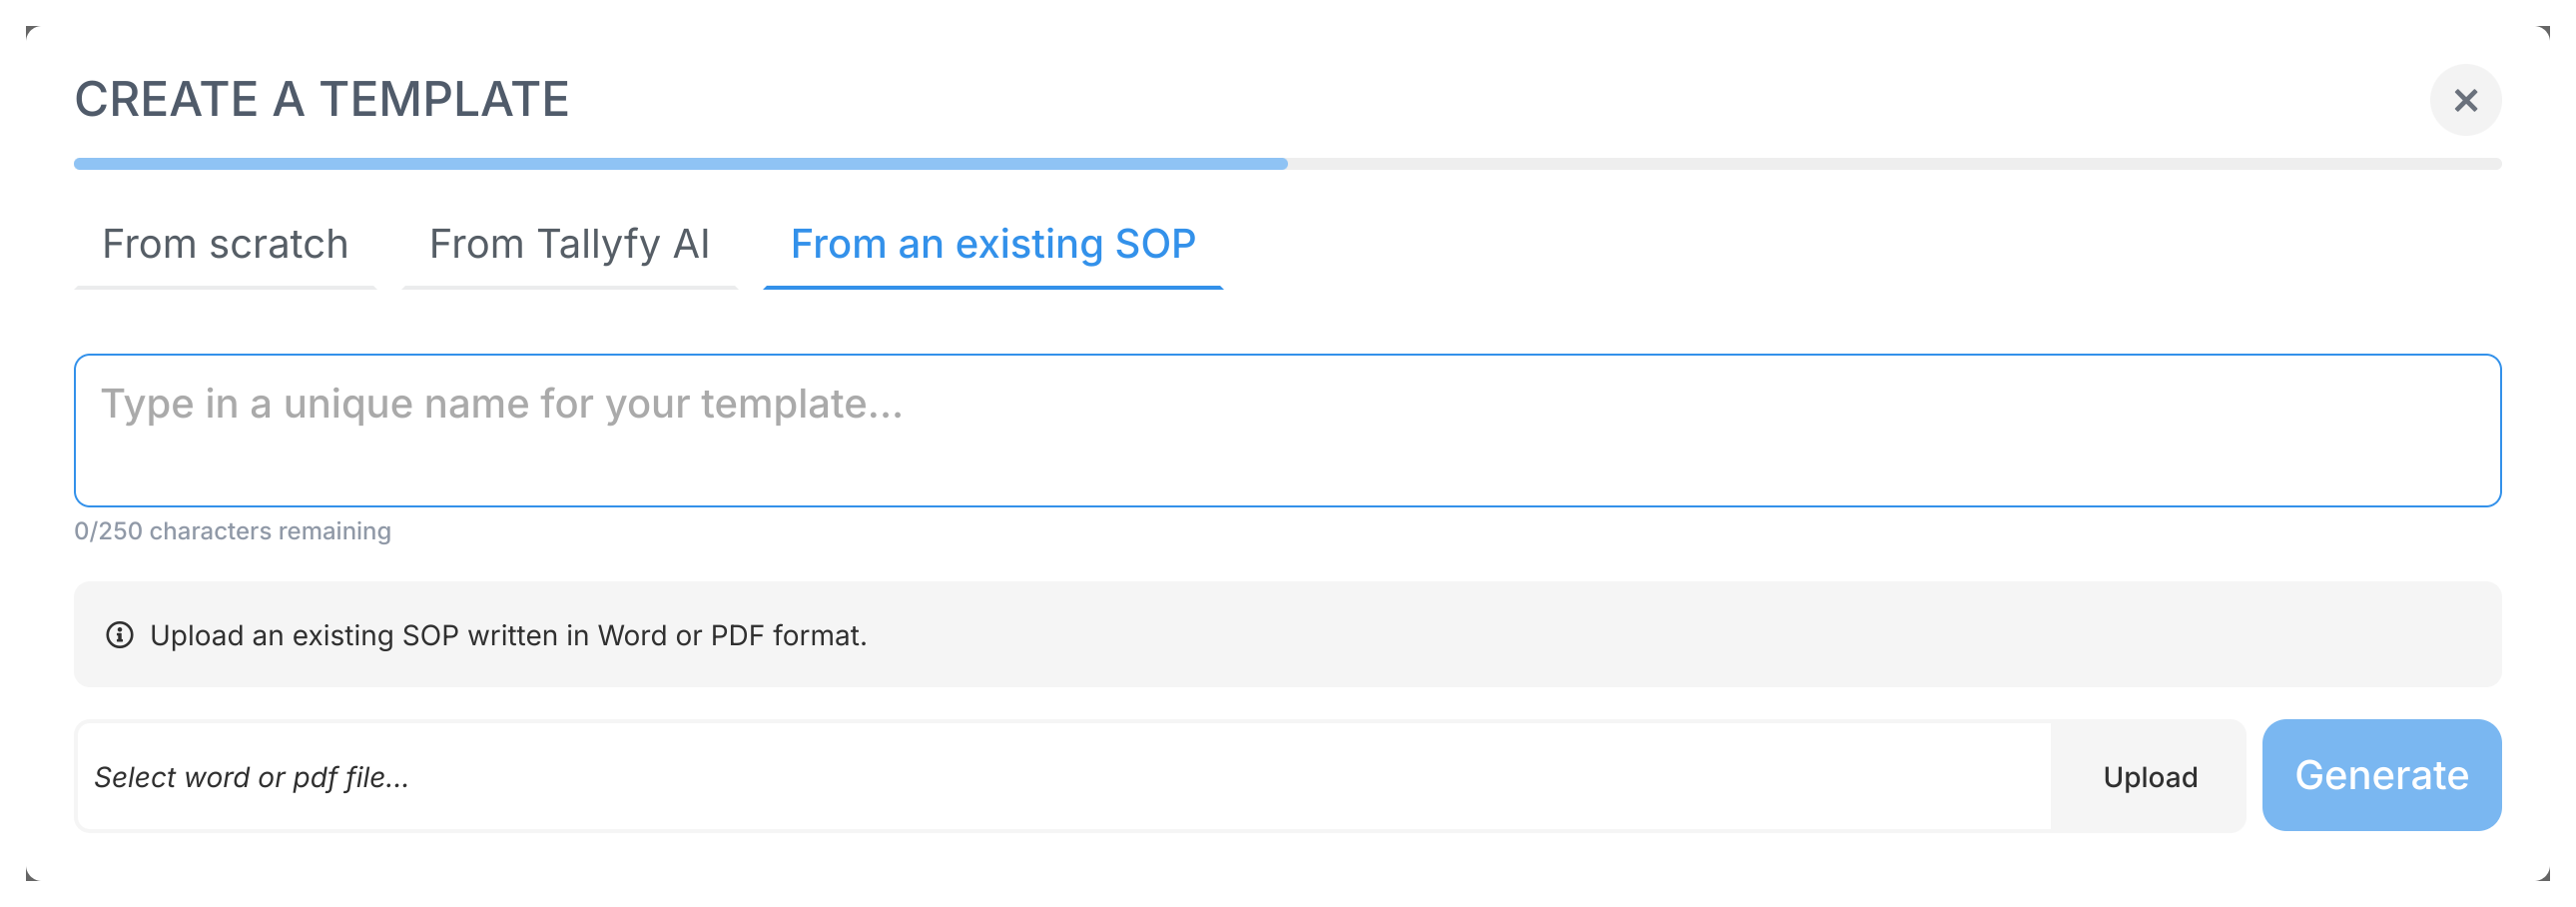
Sometimes you need every word exactly as written - no AI interpretation. Think compliance docs, legal requirements, audited SOPs. There’s no one-click “exact import” button, but here’s the workaround: convert your document to clean HTML first, then paste it into Tallyfy.
Why use exact import?
Convert to HTML - use an AI tool (ChatGPT, Claude, Gemini) to convert your document into clean HTML. Use a specific prompt:
Example AI Prompt:
I will upload a PDF of a process (SOP). Your job is to exactly convert every part of the file without changing anything at all into HTML. You must not change any content - it must remain like-for-like. You must cleanly convert tables into HTML tables. You can include the first header in the document if there is one but you don't need to add headers for every page in the document - just the first page. You must use proper semantic headings such as h1, h2, h3, h4, etc. as you see them in the document itself. You must not add any styling or CSS at all unless bold or italic is strictly necessary and occurs in the original document. Ignore all colors in the original document. If you see images in the original document, ignore those but leave a placeholder and caption to indicate where the image would go. All your output must be HTML markup that is clean and structured.Check HTML mode - go to Settings > Organization in Tallyfy and confirm HTML editor mode is enabled. With HTML mode, you can also create advanced features like mailto: links with variables
Paste HTML - create a new template From scratch. Switch the editor to HTML mode, then paste only the <body> content from the AI’s output. Skip the <head> and <html> tags.
Review and save - check how it looks in Tallyfy. It should mirror your original document exactly.
Video demonstration:
Learn how to edit and customize your template - add steps, set up automation rules, create form fields. You can also organize templates into folders to keep things tidy.
Tutorials > Create your first template
Use Cases > Import a document as a template