Automations > Conditional visibility
Tallyfy lets you show or hide entire workflow tasks based on form field values using IF-THEN…
Visibility actions let you Show or Hide specific steps based on conditions. They’re smart switches - users see exactly what they need, when they need it.
Example 1 - CFO approval for big purchases:
IF (Purchase Amount field) is ">$10,000"THEN SHOW step "Approval by CFO"The CFO approval step appears automatically for purchases over $10k.
Example 2 - Skip irrelevant reviews:
IF (Customer Type field) is "Small Business"THEN HIDE step "Enterprise Security Review"Small business customers skip the enterprise security review entirely.
Example 3 - Adapt to user input:
IF (Application Type field) is "Mortgage"THEN SHOW steps "Credit Check", "Property Valuation", and "Underwriting"Selecting “Mortgage” reveals all mortgage-specific steps at once.
Here’s what it looks like in action:
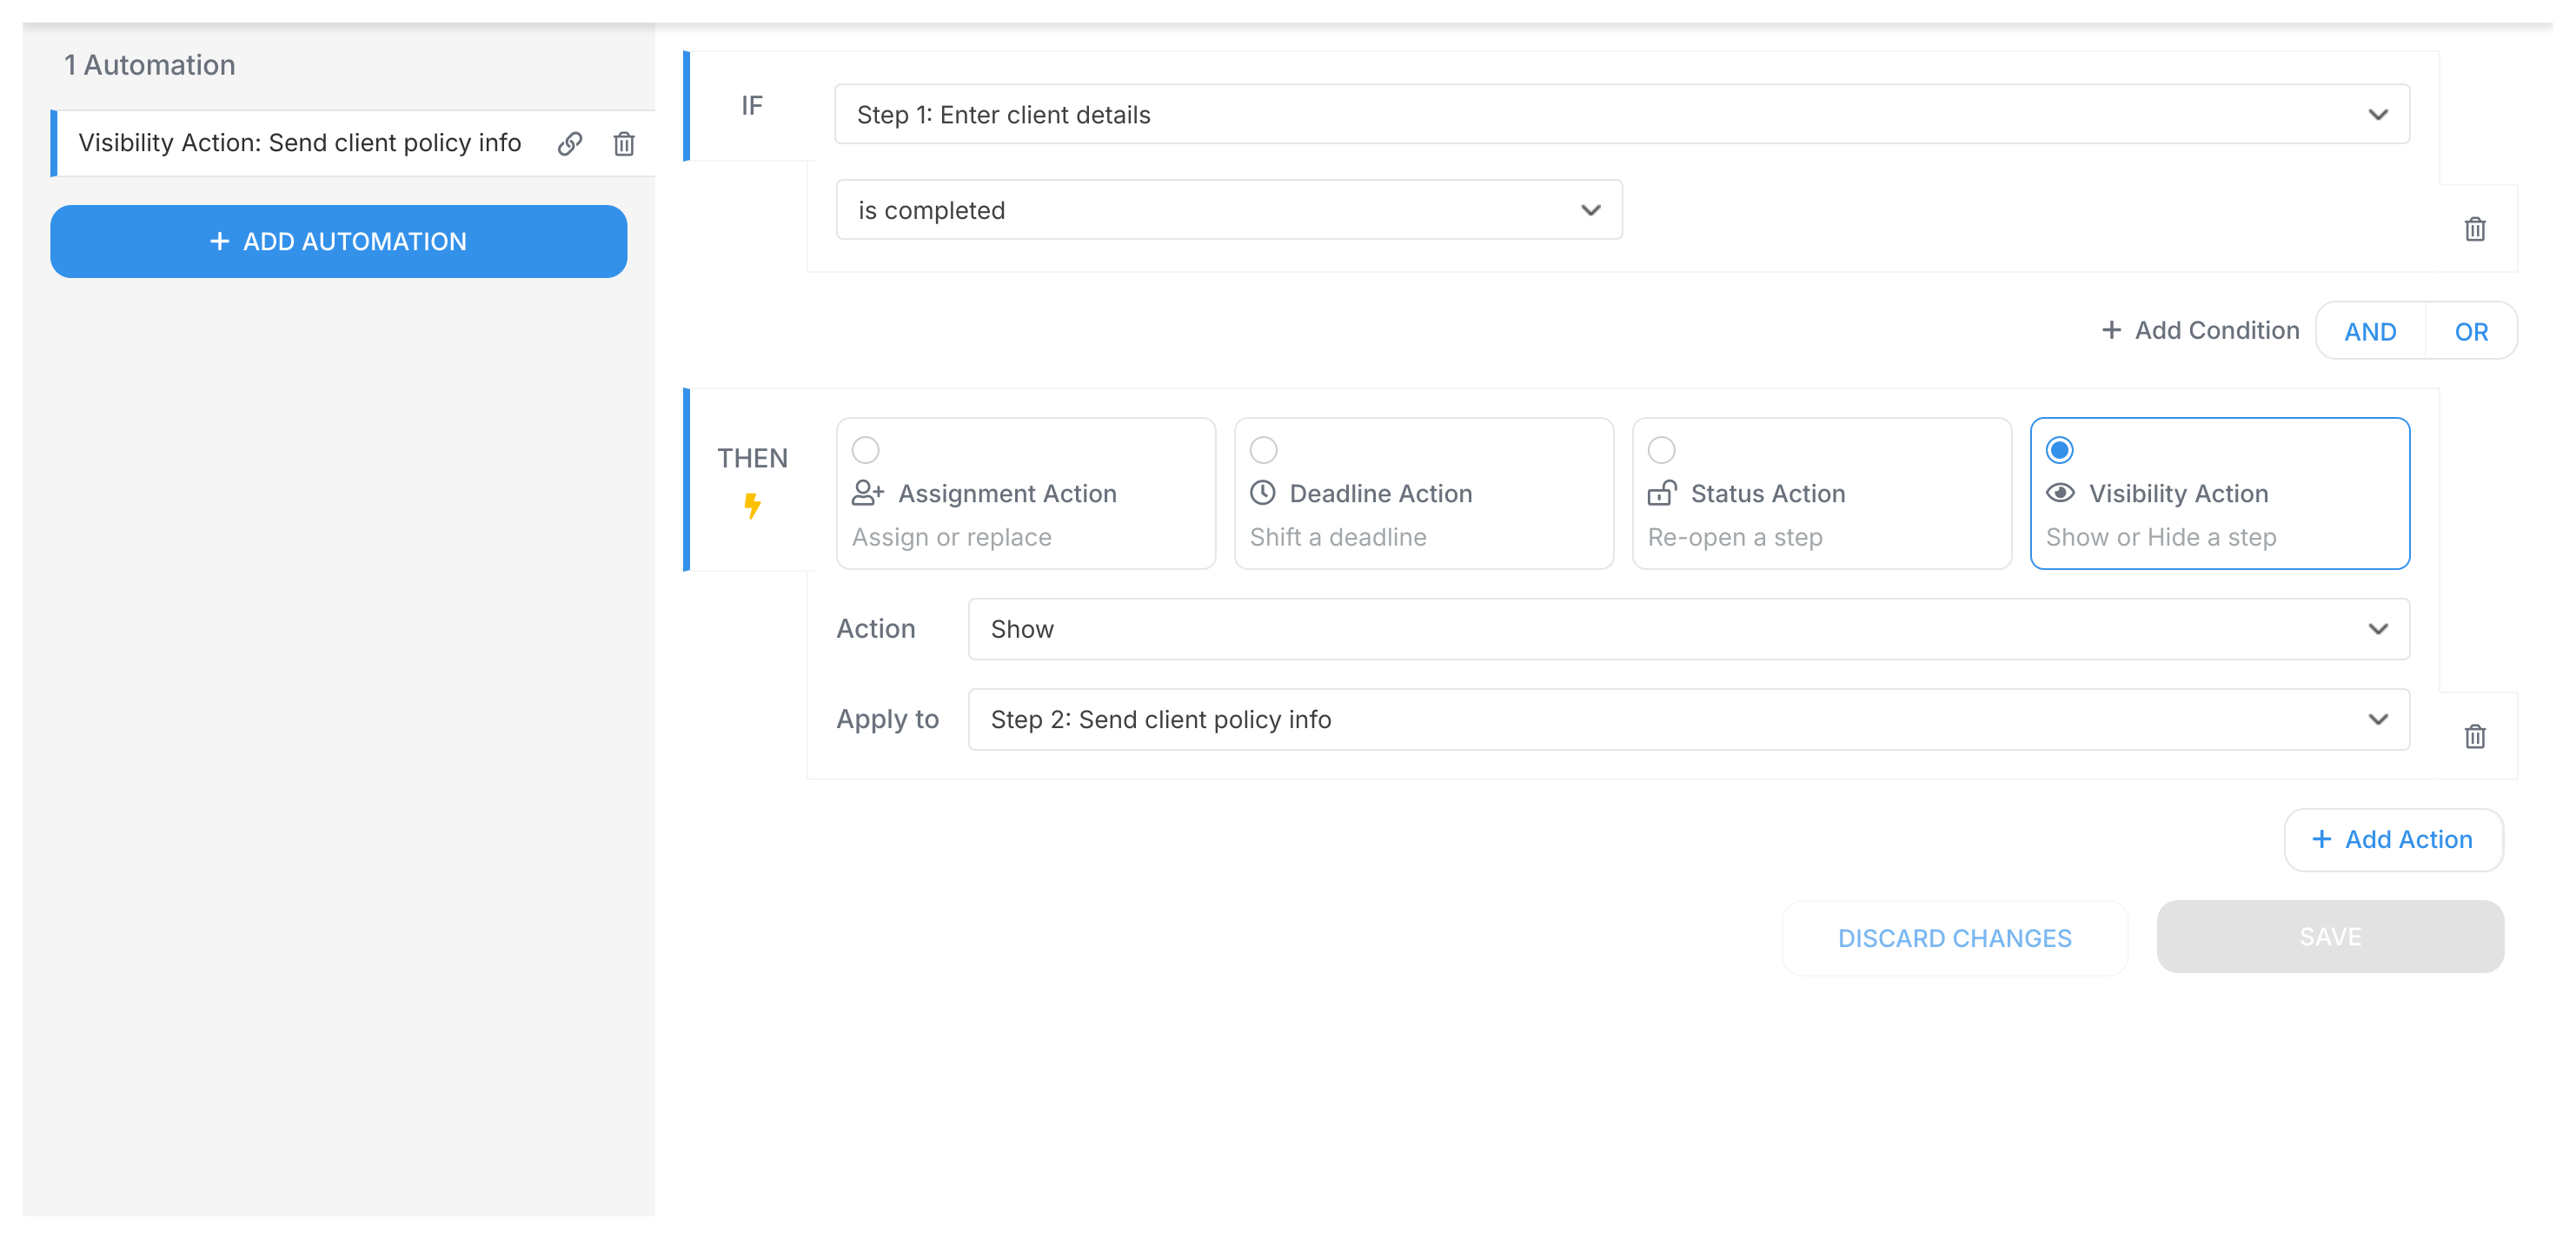
Completing one step makes the next one appear. That’s visibility automation at work.
Hidden steps can’t be completed
Hidden steps have an internal status of auto-skipped and can’t be completed. Any automation checking “if step is complete” on a hidden step won’t trigger - unless another rule makes that step visible first.
Only create completion-based automations for steps users can actually see. You can also manually show or hide steps using the three-dot menu on any task.
All tasks show up when someone launches a procedure template. To keep certain tasks hidden until the right moment:
Hidden steps stay out of sight until a Show automation brings them back.
Sometimes Task B shouldn’t start until Task A is done. You can force tasks to appear in sequence using hidden tasks and Show visibility actions in your automations2.
(Step Status) for Task A is Completed(Visibility) SHOW Task B(Step Status) for Task B is Completed(Visibility) SHOW Task CThe result:
You can chain as many tasks as you need this way.
Automations > Conditional visibility
Tutorials > Create an automation
Tasks > Manually show or hide tasks