How to automate document signing using middleware Connect Tallyfy to e-signature services like DocuSign or HelloSign through middleware tools. When someone completes a workflow step, documents automatically go out for signing. No manual work. Most teams save 15-20 minutes per document1
A Tallyfy account with webhook access
A middleware account (Zapier, Power Automate, or Make.com)
An e-signature service account (DocuSign or HelloSign)
A document template ready in your signature service
Create a workflow in your middleware tool that receives data from Tallyfy.
Set up a Tallyfy process with form fields to collect what your document needs - name, email, contract terms, etc.
Add a webhook to the Tallyfy step that should trigger signing.
Connect your e-signature service in the middleware tool.
Test everything and activate the automation .
Document signing automation flow Key points:
Steps 2-3 : The webhook fires2 Step 4 : Middleware handles field mapping - set it up once and it works every timeSteps 7-8 : The optional return path means Tallyfy knows when documents get signed without you checking
Step 1: Create a webhook listener in your middleware
Create a new workflow in your middleware tool (called a “Zap” in Zapier, “Flow” in Power Automate, or “Scenario” in Make.com).
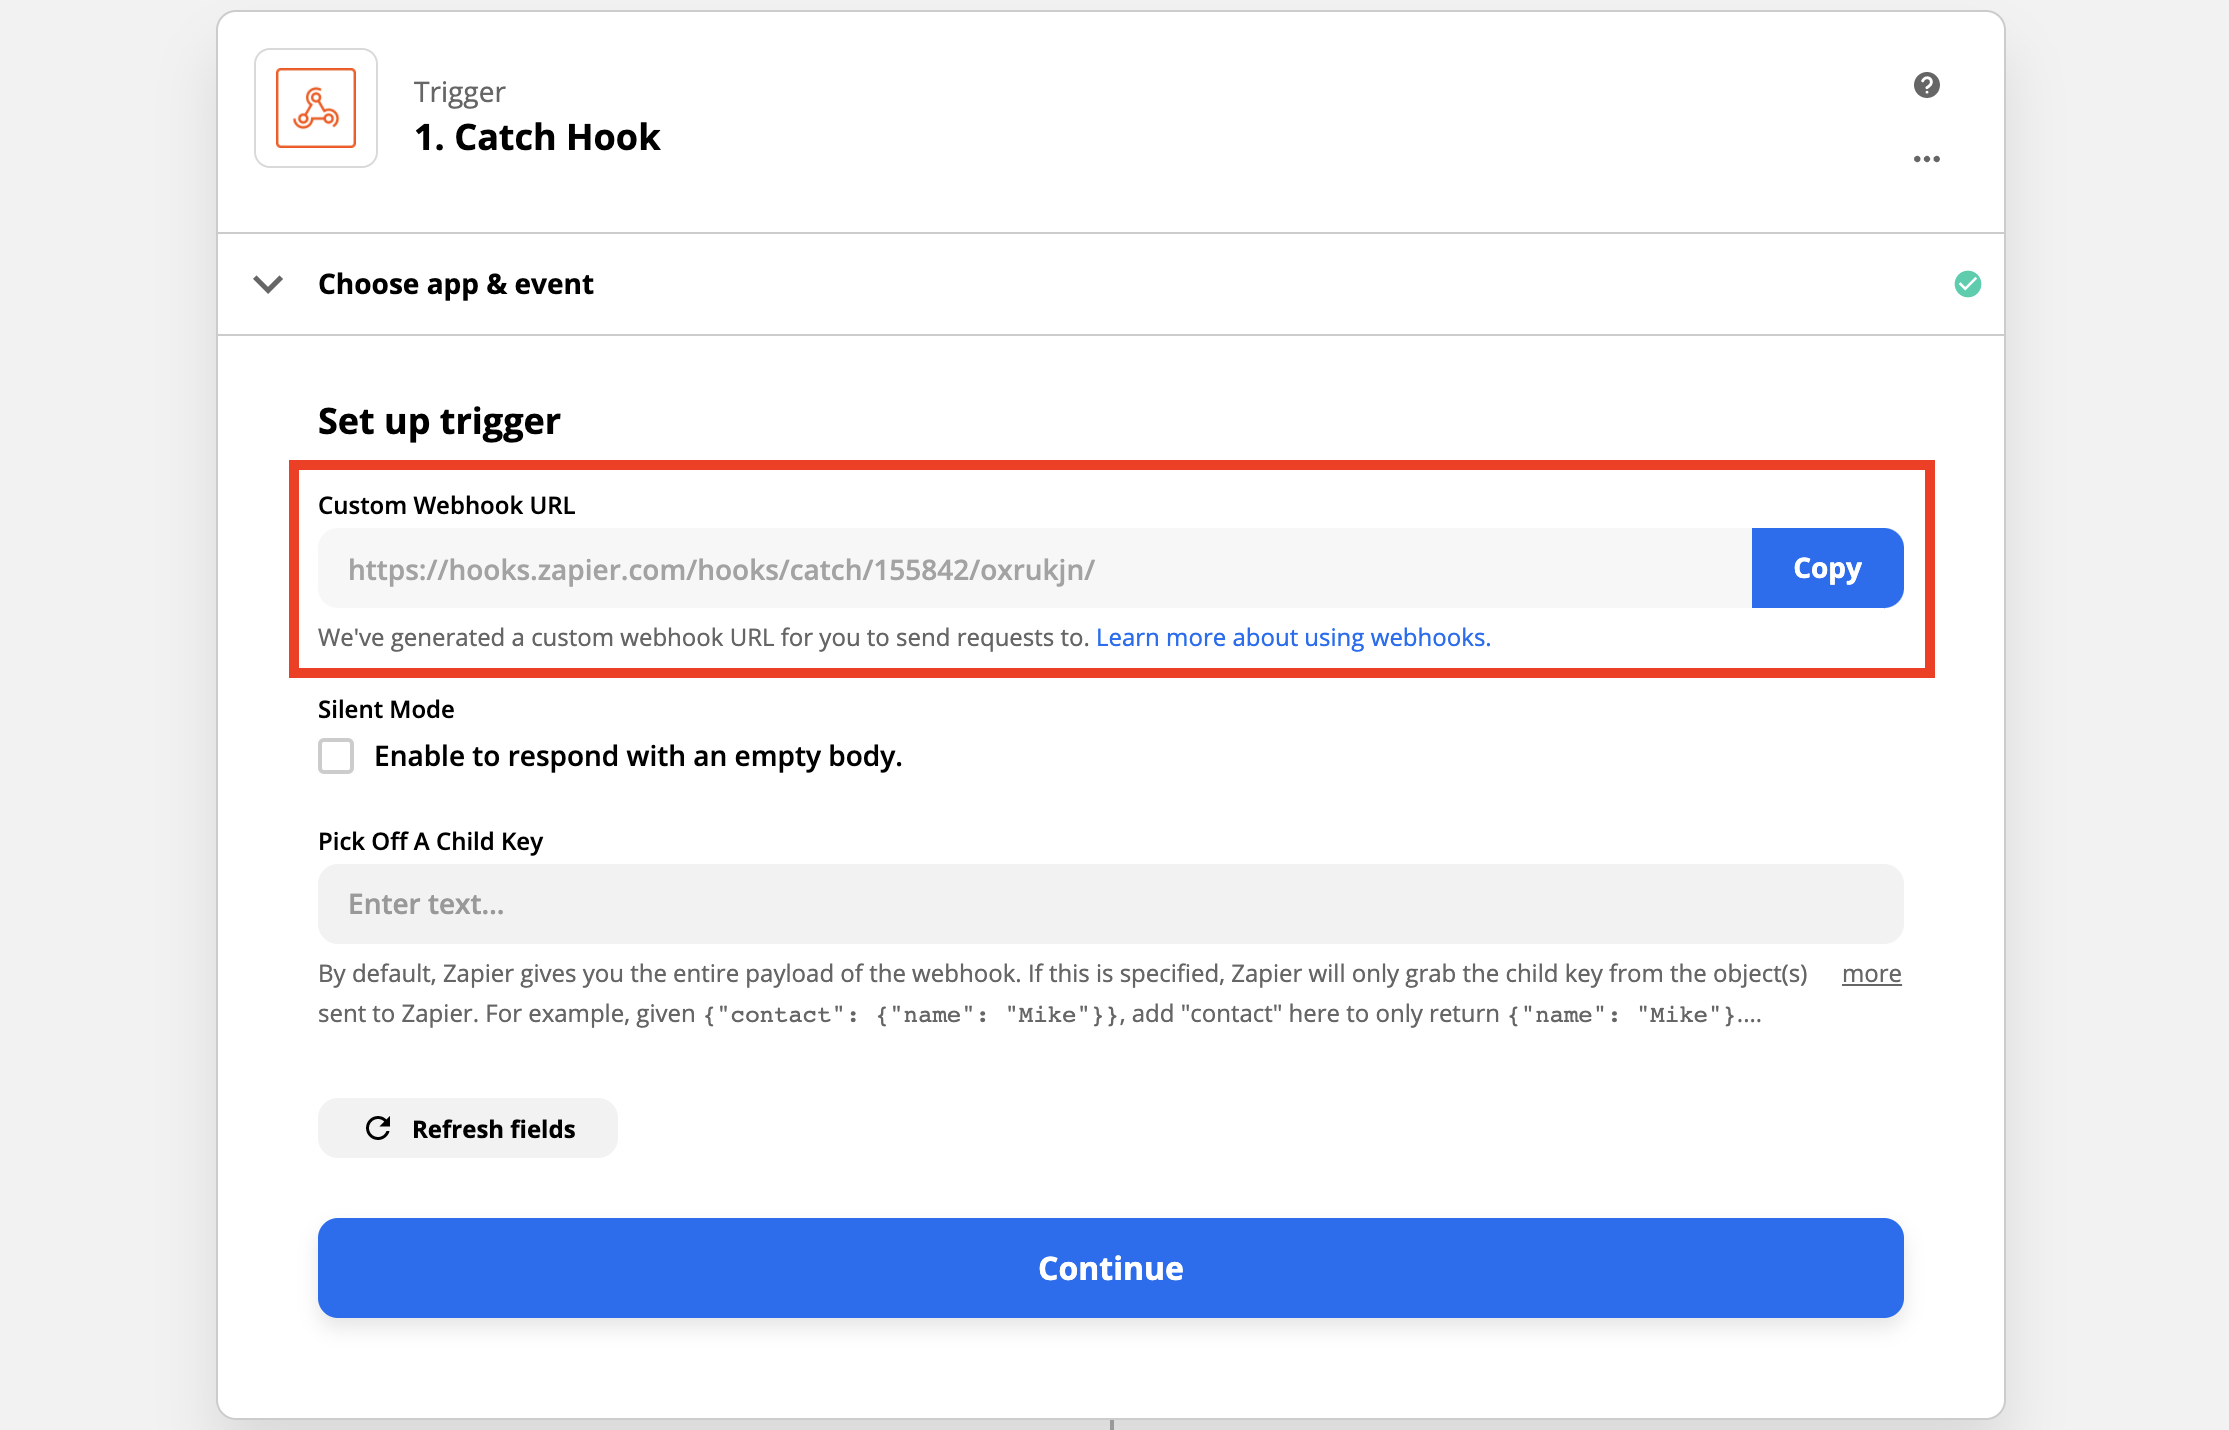
Choose “Webhooks” as the starting trigger.
Select “Catch Hook” or “When a HTTP request is received” as the trigger event.
Copy the unique URL your middleware gives you - Tallyfy sends data to this address.
Step 2: Set up your Tallyfy process
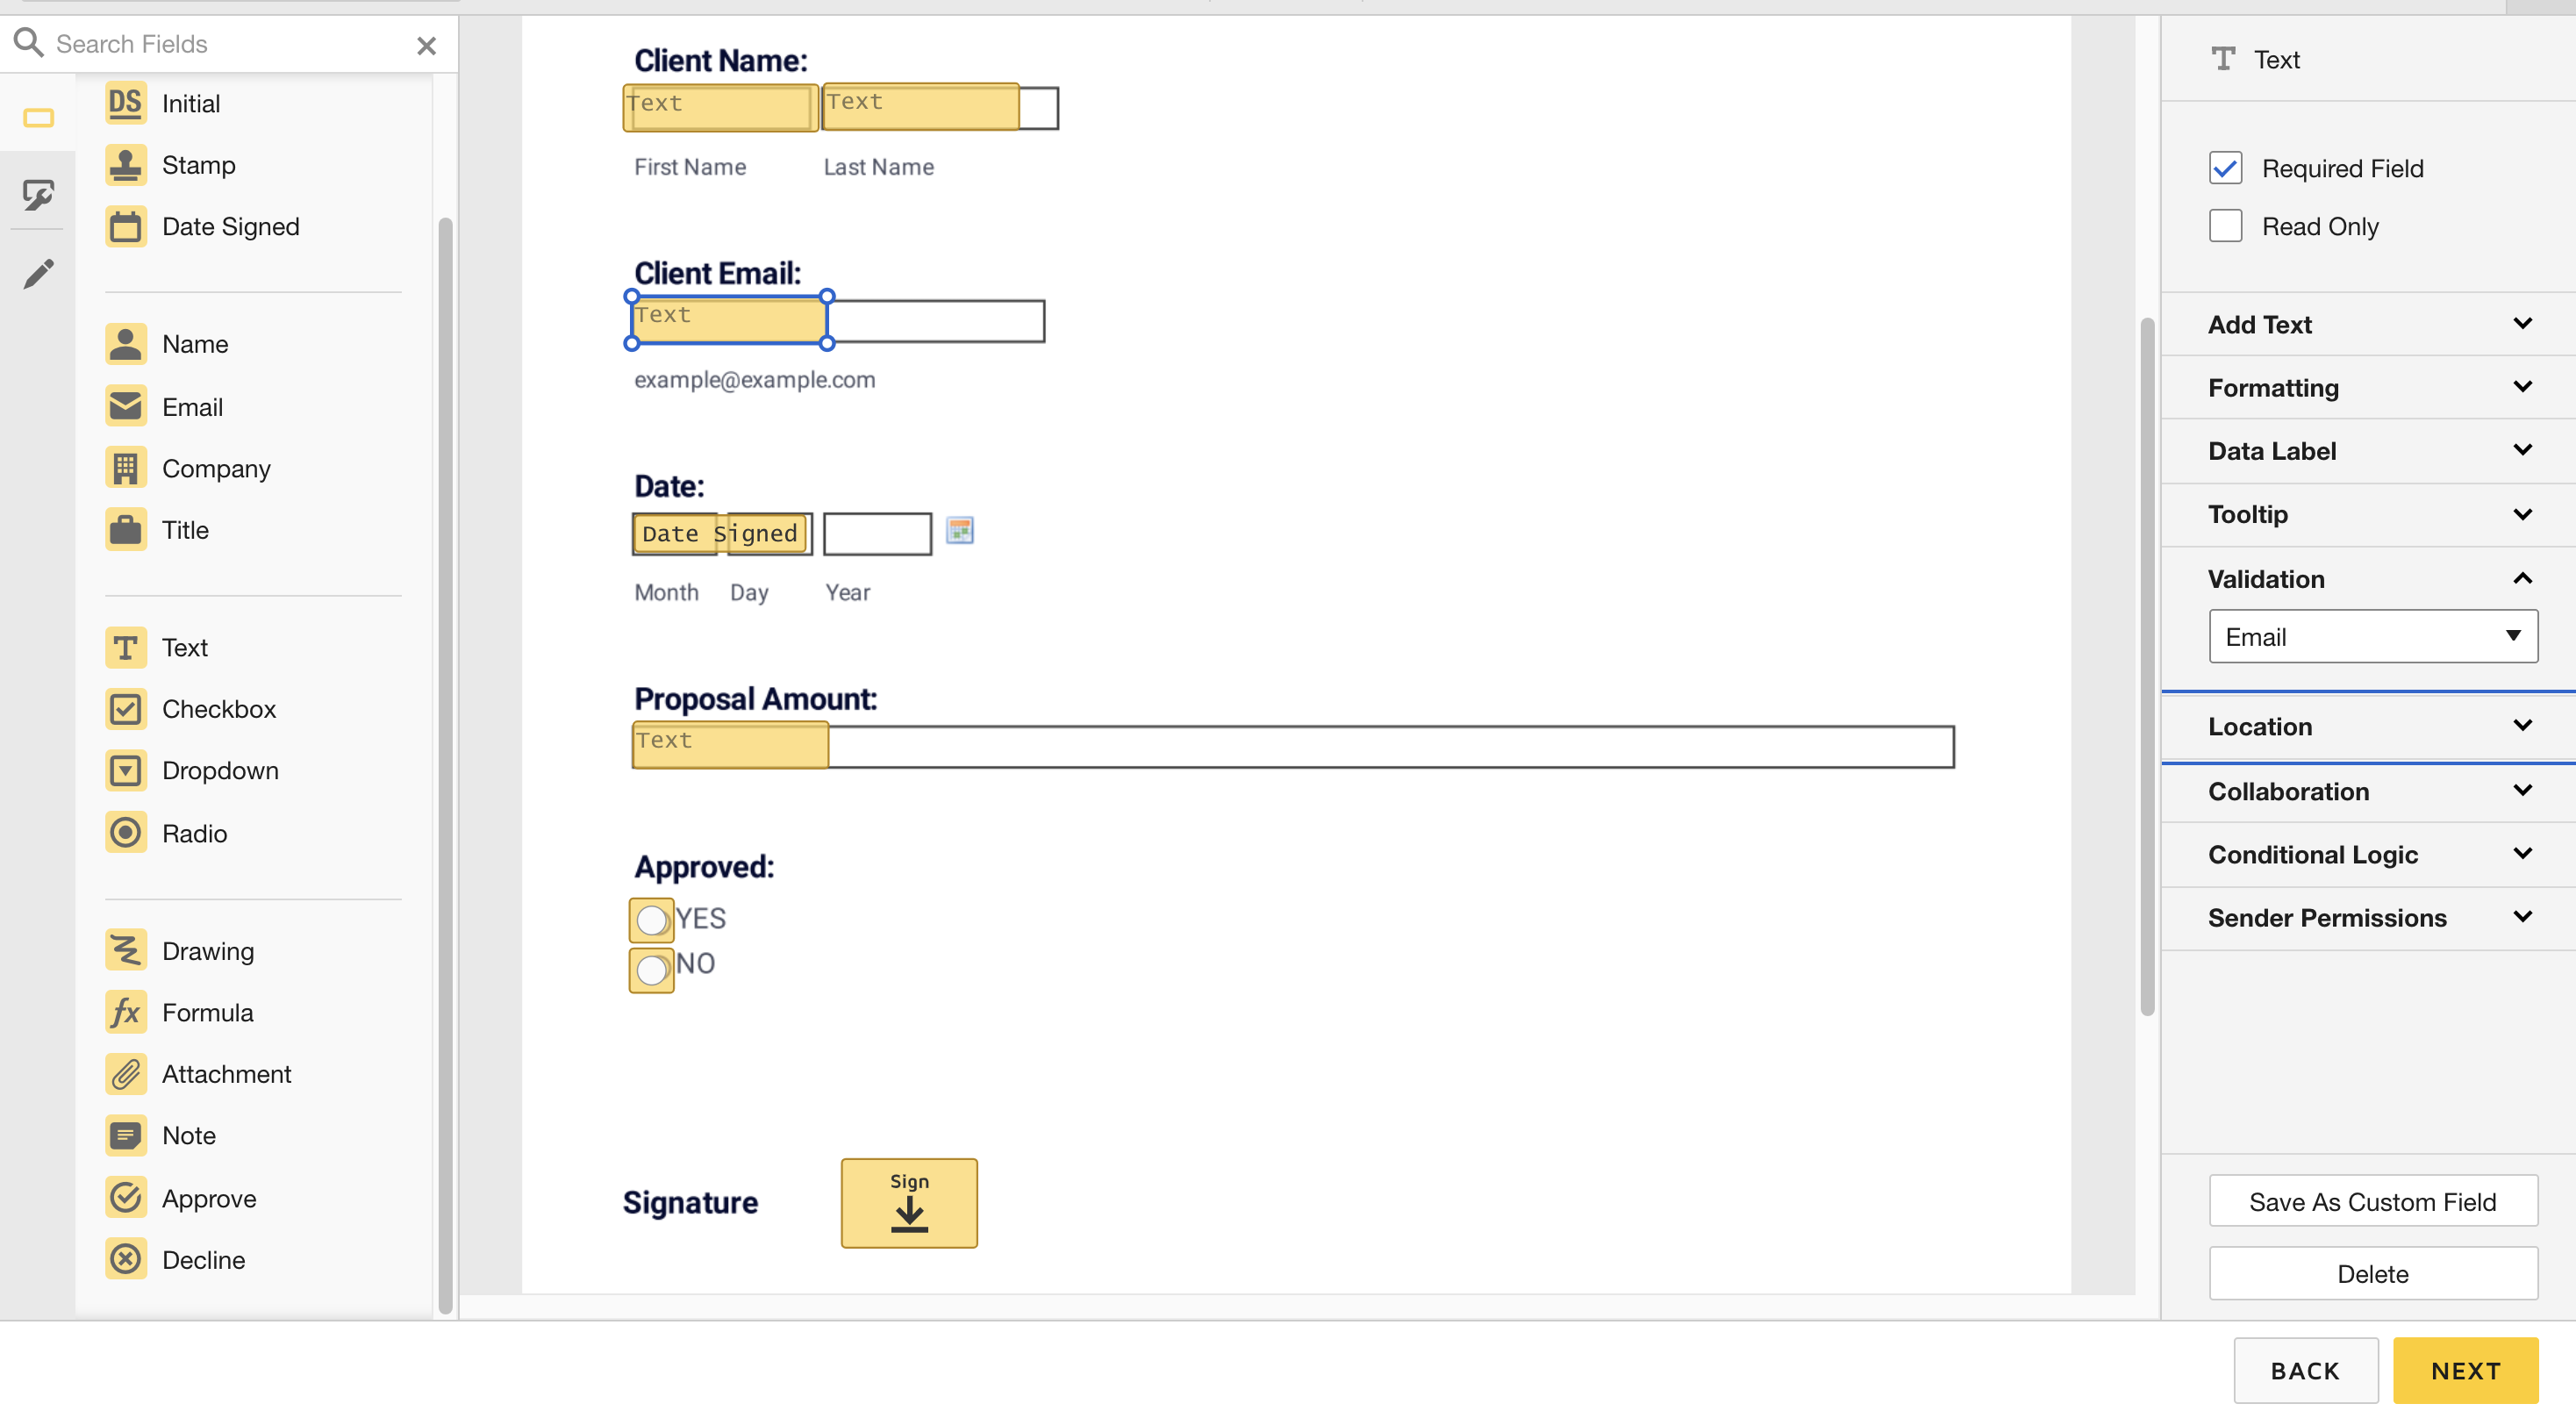
Create or edit a template in Tallyfy.
Add form fields to collect what your document needs - client name, email, contract details, etc.
Pick the step where document signing should trigger. When someone completes this step, the signature request goes out automatically.
Add the webhook URL from Step 1 to this step:
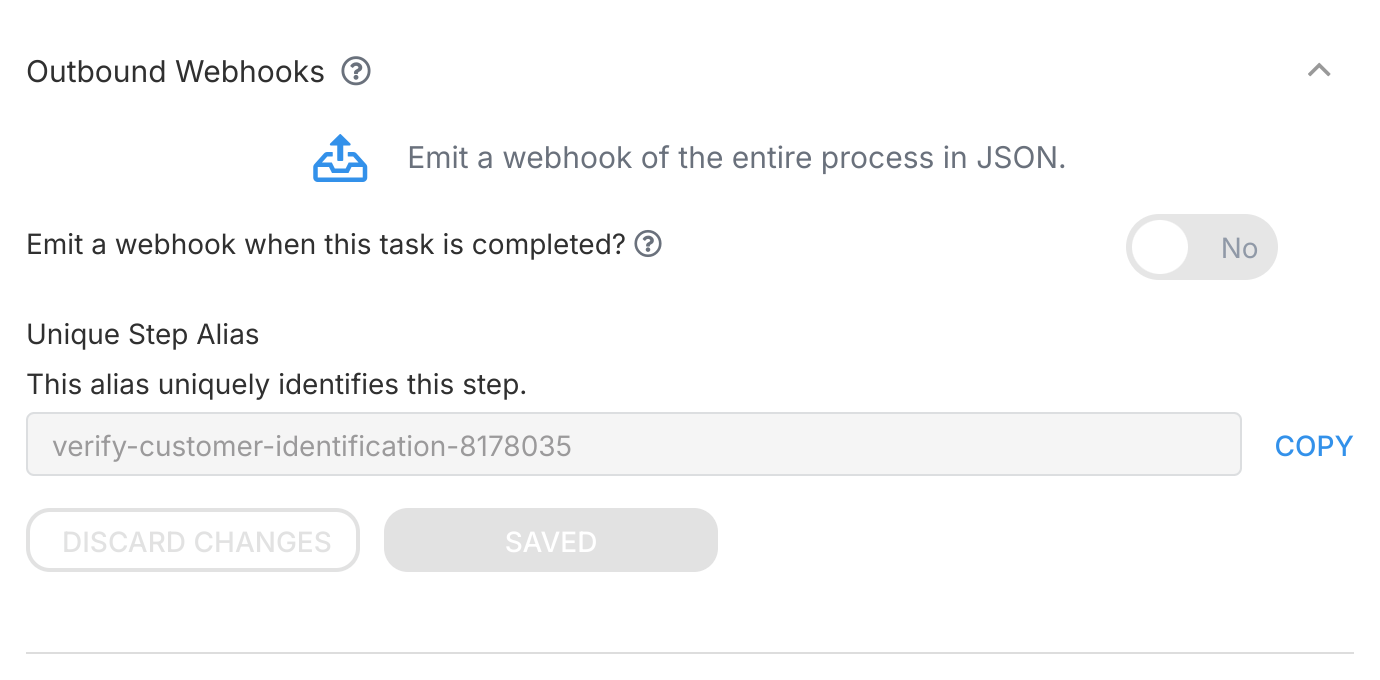
Click the settings icon for the step.
Go to the Outbound Webhooks
Paste the URL you copied from your middleware tool.
Choose which form field data to send.
Step 3: Connect your e-signature service in the middleware
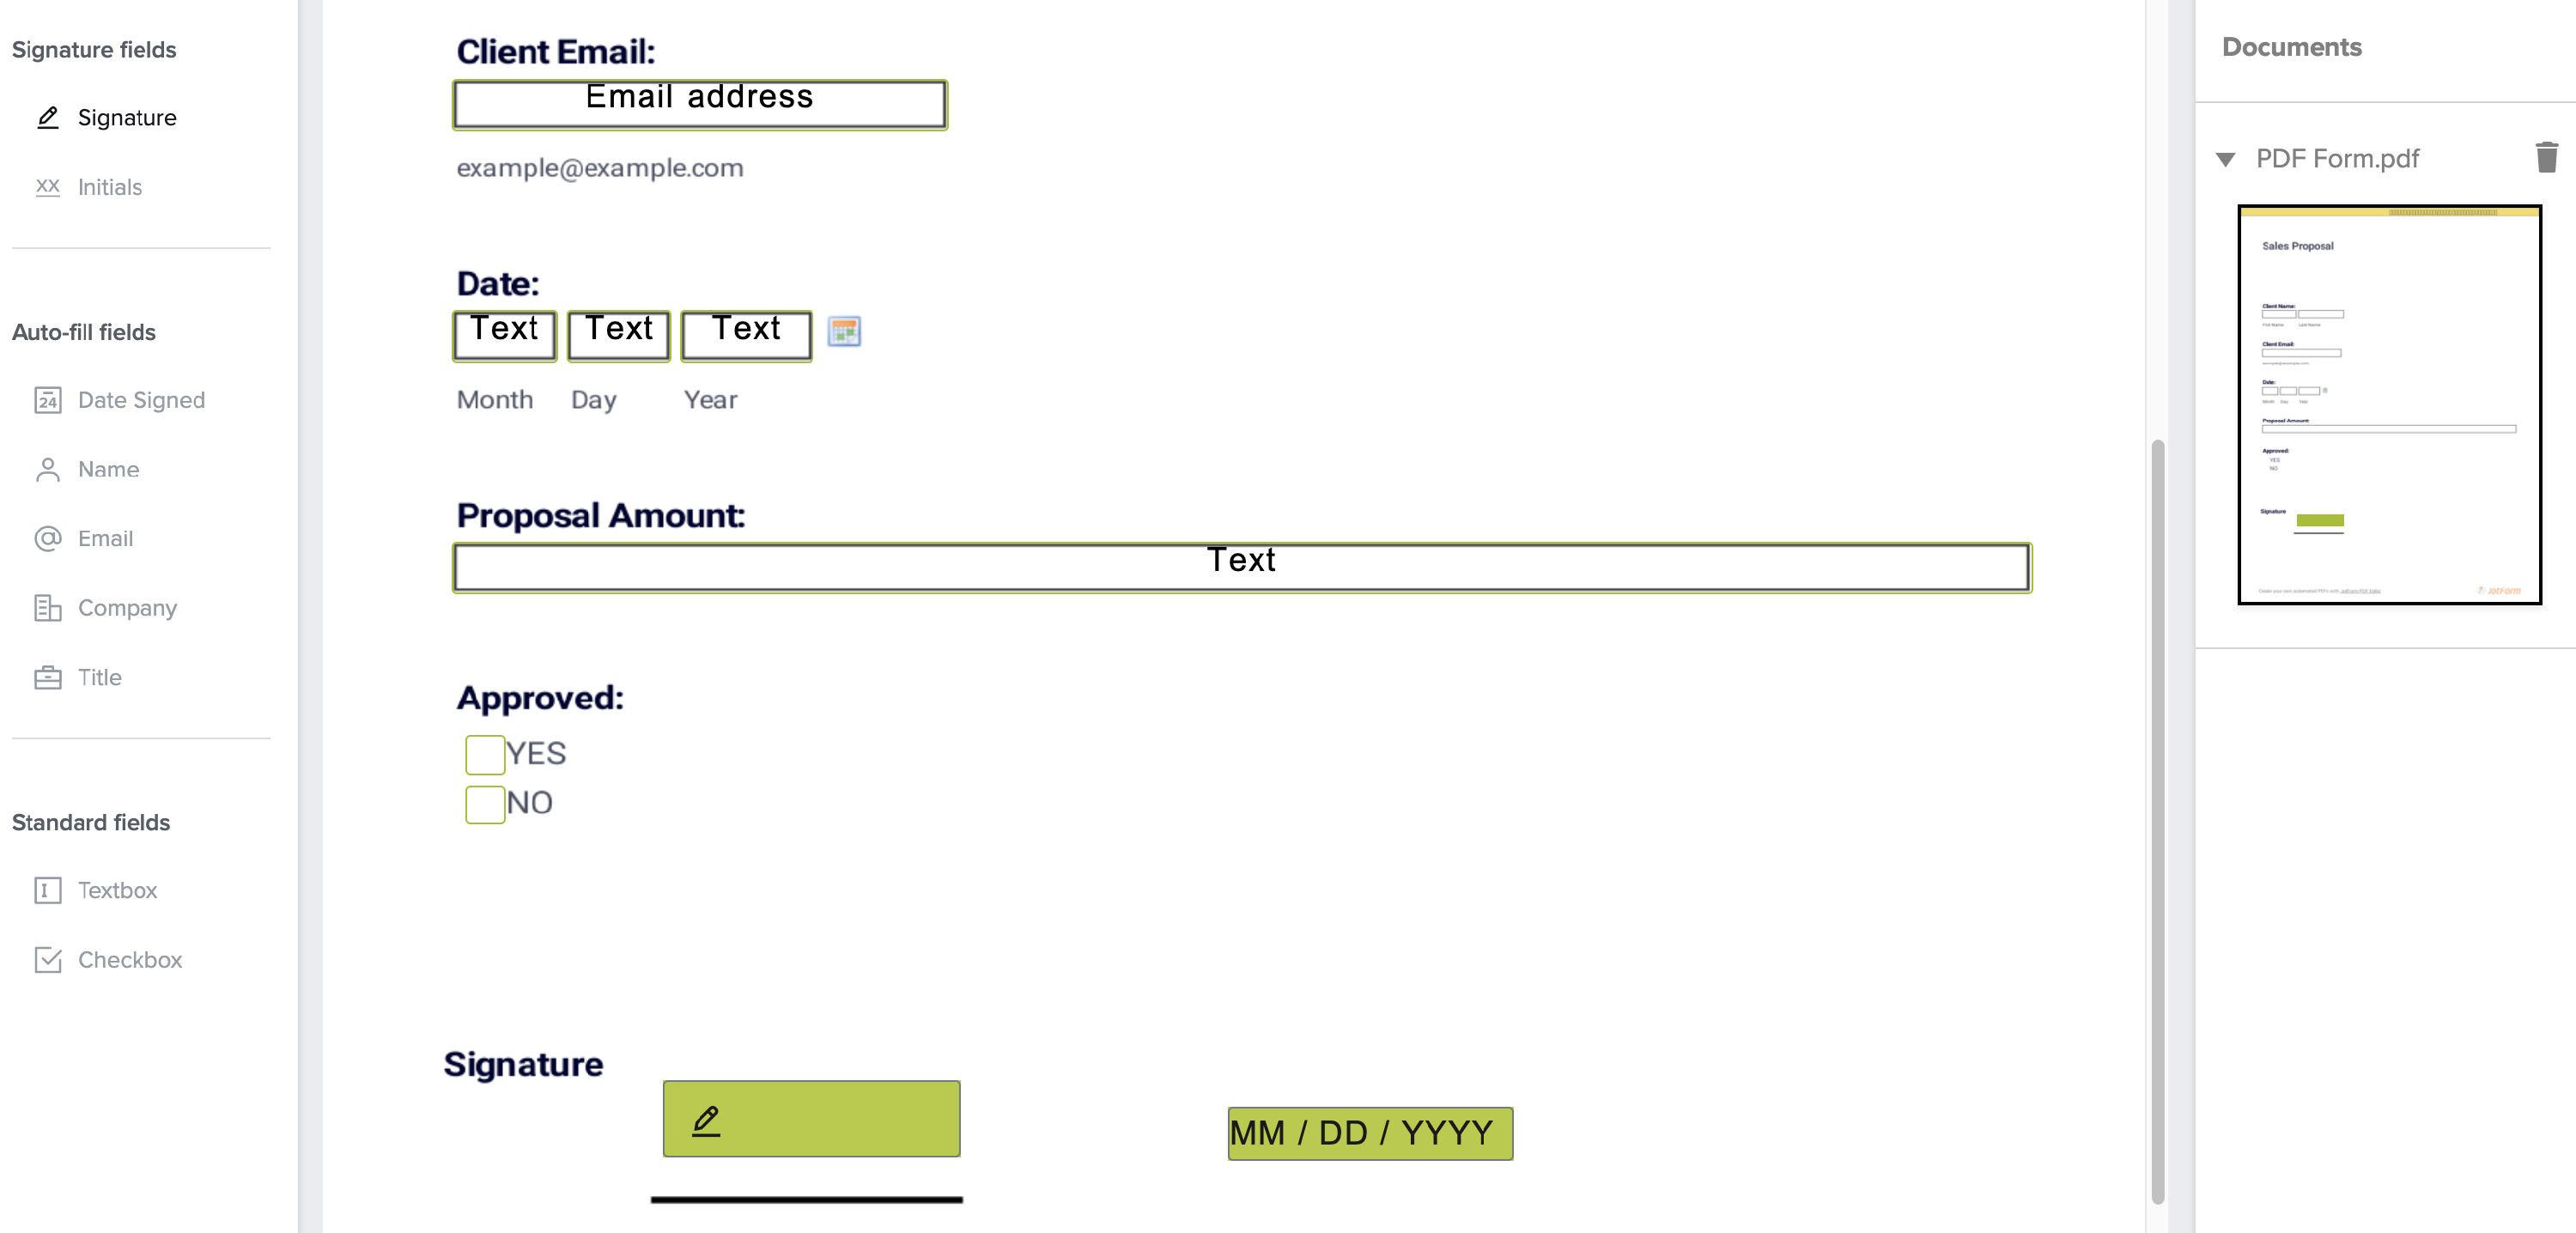
Prepare your document template in HelloSign with all signature fields and data spots marked.
In your middleware workflow, add a HelloSign action step after the webhook trigger.
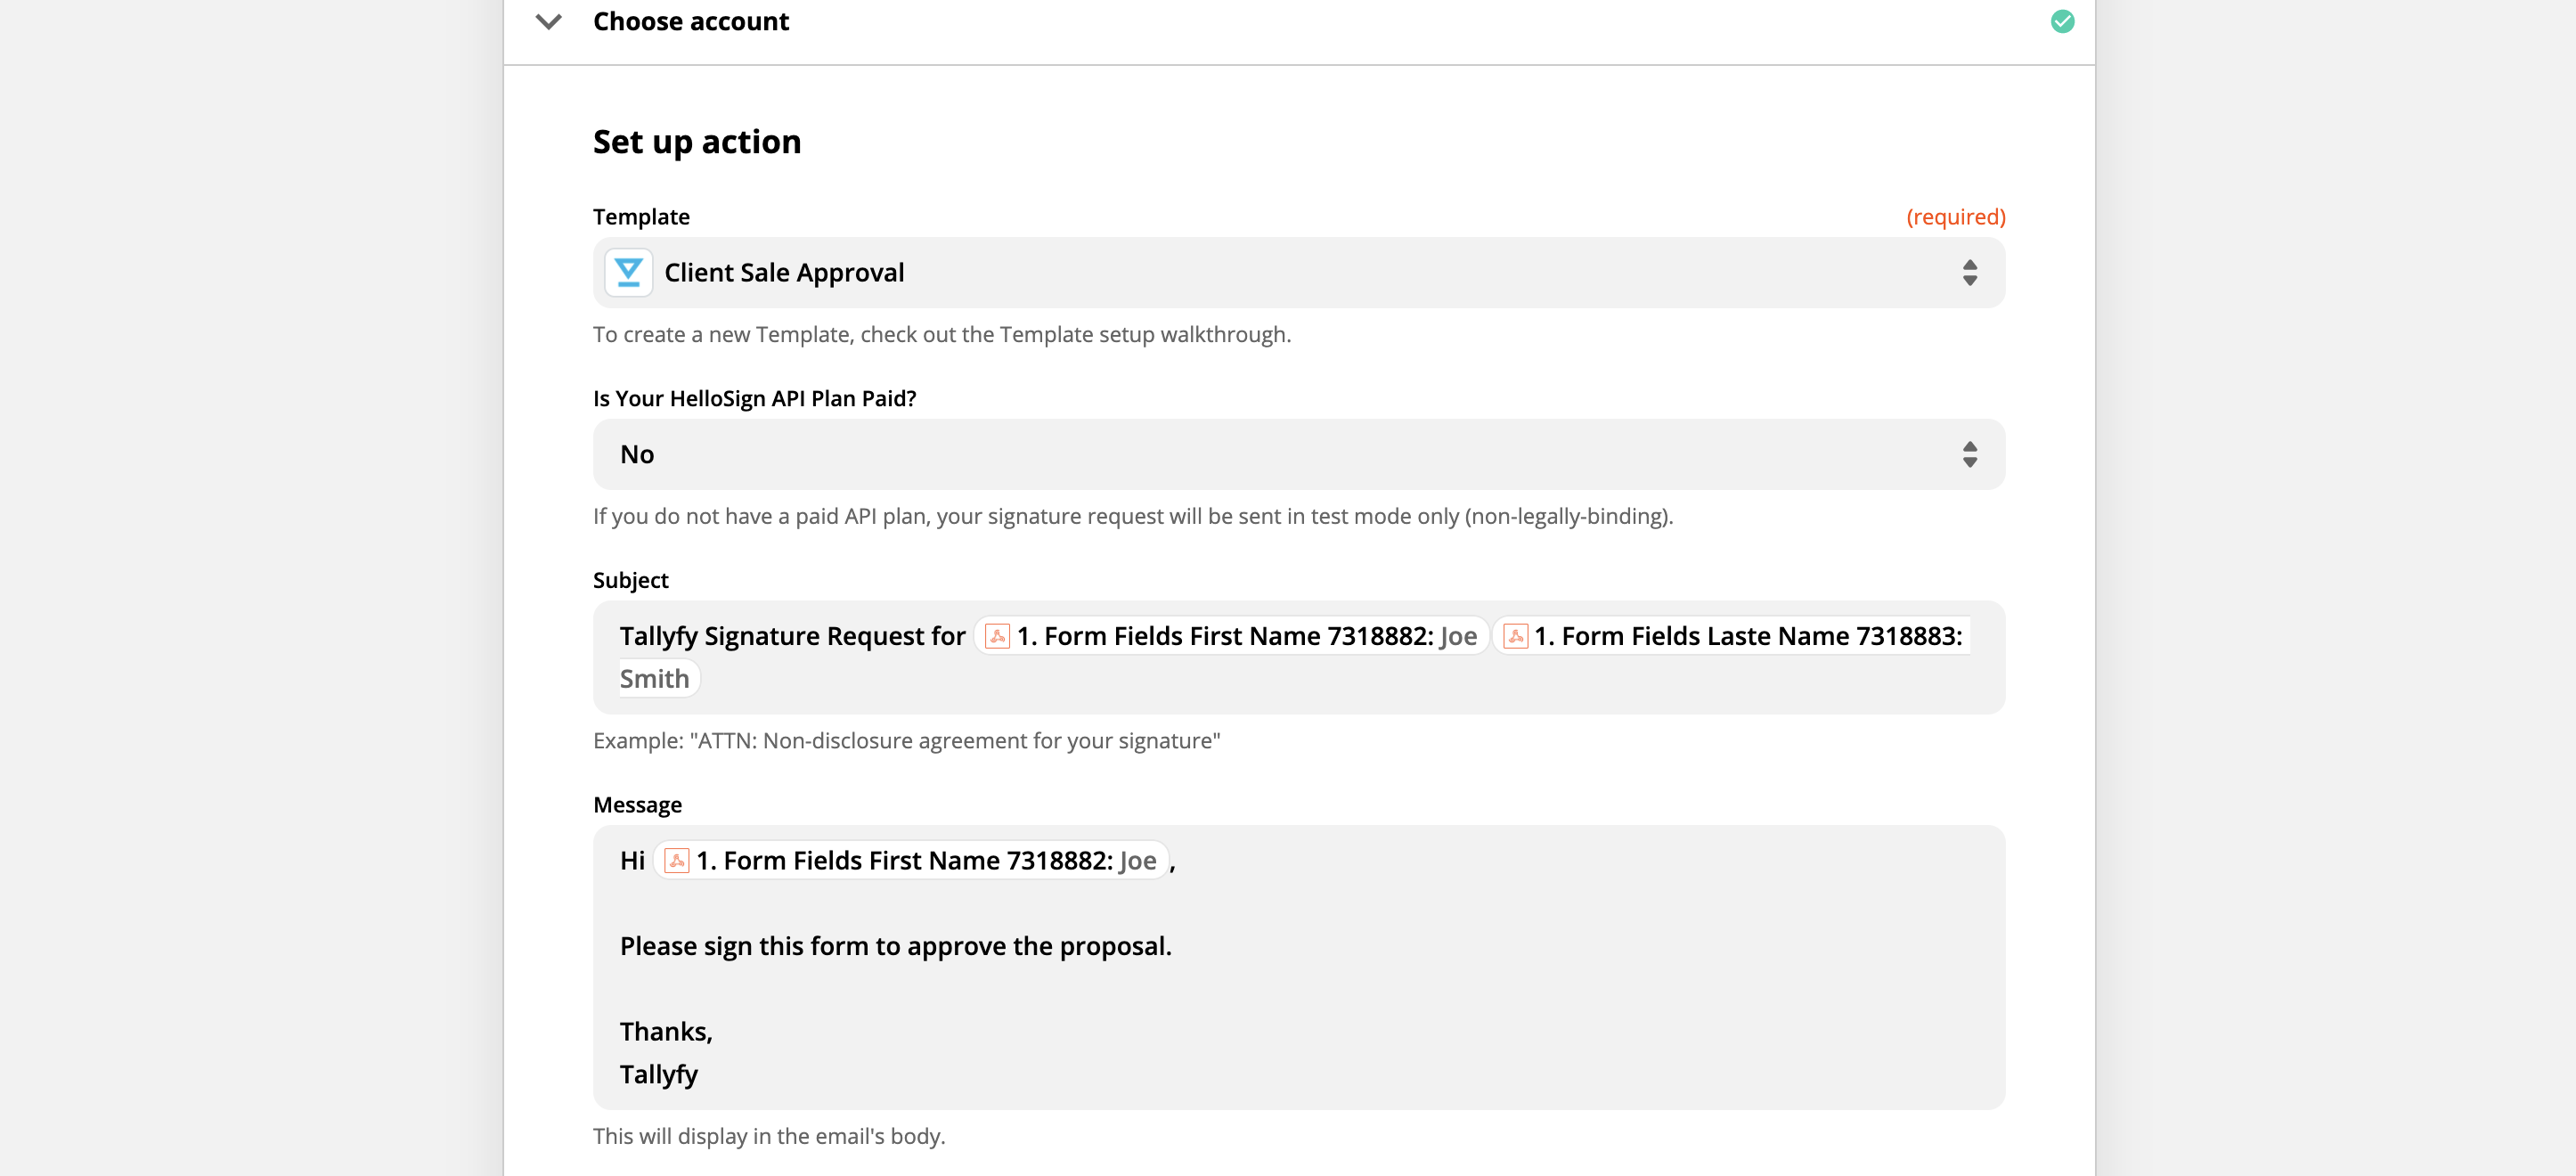
Choose “Send Signature Request From Template”.
Select your HelloSign template.
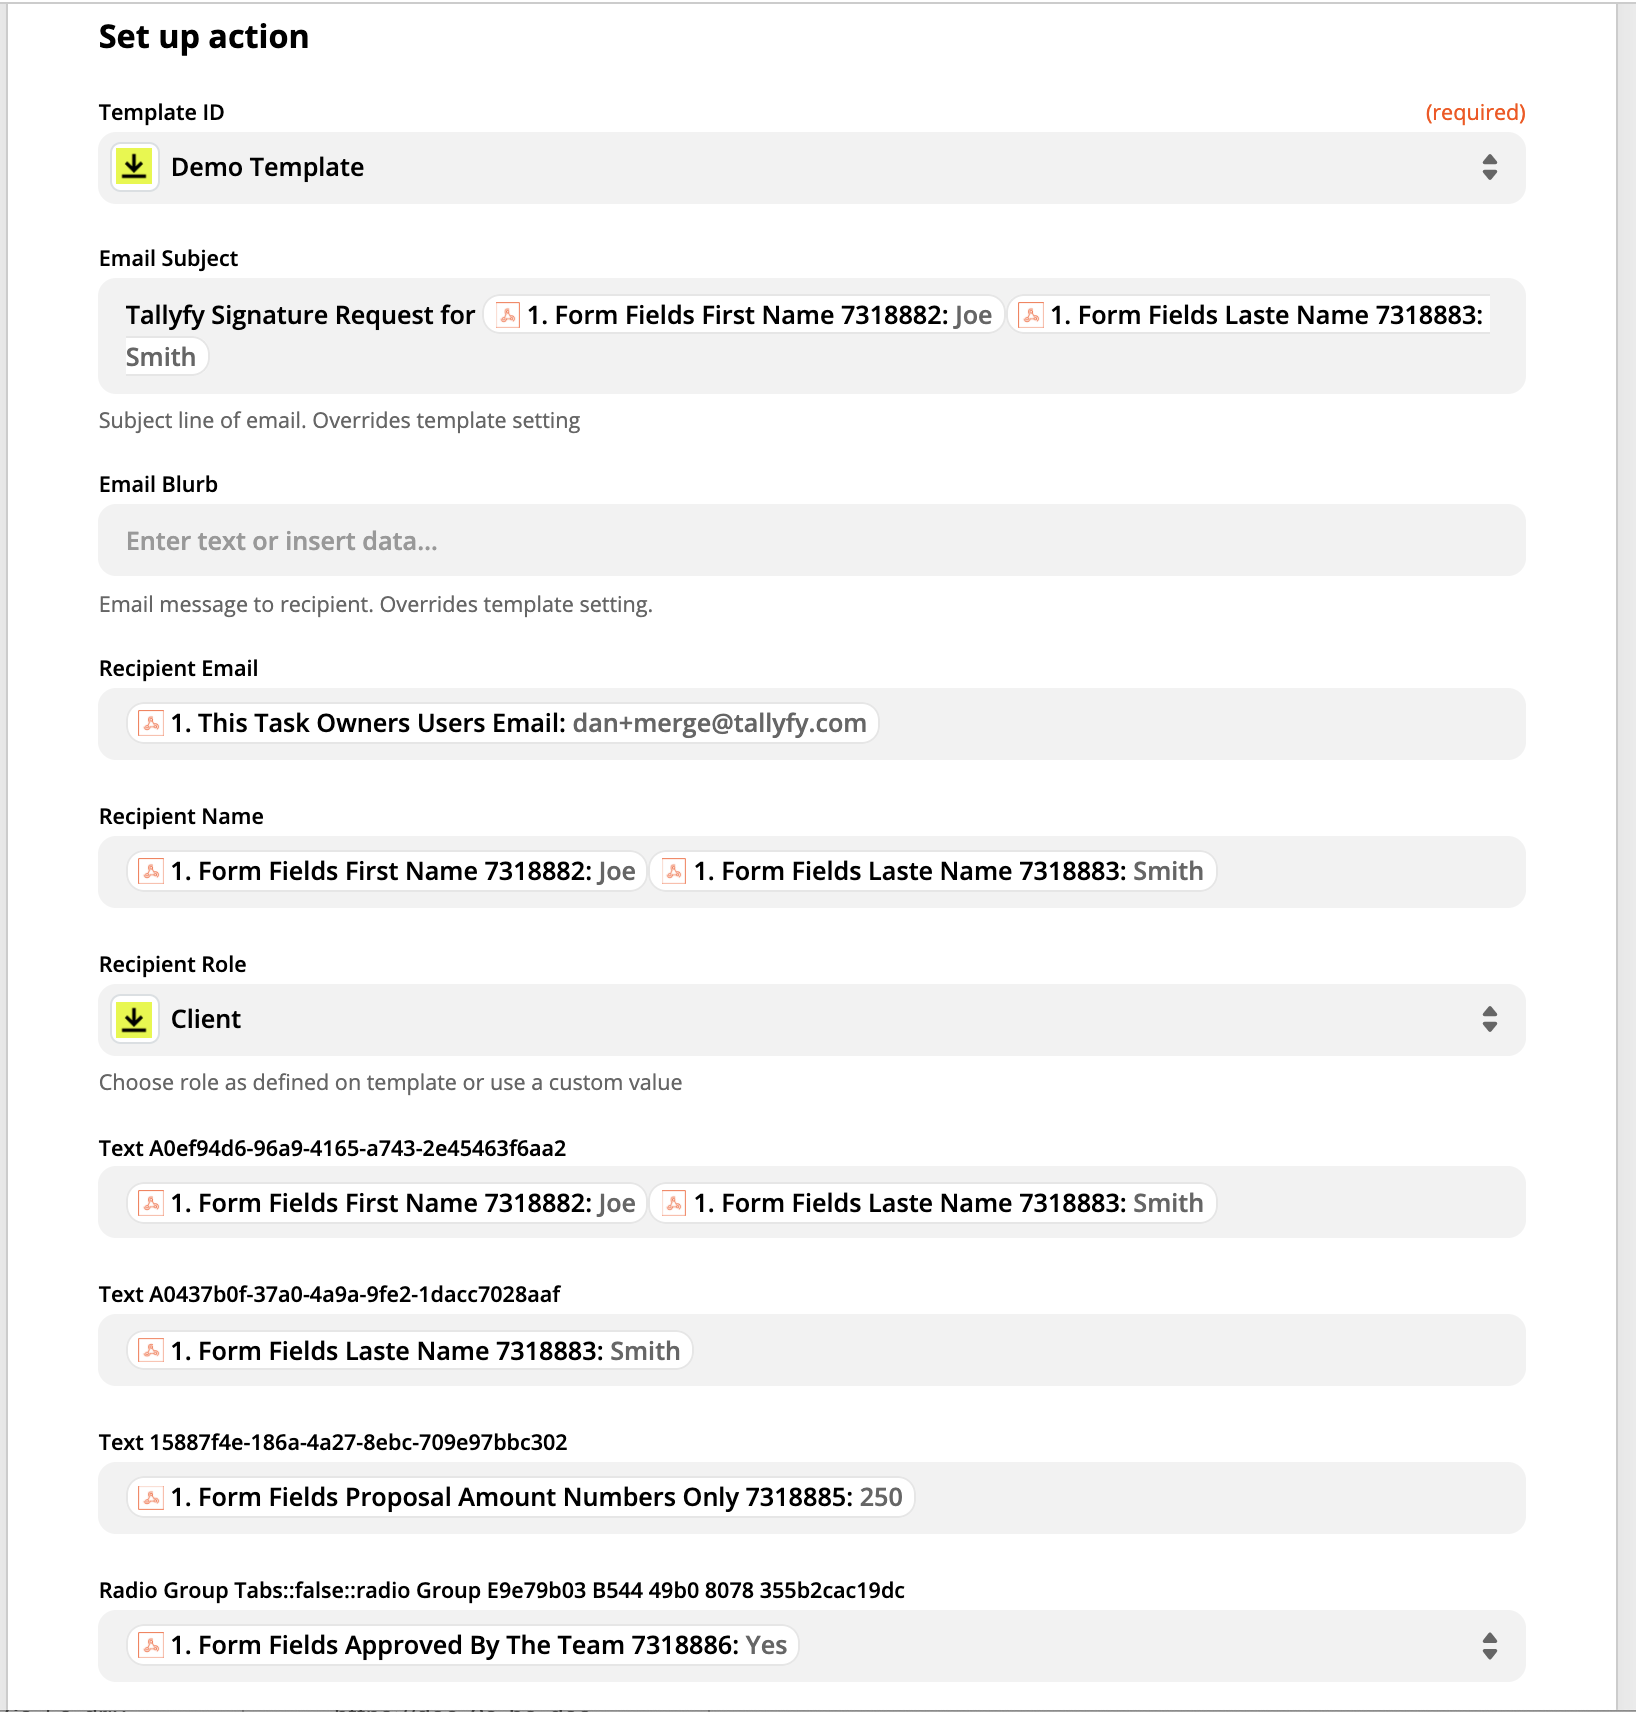
Map the Tallyfy fields to HelloSign fields - for example, Tallyfy’s ‘Client Name’ goes to HelloSign’s ‘Signer Name’.
Prepare your document template in DocuSign with signature and data fields marked.
In your middleware workflow, add a DocuSign action step after the webhook trigger.
Choose “Create Signature Request”.
Select your DocuSign template.
Map each Tallyfy field to the corresponding DocuSign field.
Step 4: Test and activate
Test your middleware workflow to confirm everything connects.
Launch a Tallyfy process with test data - use your own email to see it work.Complete the step that has the webhook attached.
Check your email for the signature request.
If it works, activate your middleware workflow. Look for “Publish”, “Turn On”, or “Activate” depending on your platform.
Tracking when the document is signed You can set up a return path so Tallyfy knows when documents get signed:
Create a second workflow in your middleware tool that triggers when your e-signature service reports “document signed.”
Use the Tallyfy API to find the right task and mark it complete.
You’ll need three IDs from Tallyfy:
Your Organization ID (found in Tallyfy settings).
The Process ID for the launched process instance.
The Task ID for the task to mark complete.
The end result:
Someone completes a Tallyfy step - document goes out for signing.
Recipient signs the document.
Tallyfy updates to show the signing task is done.